Category: Recycle

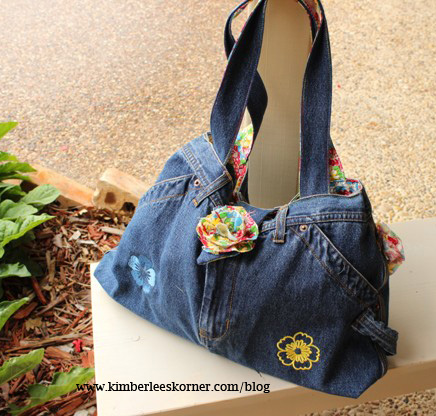
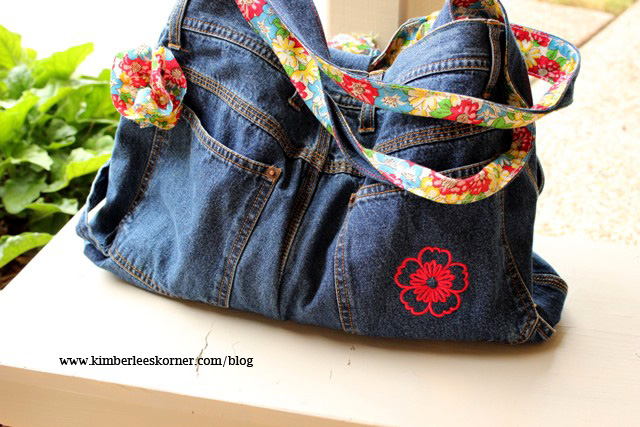
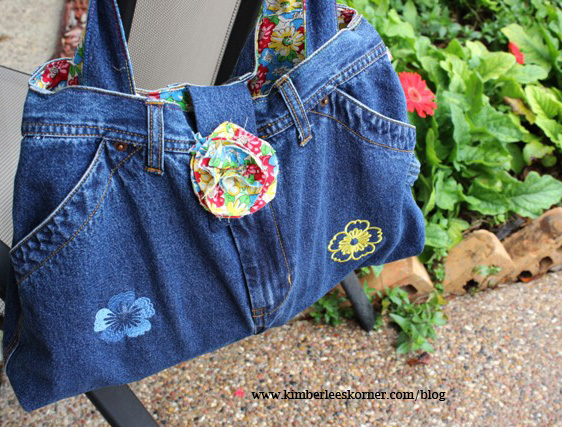
Denim Purse Made From Jeans

9 Comments

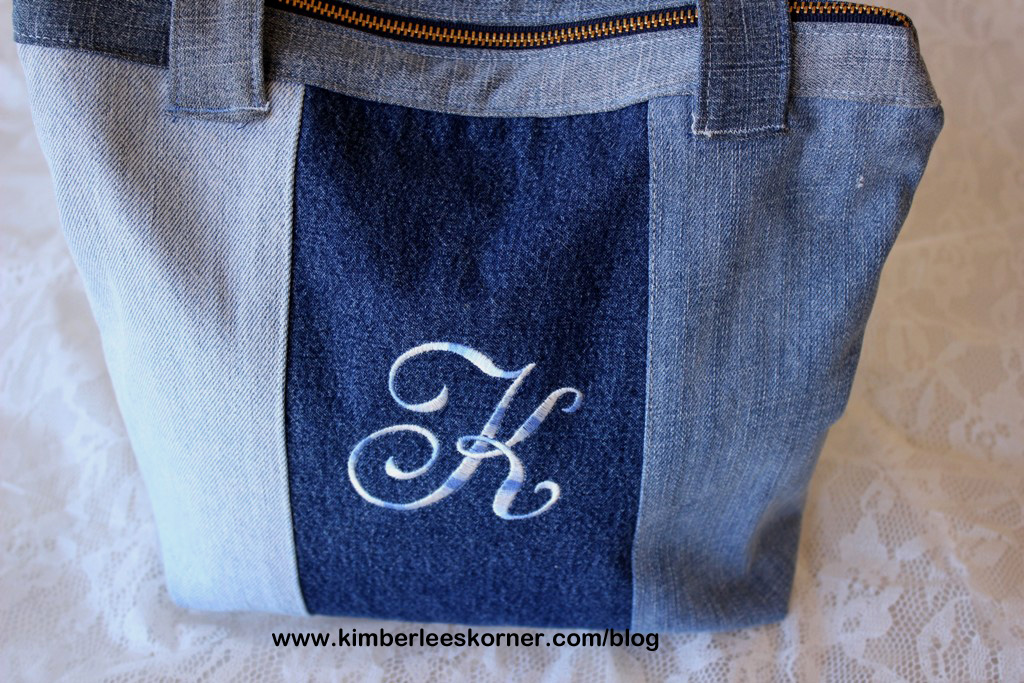
Sewing bags and purses is one of my favorite types of sewing projects.  Recently I made this purse using old jeans – a pair of mine, a pair of my husbands and a pair of one of my sons – to create this fun purse that has a zipper closure and is fully lined.  I really like how this turned out and have been using it daily as my purse for at least a month now.  This was actually a project I had started back in the fall and finally got around to finishing it.  I don’t know why I waited so long as I am very pleased with how it turned out.

denim purse made with old jeans from Kimberlees Korner

This purse is approximately 13 inches wide at the top, 10 inches wide at the bottom and 10 1/2  inches tall.  It has a nice size outer pocket on the one side and I just did an embroidered letter for my name on the other side.  The pocket is perfect for my keys or for my cellphone.

Below is the information on how I made this if you are interested in creating your own.  One of the things I like about using the jeans and upcycling is that each time you make something it looks different because of using various colors and weights of denim.

Supplies for project:

  • 3 pairs of jeans in different shades of denim
  • cotton fabric for lining – approx. 1/2 yard
  • 1 denim zipper at least 20 inches long or longer
  • thread for sewing the bag and decorative thread for embroidery design and topstitching if desired
  • denim sewing machine needles – size 90 or 100
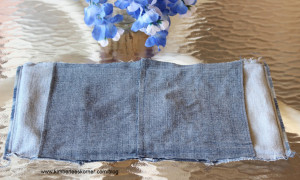
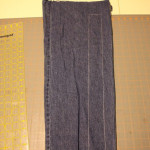
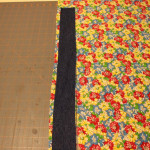
  1. Cut 6 pieces of denim from jeans 13 inches long by 6 inches wide for outer bag (I cut 2 of these size pieces from each of the pairs of jeans)
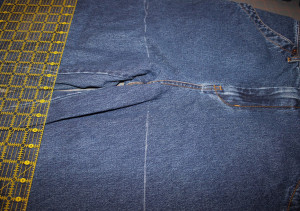
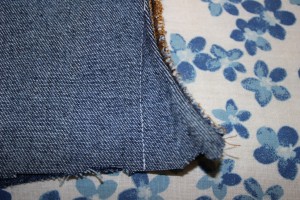
  2. Cut 1 piece of denim for outer pocket 12 inches long by 6 inches wide – fold this in half to be 6 x 6 and press, topstitch the folded edge as desired
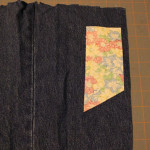
  3. Sew pocket to one of the denim panels using for the center by measuring  2 1/2 inches from one  end and draw chalk line – place the raw edges of the pocket on this line and sew using the edge of presser foot as a seam guide – press pocket up to enclose raw edge and topstitch lower edge of pocket using a decorative thread if desired or just your regular thread
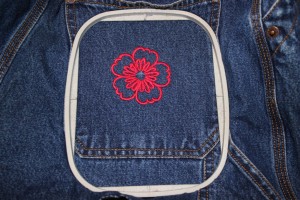
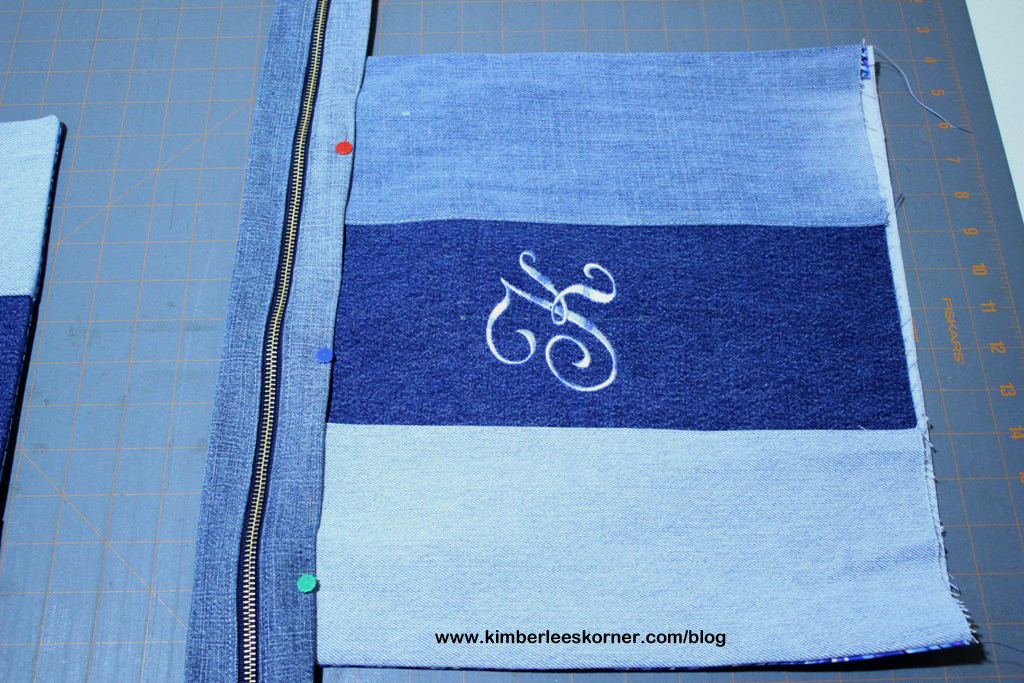
  4. Embroider design or monogram on other center panel if you are doing this step – use a tear away backing to ensure quality embroidery
  5. Sew 3 panels together along 13 inch length to create one side of bag and repeat the process to create the other side of the bag – use 1/2 inch seam.    Make sure you have your pocket upright on the one center panel and catch the sides of the pocket in the stitching.  After sewing the panels together press them and then go back and topstitch them on the outer right and left sides of the panel
  6. Cut 4 strips of denim 26 inches long by 3 inches wide – you will use 2 for the straps and 2 for the zipper casing
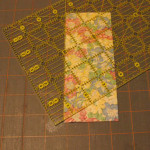
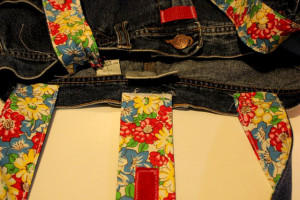
  7. Cut 2 pieces from cotton fabric for lining approx. 16 1/2 inches wide by 13 inches long or by laying your denim panels that are sewn together over the cotton fabric and cutting that size – set aside for now
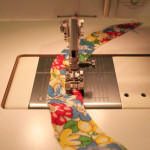
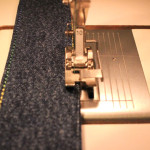
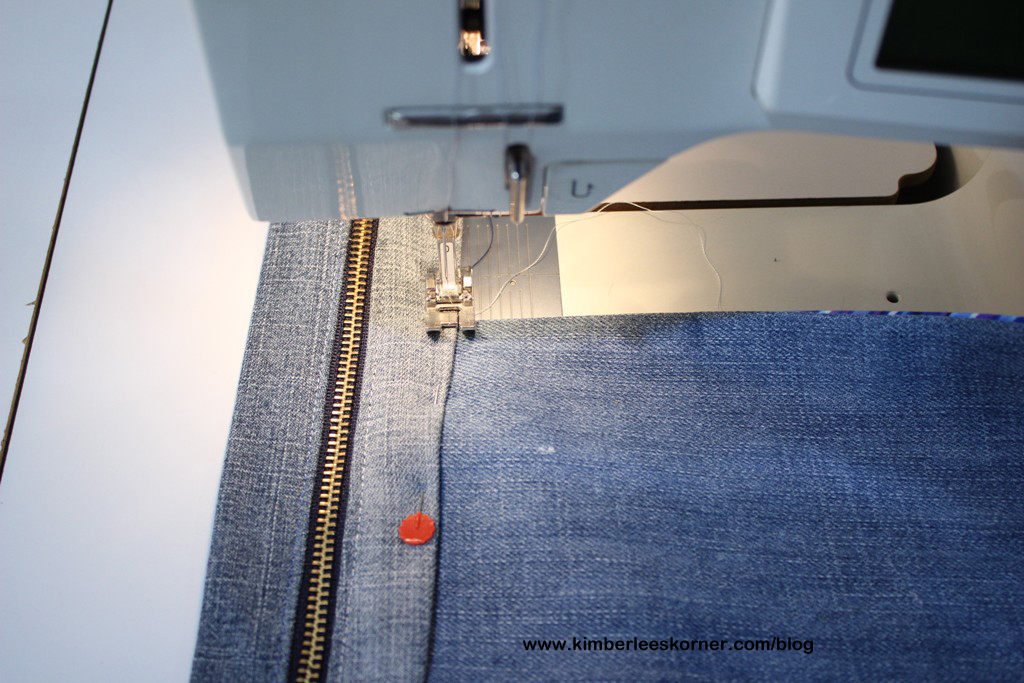
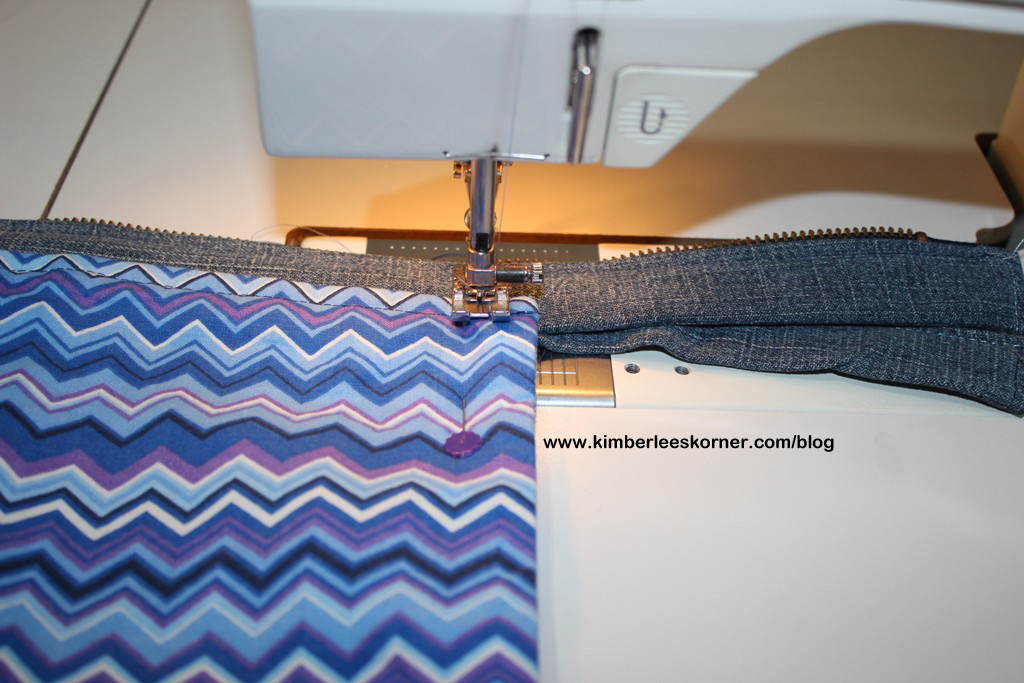
  8. For zipper casings – fold in and press 1/2 inch on each long end of strips and 1/2 on each short end  –  enclose zipper in 2 casing strips using a zipper foot and sewing close to zipper teeth  note – fabric is on either side of zipper tape, make sure you are catching the fabric on the lower side as you sew  Set this aside for now
  9. For straps – fold in 1/2 inch on ends of the other 2 strips and press – fold strips in half lengthwise and stitch with a 3/8 inch seam with right sides together  –  turn strips right side out and press – topstitch each side of strip – set these aside for now
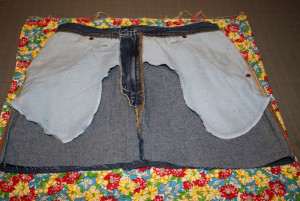
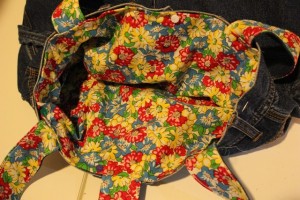
  10. Bag and Lining –  Place each bag outer side right sides together with bag lining and sew around each side and top using a 1/2 inch seam allowance – leave lower portion open for turning right side out.  Do this for both sides, clip corners and turn right side out and press
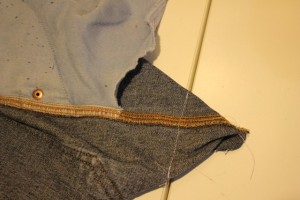
  11. Place sewn zipper casing (centering zipper casing as it will be longer than your bag sections) on top of each bag top portion with denim side facing up – topstitch down each zipper casing attaching bag to zipper casing piecePlace Zipper Casing on top of bag section  Kimberlees KornerSewing Zipper casing to bag  Kimberlees Korner
  12. Open zipper – do not forget to do this! – Place bag sections right sides together and sew around bag sides and bottom – zig zag or serge bottom raw edges of bag.  To box corners match lower bottom seam to side seam and measure in 2 inches from corner and sew – turn bag right side out – tucking long zipper tails into bag – this makes a nice sturdy area to hold or pinch when zipping the bag open and closedSewing Bag together  Kimberlees Korner
  13. Place straps on bag 1/2 inch from zipper casing edge and 1/2 inch from panel seam – use a narrow zig zag or bar tack type of stitch to sew down on ends of straps that are folded in 1/2 inch

That’s it – your bag is all done and ready to use.  You could also choose to put pockets on the inside of the bag but I never use them since I use my purse organizer.

inside view of chevron lining denim purse  Kimberlees Korner

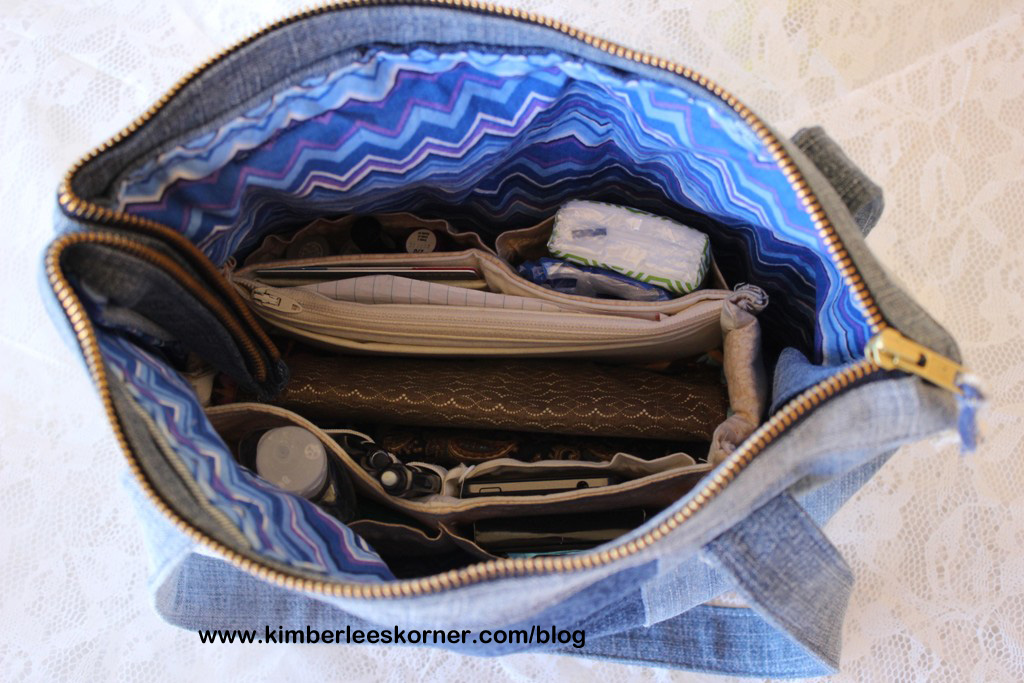
The fabric that I used for the lining is a fun chevron fabric that I got at Fabric.com.  I also got the same fabric in a different color way and made a top from that.  I think I have enough of the fabric left from my bag lining to make another top or maybe a short skirt.  I am putting the link to their site if you are interested in ordering anything from them – they offer free shipping on orders over $35.00 and have really great fabrics for reasonable prices.

Orders of $35 & up Ships Free.

I am currently working on sewing some skirts and tops for spring and summer.  What projects are you working on?  Click on Leave a Reply and tell me about them.

KimberleeDenim Recycled Jeans Purse from Kimberlees Korner


Recycled Denim Book Cover

9 Comments

Now that I have finally pulled out some of the old jeans that I have been saving I am really getting into making things from them.  This book cover is my fourth completed project using old jeans.

book cover made from old jeans by www.kimberleeskorner.com/blog

To make this project I used what was leftover from the same two pairs of jeans that I used to make my Cork Tile and Denim Project.  This time I did not use the pockets but used the leftover leg pieces.

Here is how I make a book cover:

  • Measure your book while it is opened – side to side for width, then measure from top to bottom for height or length
  • To these 2 measurements add 1 inch to each for seam allowances (which are 1/2 inch)  So, if your measurements were 13 w by 8 h you would now have 14 w x 9 l

Note:  Since this project used leftover denim from another project I had to cut 3 pieces for the outer cover – those pieces vary according to what size your book is but if you figure on adding 1/2 inch to each of the 3 pieces for seam allowance it will be approx. the right size for your book.

For my book – which measured 13″ w (opened) by 9″ l here are the pieces I cut:

outer pieces – 2 pcs – 4 1/2″ w by 10″ l

1 pc – 7″ w by 10″ l

flaps – 2 pcs – 4 1/2″ w by 10″ l

back lining – 1 pc – 11″ w by 10″ l

bookmark strip – 3/4″ w by 12″ l

Note:  after I finished it was a little wide – next time I would reduce the width a little probably by 1/2 inch.

First I sewed the 3 outer pieces together with the wider piece being in the middle using a 1/2″ seam.  I then pressed them to one side and topstitched those 2 seams using an edgestitch foot.

Next you sew any decorative stitch to the front however you choose – to add some color I used variegated thread.  This is a fun way to use some of your decorative stitches if your machine has any or you can just use a zigzag stitch.

view of topstitched pieces and decorative stitches with variegated thread www.kimberleeskorner.com/blog
view of topstitched pieces and decorative stitches with variegated thread
www.kimberleeskorner.com/blog

Then you attach the book flaps to each side right sides together sewing just the ends.  I first serged the one side that will be exposed to prevent fraying or you can zigzag it or even turn it under.

Serge edges of long skinny bookmark piece or zigzag.  Place the strip at top of one side in middle.

denim book cover inside view- no book

For the back lining/facing piece serge each of the sides or zigzag.  Place this lining piece right sides together with outer book cover – the book flaps will be in the middle.  Sew across each top and bottom piece catching the long bookmark strip in the top but not the bottom.

denim book cover wrong side view The above photo shows the back lining piece sewn over the flaps and front cover.  I had to piece my back lining piece together to make it wide enough.

Clip the corners and turn right side out and press.  Congratulations! – your book cover is done.  How easy was that?  I would love to see what yours looks like if you decide to make one.   You can email me a photo or post it on my facebook page.

recycled denim book cover by Kimberee   www.kimberleeskorner.com/blog
recycled denim book cover by Kimberee www.kimberleeskorner.com/blog

What sewing projects have you been working on lately?  Let me know by clicking on Leave A Reply.  Have a great week!

 photo dbaf2cd4-dd2b-49d6-8838-f9aff3fe3cbb_zpsca4b926e.jpg


Linking up to :

More the Merrier Monday

Cork Tile and Denim Project

3 Comments

I got the idea for making this project from pinterest.  Here is my pin for the project.  The project is just an image and does not link to any site or instructions.  I thought this was a really cute idea and a great way to organize some things so I made two of them.  I am using one on a wall behind my desk and the other on the wall behind my sewing machine.

denim pocket and clothespin wall organizer project by kimberlee from kimberleeskorner.com/blog

The photo above was the first one I made.  That is the one I am using on the wall behind my desk to hold notes and the pocket holds important info like bills to pay, etc.  I was able to clear a basket off my small desk that was holding some of these things and now I have a lot more usable desk space.

This project is so quick and easy to make.  You will need:

  • cork tiles – 12 x 12 (I got mine at Hobby Lobby)
  • old jeans – cut out the pocket
  • clothes pins
  • glue gun
  • washi tape (optional – for clothes pins)

Basically you just figure out where you want your pocket and clothes pins to go and glue them down with a glue gun.  You can put the washi tape on the clothes pins after you are done if you want to add some color to them.  I guess you could also write on them with permanent marker if you wanted to label them.  I chose to hang the first one I made so I cut a strip of denim and glued it to the back of the cork board.  I used a small cup hook on the wall to hang it with.

cork tile and denim pocket project 2 by kimberlee from www.kimberleeskorner.com/blog

The one above here is the second one that I made and I am using that on the wall behind my sewing machine.  This one is very basic.  I think the clothes pin clips will be nice for holding pattern instructions or photos of ideas I have to inspire me.  The pocket can hold smaller items like a seam ripper, seam gauge or pencils and pens.  This one I chose to use the sticky back squares the cork tiles came with and put it on the wall.

Below are the photos of my projects hanging on the wall in my sewing – office room.  The photos are not great due to the fact that this room needs better lighting – something I am going to be working on changing soon – and also both areas where the cork tiles hang I have a shelf above that area so it gives a shadow.  It gives you the basic idea of how I am using them though.

corkboard denim pocket project hanging on the wall  www.kimberleeskorner.com/blog
corkboard denim pocket project hanging on the wall
www.kimberleeskorner.com/blog
corkboard denim project - second one made for sewing area  www.kimberleeskorner.com/blog
corkboard denim project – second one made for sewing area www.kimberleeskorner.com/blog


If you would like to receive future updates please subscribe via RSS feed, with bloglovin or through email by clicking any of those icons in the sidebar.  I hope everyone is having a great day!


Upcycle Project – Old Jeans into Bag

1 Comment

I finally finished the denim bag I started over 2 months ago.  The project got put aside when I began working on some new skirts and shorts and my summer tunic.  Too many ideas and projects and not enough time is forever a problem!  Here is my finished bag:

Bag by www.kimberleeskorner.com/blog
Front side of bag by www.kimberleeskorner.com/blog
Back of denim jeans bag by Kimberlees Korner

This bag was made using a very old pair of jeans that were mine – I had not worn them in many years.  Below are the steps I used to make this bag.  Really if you want to make an upcycled bag you can just kind of go with it and use your own ideas and sewing skills.  That is more or less how I created mine.

1.  Cut off the jeans at the crotch area – draw a chalk line and cut

draw chalk line at crotch area of jeans and cut on line

2.  Even up the bottom and sew a little at the lower crotch area to straighten the seam on front and back side

sew lower crotch area to be a straight seam on front and back side

3.  Do machine embroidery wherever you desire – I did mine on lower pocket areas and made it so I could use the pockets

machine embroidery on denim bag by www.kimberleeskorner.com/blog

4.  Lay the denim bag section over your lining fabric and cut out lining

cut out lining by laying denim section over lining fabric

5. Cut straps from denim leg pieces and lining fabric – I did mine 23 in. long by 2 in. wide – cut 2 of each

cutting straps from jean leg section


cut straps from lining fabric using jean piece for guide


6.  Cut tab closure piece  – 6 in. long by 2 1/2 in. wide – 1 denim, 1 fabric and 1 interfacing                                 Angle one end 60 degrees if you want it to be slanted not straight

cut tab closure at a 60 degree angle


cut tab closure of denim with RS of fabric facing down


7.  Sew up bottom of bag with 1/2 in. seam allowance and square off ends of bag by sewing in 1 1/2 in.            on each corner – I cut this off after sewing to remove bulk

sew a straight line 1 1/2 in. from corner to box bag bottom

8.  Sew up lining on sides and bottom and square off ends as done in step 7

9.  Cut 2 circles aprrox. 6 in. around and cut into a spiral for the scrappy flowers

6 inch circle for scrappy flower

10.  Sew scrappy flowers by using a stitch length of 5 and stitch 1/4 in. away from edge of inner side of cut        spiral.  Pull to thread to gather and coil fabric into a circular flower.  Stitch with narrow zigzag in the              middle to hold flower in place.

Cut circle into a spiral


sew along inner edge of spiral piece with long stitch length to gather for scrappy flower


coiling flower up after gathering to create flower


11.  Sew scrappy flower to back pocket of bag on corner

12.  Straps – sew down each long side with RS together using edge of presser as a seam guide.  Turn RS        out using a dowel.  Press and topstitch edge of each strap – baste straps in desired area on top edge            of bag

use edgestitch foot to topstitch edge of straps

13.  Sew tab closure – fuse interfacing to lining – sew tab with RS together around long edges and angled          end – leave straight top side open – clip corners and turn RS out

sewing of tab closure


baste straps and closure tab to edges of bag


14.  Use a 1 to 1 1/2 in. piece of velcro to sew onto tab on fabric side of tab and other side of velcro to                denim bag – I place one verical and 1 horizontal for easy adjustable closure.  After sewing velcro on            sew tab with basting stitch onto middle of bag

15.  Fold down approx. 1 in. on top of open lining part of bag with WS together

16.  Place lining WS out down into denim bag.  Using edge stitch foot sew around bag to close up lining            and secure straps and tab in place – you can then remove basting stitches

place lining inside bag WS tog. and sew around top using an edgestitch foot

17.  Make small pleat on either side edge of bag, if desired, to make opening at the top a little smaller

18.  Sew other scrappy flower onto tab closure with narrow zigzag stitch to hide velcro stitching

Bag is done!  Fill it with stuff!

denim upcycled bag from Kimberlees Korner

Recommended items for easier sewing:

  • denim needles size 90 or 100
  • edgestitch foot for topstitching
  • quality sewing thread

This is a fun and easy way to recycle jeans.  I made another bag like this about a year ago using some sewing embroidery motifs and sewing fabric for the lining.  I did not put the tab closure on that bag because I wanted to use it for a knitting tote not a purse.  The flower one I am using as a purse.  

recycled denim - jeans turned into knitting bag by Kimberlees Korner
recycled denim – jeans turned into knitting bag by Kimberlees Korner


recycled denim bag - jeans turned into a knitting bag by Kimberlees Korner
recycled denim bag – jeans turned into a knitting bag by Kimberlees Korner


Currently I am working on some other ideas for using old jeans.  To receive future updates on my other projects subscribe via RSS feed or through bloglovin by clicking on the icons in the sidebar.  Have a great day!

Recycle Plastic Ice Cream Bins for Storage Containers

Gallon Plastic Ice Cream container recyled into storage container   I try and reuse containers that food or other household items came in as much as possible.  One of the types of containers I have found several good uses for is a large plastic rectangle ice cream container, the 1  gallon and 1 pint size, with a handle. The great thing about these containers is they clean up easily and the lids fit on securely, if you want to use the lid.  They also stack nicely.  The handle is another bonus.

I have been using this type of container to keep my compost stored under my kitchen sink for several years now.  It is great to have a container with a lid for this purpose.  Each day I take the bin filled with fruit and veggie scraps and coffee grounds out to my big compost bin behind the shed out in our backyard.  The handle makes it easy to carry.

Recycled Ice Cream Bin used under kitchen sink for Composting Bin

I have also used this type of ice cream bin to store and somewhat organize my beading supplies.  The idea for using this container for this purpose came to me last summer when I was going out of town.  I decided I wanted to take my beading supplies so my niece and I could make some bracelets while I was visiting her.  This container was perfect for travelling.  It did not take up too much space in the car and the lid held everything in there securely without spilling.  I had already bought some of those little bead organizers with small compartments and those containers fit right inside this larger ice cream bin with my beading mats on the top.

Recycled ice cream container used for beading supplies

Another idea for using these containers is to hold old rags under the sink, or scrub brushes.  I use one under the bathroom sink to hold some rags and old toothbrushes I use for cleaning.

I have also bought ice cream in the round plastic containers and use some of those as well for soaking small laundry items or in the past for my kids bath toys when they were young.  There are lots of possibilities with these large 1 gallon ice cream containers.  Let me know what you come up with by leaving a reply.