Have you taken an online Craftsy class yet? I first learned about Craftsy over a year ago and took the Jean-ius class, this is a class on how to sew your own jeans by using an existing pair of jeans you love to make a pattern. I have been sewing for over 25 years but learned lots of great techniques and tips on how to sew jeans to make them look professional. If you check out my pinterest board on my sewing projects you can see my jeans or through my craftsy projects.
I am writing this post to inform you that Craftsy is having a summer saleon some of their classes. This would be a great time to try out an online class for a very low price. Here are some of the advantages to taking a Craftsy class:
watch it when you want to – learn at your own pace
watch the class as many times as you want to – once you buy it you have it forever and can access it at any time
lots of great knowledgeable instructors
I have also taken the Just Shoot It class on photography and learned a great deal more about my camera and how to take better photos (still improving them all the time though). This class also inspired me to buy a better camera – a Canon DSLR. Having a nice DSLR has also made a great difference in my photos.
I am also signed up for a few other classes that I have not yet totally completed. I bought those classes on a previous craftsy sale knowing that I can take them whenever I want to on my own time.
You can click on the link above to view the online sale. They offer lots of different types of classes on a variety of crafts – click above to check them out. The sale ends this Sunday July 21, 2013 so don’t delay.
Thanks for visiting my blog. Please follow me via RSS feed or through bloglovin by clicking on either icon in the sidebar to receive future updates. Have a great weekend!
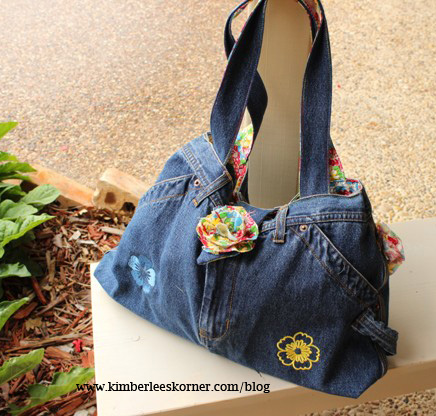
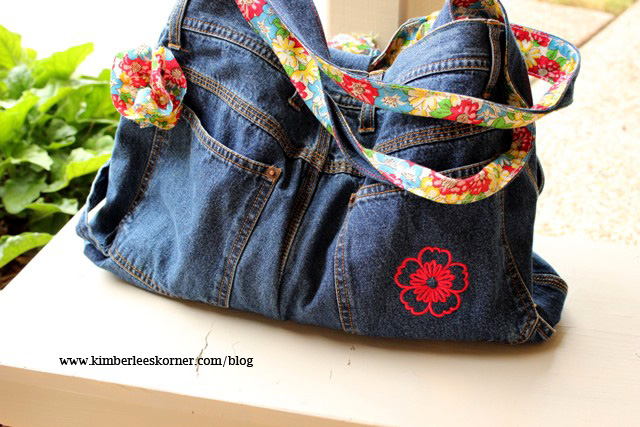
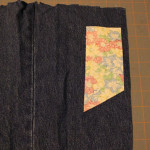
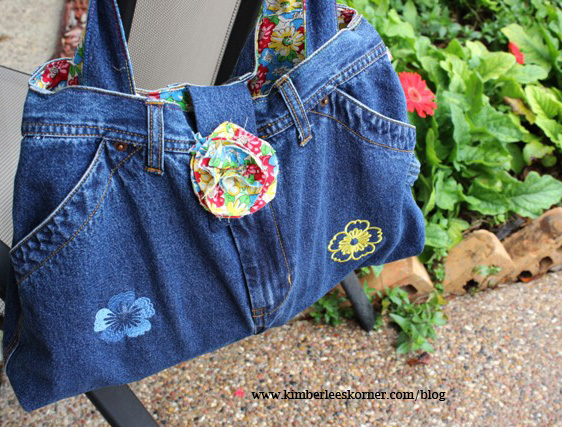
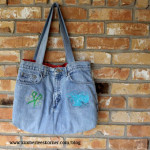
I finally finished the denim bag I started over 2 months ago. The project got put aside when I began working on some new skirts and shorts and my summer tunic. Too many ideas and projects and not enough time is forever a problem! Here is my finished bag:
Front side of bag by www.kimberleeskorner.com/blogBack of denim jeans bag by Kimberlees Korner
This bag was made using a very old pair of jeans that were mine – I had not worn them in many years. Below are the steps I used to make this bag. Really if you want to make an upcycled bag you can just kind of go with it and use your own ideas and sewing skills. That is more or less how I created mine.
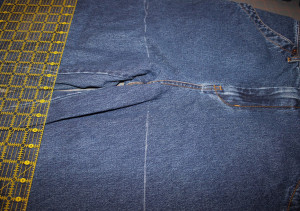
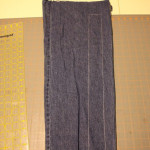
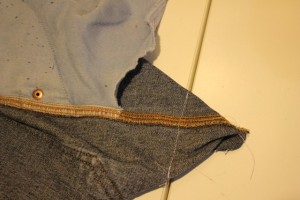
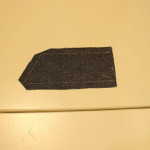
1. Cut off the jeans at the crotch area – draw a chalk line and cut
draw chalk line at crotch area of jeans and cut on line
2. Even up the bottom and sew a little at the lower crotch area to straighten the seam on front and back side
sew lower crotch area to be a straight seam on front and back side
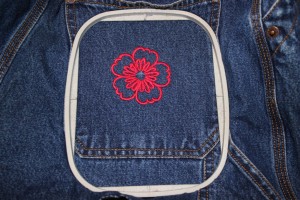
3. Do machine embroidery wherever you desire – I did mine on lower pocket areas and made it so I could use the pockets
machine embroidery on denim bag by www.kimberleeskorner.com/blog
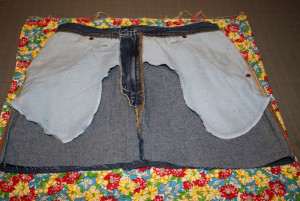
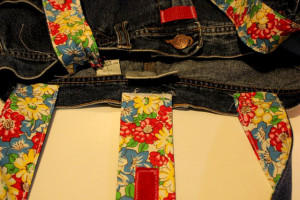
4. Lay the denim bag section over your lining fabric and cut out lining
cut out lining by laying denim section over lining fabric
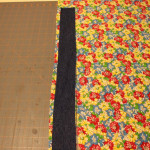
5. Cut straps from denim leg pieces and lining fabric – I did mine 23 in. long by 2 in. wide – cut 2 of each
cutting straps from jean leg section
cut straps from lining fabric using jean piece for guide
6. Cut tab closure piece – 6 in. long by 2 1/2 in. wide – 1 denim, 1 fabric and 1 interfacing Angle one end 60 degrees if you want it to be slanted not straight
cut tab closure at a 60 degree angle
cut tab closure of denim with RS of fabric facing down
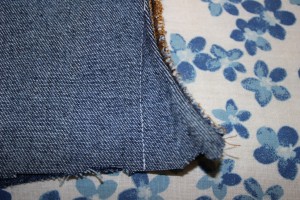
7. Sew up bottom of bag with 1/2 in. seam allowance and square off ends of bag by sewing in 1 1/2 in. on each corner – I cut this off after sewing to remove bulk
sew a straight line 1 1/2 in. from corner to box bag bottom
8. Sew up lining on sides and bottom and square off ends as done in step 7
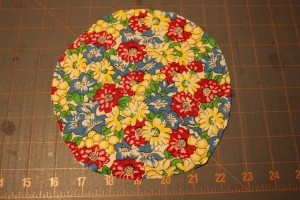
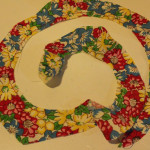
9. Cut 2 circles aprrox. 6 in. around and cut into a spiral for the scrappy flowers
6 inch circle for scrappy flower
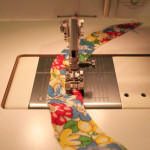
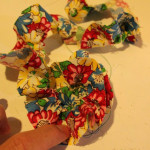
10. Sew scrappy flowers by using a stitch length of 5 and stitch 1/4 in. away from edge of inner side of cut spiral. Pull to thread to gather and coil fabric into a circular flower. Stitch with narrow zigzag in the middle to hold flower in place.
Cut circle into a spiral
sew along inner edge of spiral piece with long stitch length to gather for scrappy flower
coiling flower up after gathering to create flower
11. Sew scrappy flower to back pocket of bag on corner
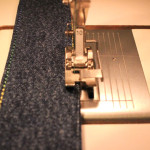
12. Straps – sew down each long side with RS together using edge of presser as a seam guide. Turn RS out using a dowel. Press and topstitch edge of each strap – baste straps in desired area on top edge of bag
use edgestitch foot to topstitch edge of straps
13. Sew tab closure – fuse interfacing to lining – sew tab with RS together around long edges and angled end – leave straight top side open – clip corners and turn RS out
sewing of tab closure
baste straps and closure tab to edges of bag
14. Use a 1 to 1 1/2 in. piece of velcro to sew onto tab on fabric side of tab and other side of velcro to denim bag – I place one verical and 1 horizontal for easy adjustable closure. After sewing velcro on sew tab with basting stitch onto middle of bag
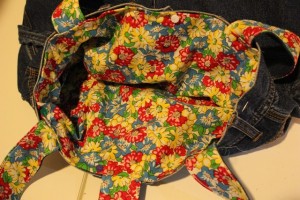
15. Fold down approx. 1 in. on top of open lining part of bag with WS together
16. Place lining WS out down into denim bag. Using edge stitch foot sew around bag to close up lining and secure straps and tab in place – you can then remove basting stitches
place lining inside bag WS tog. and sew around top using an edgestitch foot
17. Make small pleat on either side edge of bag, if desired, to make opening at the top a little smaller
18. Sew other scrappy flower onto tab closure with narrow zigzag stitch to hide velcro stitching
Bag is done! Fill it with stuff!
denim upcycled bag from Kimberlees Korner
Recommended items for easier sewing:
denim needles size 90 or 100
edgestitch foot for topstitching
quality sewing thread
This is a fun and easy way to recycle jeans. I made another bag like this about a year ago using some sewing embroidery motifs and sewing fabric for the lining. I did not put the tab closure on that bag because I wanted to use it for a knitting tote not a purse. The flower one I am using as a purse.
recycled denim – jeans turned into knitting bag by Kimberlees Korner
recycled denim bag – jeans turned into a knitting bag by Kimberlees Korner
Currently I am working on some other ideas for using old jeans. To receive future updates on my other projects subscribe via RSS feed or through bloglovin by clicking on the icons in the sidebar. Have a great day!
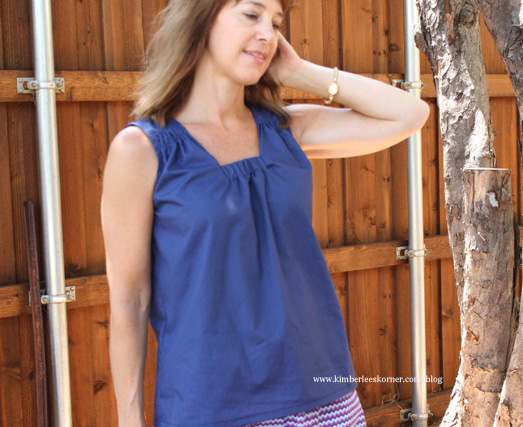
This is one of my latest summer sewing projects that I finished recently – this navy tunic top. I made this top using Simplicity pattern 1668. Once again it was one of those bargain 99 cent patterns I got from Hobby Lobby a few weeks ago. The pattern can also be made into a dress with a waist tie. So far I have only made the tunic.
I love this top! It is lightweight and comfortable to wear. The size I made, according to my measurements, fits well. Although I think the next time I will scoop out a little more depth for the arm syce area. I prefer for my sleeveless tops to have a little more depth under the arm. I think it is because I have bigger shoulders so I usually need a little more room in this area. Another great thing about this top is it matched my chevron skirt that I also made recently.
The top has a gathered shoulder area and a gathered front that has elastic in the center. The back of the top has a large pleat. See photos below for front and back views:
navy summer tunic top – matches with my chevron skirt I made both items sewn by Kimberlees Kornerback view of navy summer tunic made by Kimberlees Korner
This pattern has quite a few pattern pieces but is fairly easy to sew. I would recommend it to anyone with intermediate sewing skills. Sewing the front elastic casing area was a little involved and requires some patience. Also, for the armhole facing I did not use the recommended bias tape – I just made my own from 1.5 inch bias strips.
I made this particular top out of a lightweight broadcloth. I am planning to make another one this summer. I have not decided what color yet – maybe white so it will go with everything.
Currently I am working on a denim upcycle bag made from old jeans. I am hoping to finish it soon so I can post it on my blog in the next week.
Thanks for stopping by my blog. To receive updates you can subscribe via RSS feed or through bloglovin by clicking on either icon in the sidebar. Have a great day!
I just love pinterest! It is such a great way to find ideas and inspirations for just about everything.
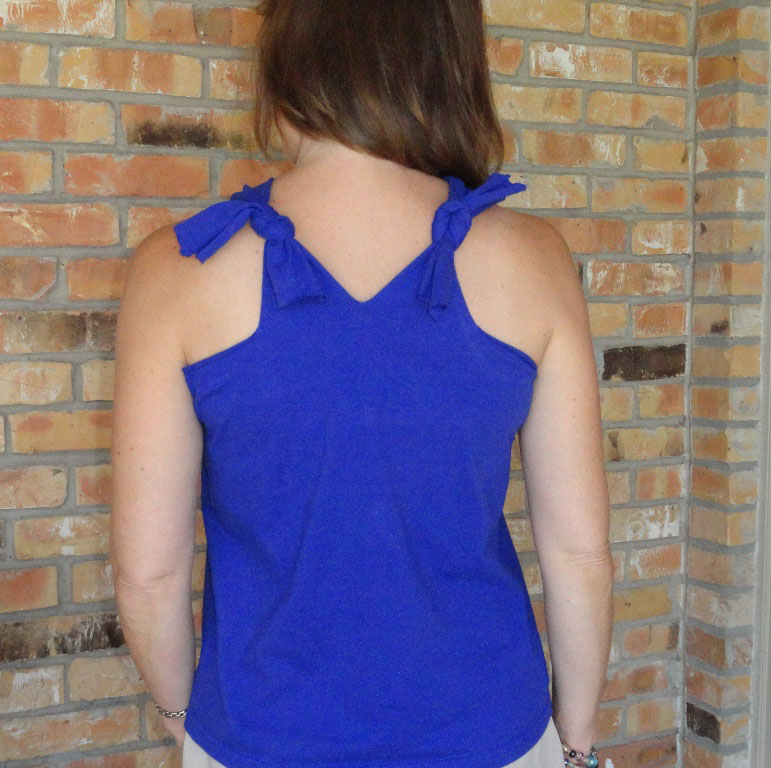
These tank tops were projects I found on pinterest and decided to make. Both of them use a t-shirt to make the tank.
No Sew Tank Top made from Wobisobi tutorialBack of No Sew Tank Top – tutorial from WobisobiTank Top made from pinterest tutuorial with my own i-cord strap idea and couched hem
The royal purple one above was made using the directions I found from the Wobisobi site. The project is called No Sew Halter and if you click on the highlighted text it will take you to the tutorial. It is very easy to follow and requires no sewing. I have made two of these now. There are lots of other no sew t-shirt ideas and tutorials on this blog as well.
The red one to the left was made using a tutorial from crafterhours blog. It is called tee to tank and if you click on the highlighted text it will take you to the tutorial. I also found this through pinterest. This particular tank does require a little bit of sewing. I added a little of my own creativity to this one by hemming the bottom by couching down a variegated yarn that I had leftover in my stash from another project. I also used this yarn to knit some i-cord for the straps at the top and neckline. The i-cord then ties on one side. I really like how this tank top turned out.
After making the red tank top I got inspired to use my pattern making program, Bernina My Label, and make my own version of this tank. I used part of the halter top pattern that is from the My Label patterns and this batik fabric to make the multi color version below.
Tank Top – idea inspired by pinterest – made using Bernina My Label halter top pattern by Kimberlees Korner
All of these tank tops are super easy and quick to make. A great way to recycle an old t-shirt and create something new to wear for summer.
I hope everyone is having a nice weekend. It is hot here in Texas so I will probably be wearing one of these tank tops this weekend.
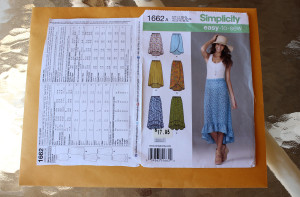
sewing pattern review for skirt simplicity pattern 1662
I love to make skirts for spring and summer. The fabrics they offer for these two seasons are just perfect for long or short skirts. I also think that it is more comfortable to wear a skirt when it is hot outside than pants or shorts, sometimes.
I was recently at Hobby Lobby again – it seems I go there about every other week – and they had Simplicity patterns for .99 cents again. I can not resist buying one when they are that low – even though I don’t need any more patterns!
This pattern, Simplicity 1662, offers 5 styles of asymmetrical skirts. The skirts attracted my attention because they look comfortable, different than any of my other patterns, and easy to make.
simplicity pattern 1662 for asymmetrical skirts
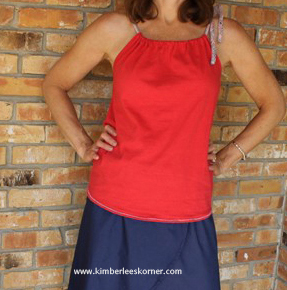
So far I have made two of them using view A. The navy one (photo above) is in a lightweight broadcloth and the red one (see photo below) is in a cotton print. The red one I altered a little on my own to have a straight hem in the back. I am always changing things on patterns, it seems, to create my own design. The skirts have only a few pattern pieces and an elastic waistband.
red burst cotton skirt sewn with simplicity pattern 1662 view A
back view of red burst cotton skirt by Kimberlees Korner
These skirts are so easy to sew. Definitely a project a beginner can make. I have been sewing over 25 years and from start to finish, including cutting out the fabric, I made this skirt in a little under 2 hours. A quick and easy summer project. I am planning to make view E next, the longer version with the lower ruffle.
I hope everyone is having a great day and has a Happy 4th of July tomorrow.
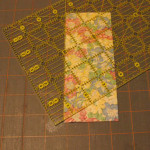
patterns stored in large envelopes and clear plastic container with lid from Office Depot
Years ago I learned of this pattern storage method from a book I read called Confessions of an Organized Homemaker by Deniece Schofield. I have been using this method to store my patterns ever since as it is much more efficient than keeping them in the original small envelope.
To Store your patterns you will need:
sewing pattern and blank envelope
10 x 13 envelopes
Scissors
Glue or Glue Sticks
Bankers Box or Plastic Storage Box
Here is what you do:
Remove all pattern pieces and instructions
Cut envelope down one side and the bottom so it lays out flat
Glue this cut pattern envelope to the front of large 10 x 13 envelope
Place all pattern pieces inside large envelope
pattern glued to blank envelope for more efficient storage
Now your pattern pieces fit neatly inside this larger envelope and do not get so squished up and wrinkled. It is also easier to read the pattern yardage and see the front view without having to flip it around. The patterns store perfectly inside of bankers boxes or I recently found this plastic storage box at Office Depot that has a lid and stores the patterns perfectly. The photo above at the top is of the plastic storage box. I have used the bankers boxes for years as you can tell by the wear on my box – it still has tape marks around it from when we moved 7 years ago and places where labels fell off.
Use Bankers boxes for storing your sewing patterns
Follow me through RSS feed by clicking the icon in the sidebar or through Bloglovin if you like this post.
I recently came across some mini chevron cotton print fabrics at Hobby Lobby. They appealed to me because both prints had colors that I love in them. I bought the fabrics not sure exactly what I would make with them. Therefore, I always buy at least 3 yards of fabric to ensure I have enough. I learned this lesson a long time ago from a lady I worked with that told me you need to buy at least 3 yards so you have enough to make a garment. If I have extra left I usually cut it into 2 1/2 in. or 1 1/2 in. strips for other projects. I was thinking I would make skirts from both of these fabrics but different styles and then decided one would be a cute top with the right pattern. Here is what I ended up making:
Blue & Green Chevron Top by Kimberlees Korner
Chevron Skirt – Kimberlees Korner
The pattern I used for the skirt was one I have had for a couple of years, Butterick B4803. I had made the different versions in the pattern of the long length and decided I wanted a shorter skirt this time so I used the basic view E and measured from my waist to just above my knee to figure the length I would shorten the pattern to.
I love to sew skirts for summer. They are easy to make for one thing and sometimes a lot cooler and more comfortable than shorts or pants. This particular pattern has only 2 side seams and and elastic waist and a narrow lower hem. So easy to make. I will be making more this style and length.
As I got in my closet the other day and decided to wear the skirt for the second time I discovered this top that I had embroidered a couple of years ago. The embroidery design matched the skirt colors perfectly – how great is that? I did alter-upcycle the shirt some though to look more updated with the skirt. Note: I will do a future post on my upcycled t-shirt at another time.
Chevron Skirt with Embroidered Top by Kimberlees KornerFront of Chevron Top by Kimberlees Korner
The pattern I used for the top was one from my Bernina My Label software program. I used the basic tunic pattern, removed the darts, added a cap sleeve, a scoop neckline and decided to place elastic in the center front and back to gather it in some. I used 1/8 in. wide elastic approximately 7 in. long stretched across 10 in. of the center front and the center back.
If you enjoyed this post you may want to follow via RSS feed by clicking the icon in the sidebar or through Bloglovin.
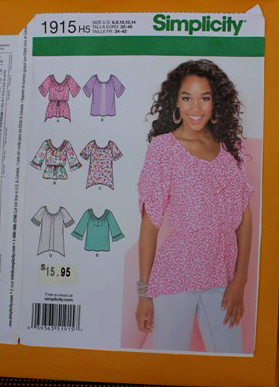
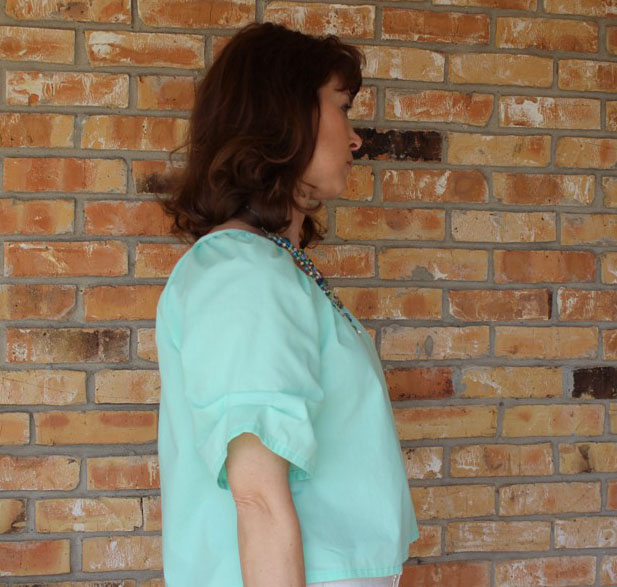
Simplicity Pattern 1915 made in mint green broadcloth
I recently made this top after acquiring some new patterns from Hobby Lobby. They were on sale for .99 cents and I couldn’t resist buying a couple of new patterns. I really do not need any more patterns but it is hard to say no when they are such a bargain.
This pattern was pretty easy and had good instructions. If you have basic sewing skills and have made a few garment before you should be able to make this. You will need to know how to gather as the whole neckline is gathered.
The fabric I used to make my top was a lightweight broadcloth in a pretty shade of mint green. I have plans to make another one in purple and possibly put some embroidery on it. As you see from the photo of the actual pattern there are other options for making the top look different. The version I made this one was version E. I think I will make my next version C with the curved hemline.
Simplicity Pattern 1915
The top also has an option for tucks at the lower hemline of the sleeves. The following photo is a close up of the sleeve tucks.
Simplicity Pattern 1915 – close up of sleeve tucks
I hope you enjoyed the pattern review. I plan on doing other pattern reviews in the future so make sure you subscribe to my blog via RSS feed or through Bloglovin if you like this post.
I made this dress many years ago. I haven’t worn it in a couple of years as a dress but liked the fabric – it is a cotton knit – and didn’t want to get rid of it. So, I decided to convert it into a skirt since I seem to wear more skirts than dresses. The following steps are listed below if you are interested in how to do this to one of your own dresses.
Step 1: Measure from your waist down to see how long you want to make your skirt – I wanted a long skirt so I decided on 30 inches.
Step 2: Place on a cutting table or surface and measure from bottom hem up to waist 30 inches plus 1 1/4 inches for the fold over for the waist band casing – My total was 31 1/4 inches.
Step 3: Mark with a chalk pencil all the way around 31 1/4 inches from bottom hem.
Step 4: Cut on the chalk line just made in step 3.
Step 5: Serge cut edge with your serger or zig zag on a regular machine to prevent fraying. Not totally necessary with knit fabric but I think it makes a more finished look on the raw edge.
Step 6: Turn down waist band WS(wrong sides) together 1 1/4 inches – pin and/or press.
Step 7: Sew using straight stitch close to serged edge, or approx. 1 1/8 inch from folded edge, leaving about a 1 to 2 inch opening for inserting elastic.
Step 8: Measure elastic around your waist and cut to size needed.
Step 9: Use a safety pin on one end of elastic to guide through casing.
Step 10: Stitch elastic together by overlapping 1/2 to 1 inch and zig zag over overlapped edge to secure.
Step 11: Pull elastic back into casing and evenly distribute fabric over elastic.
Step 12: Use a straight stitch to close up casing opening.
Step 13: (optional) Stitch in ditch, or side seams, of skirt seams to prevent elastic from rolling.
Here is my finished skirt-
I have also done this to another dress and made it into a short skirt just above the knee. This is a quick and easy update to your wardrobe.