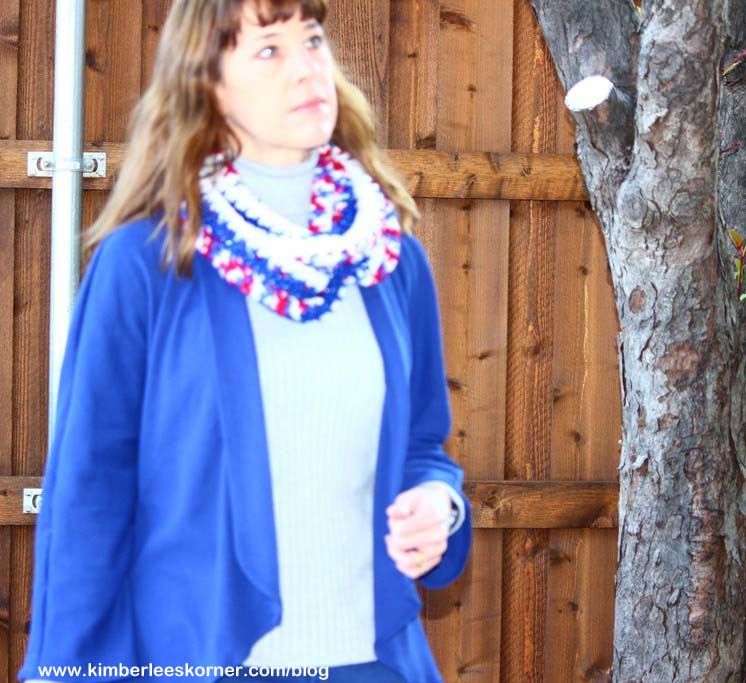
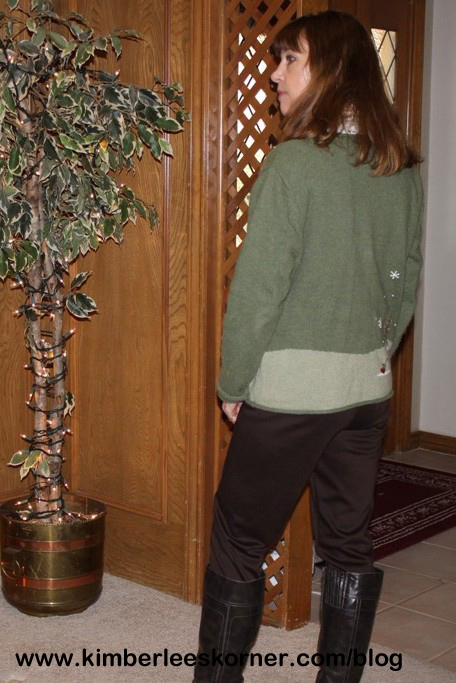
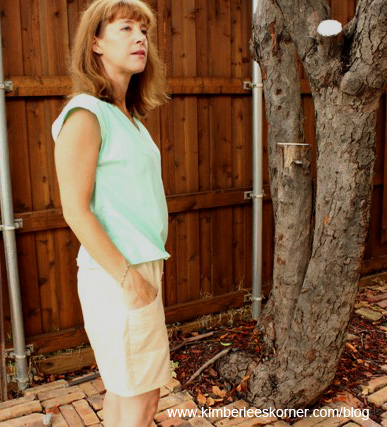
I recently made this knit jacket using a pattern that I also made a tunic from this past summer. The pattern is Simplicity 1668. It is one of those patterns considered to be sportswear as there is a whole ensemble that you can make in the pattern that includes a dress, jacket, pants, shorts and a tunic. So far I have only sewn the jacket and the tunic.
The fabric I used for this jacket was a lightweight knit that I believe I bought from Hancock Fabrics. The jacket is very easy to sew as it has minimal pieces. There are no sleeves to sew as it has a dolman sleeve. I always like that as it makes completing your project so much easier when there are no separate sleeves to sew. The front features a shawl type of collar and that was sort of time consuming to sew as it requires interfacing and since it is curved you have to sew slowly and do some clipping to make the seams lay nicely. I don’t think the jacket front is hard to sew just requires a little time and patience to ensure it turns out well. You also need to press it to get a crease to make it fold back.
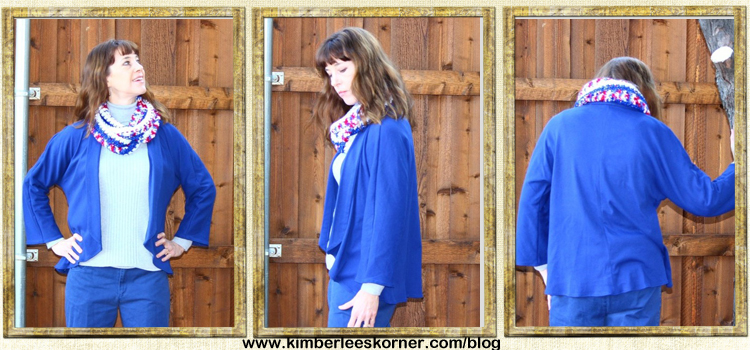
As you can see from the photos the jacket is a 3/4 sleeve and it also has an asymmetrical drape as the back is lower than the front.
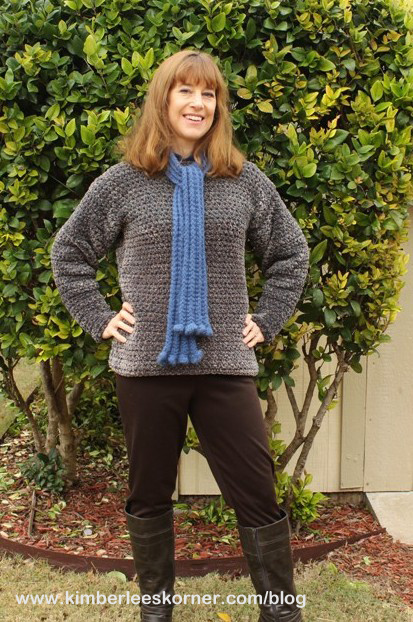
I really like this jacket a lot and was so pleased that I had some navy pants that I made a couple of years ago that went with the jacket and It also looked nice with my Olympic Crochet Scarf that I had finished during the winter Olympics. I think I would like to make this jacket again in the near future in a cream or white for spring or summer. This jacket is the perfect thing to keep with you for those air conditioned places that are so chilly in the summer time.
Currently I am working on sewing some jeans and jean shorts. I will be doing a future post on them so be sure to subscribe via bloglovin, email or RSS for updates.
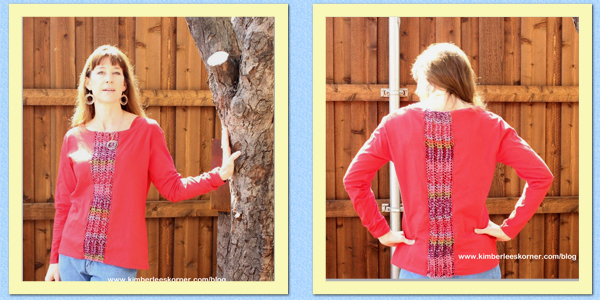
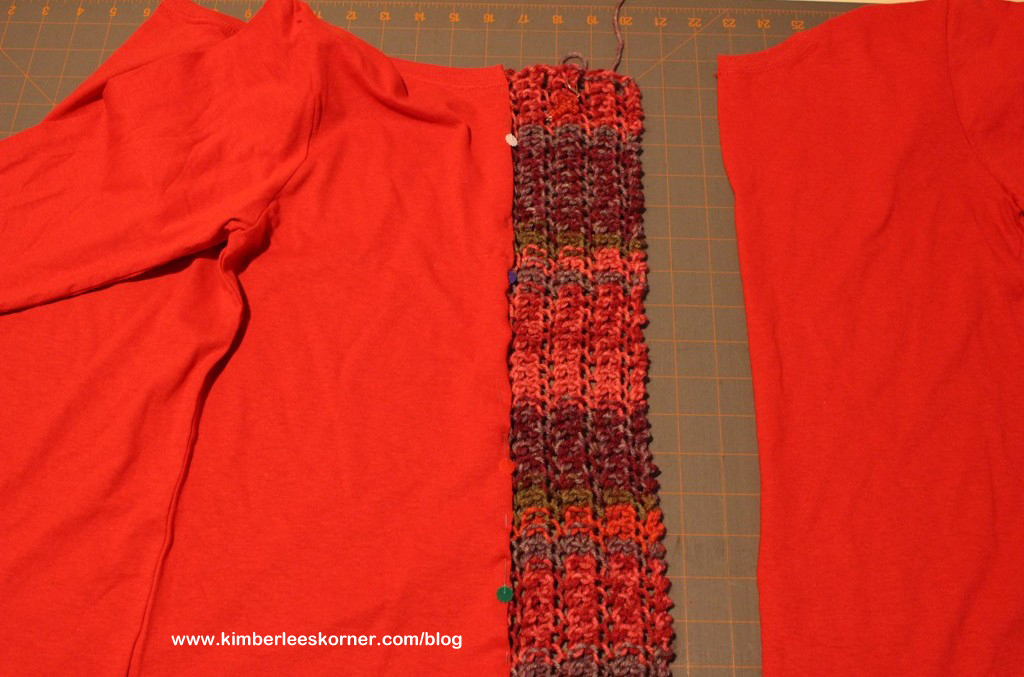
I recently designed this new shirt that has a lace knit panel insert on the front and back. The idea for creating this was for two reasons. One, this shirt was a little too small (tight) for me and Two, I really like this easy to knit lace stitch that I had recently used to create another project.
To make this you will need to know how to knit and how to use a sewing machine.
Supplies needed:
Size US 8 knitting needles
Worsted weight yarn that is washable – I used Hobby Lobby I Love this Yarn
T-shirt that is a little too snug or one size too small for you
Fabric scissors
Sewing machine
Sewing thread to match shirt
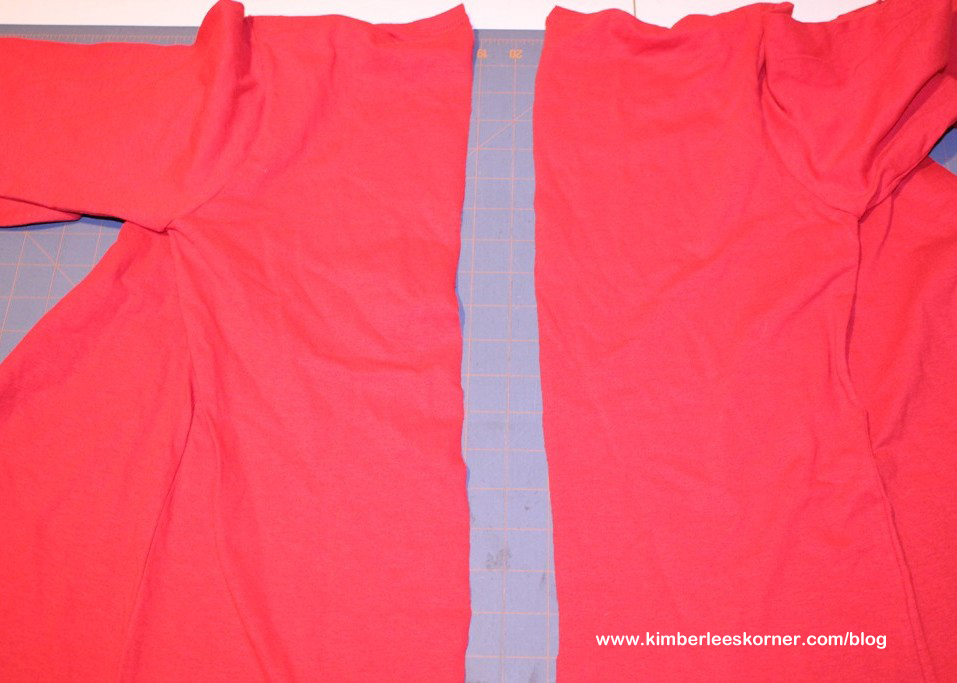
Step 1: Using your fabric scissors cut up the center front and center back of shirt – use a tape measure or ruler to determine the center point.
Step 2: Knit your lace panels
Cast on 16 sts – knit the first row
Row 1: *k2tog, yo, k2; rep from * across
Rep Row 1 for pattern – measure your front cut center line of shirt and when your knitted piece is close to that length knit 1 more row, then bind off.
Make another panel for the back following the same pattern above – note that the back section will be longer so you will need to measure that and knit this panel a little longer.
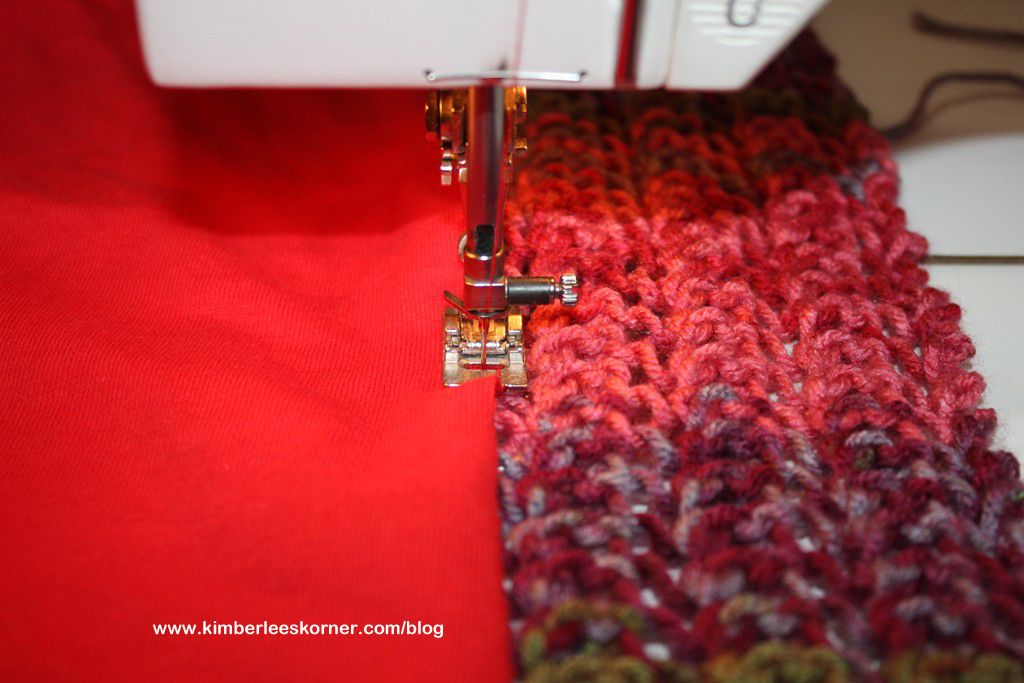
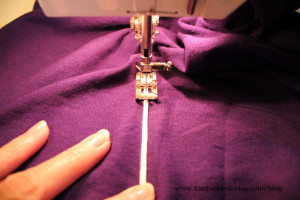
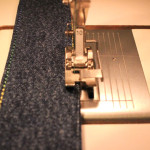
Step 3: When both your panels are knitted you will then pin them to the shirt front and back and using your sewing machine and a stitch length of approx. 3 stitch the shirt and panel together with the shirt laying on top of the panel – use the inner edge of you presser foot (see below) as a guide for a seam allowance. You will have to stitch down each side of the panel so you will stitch 4 different times. Weave in the ends of the yarn when you are done – or you could do it before but I did mine at the end.
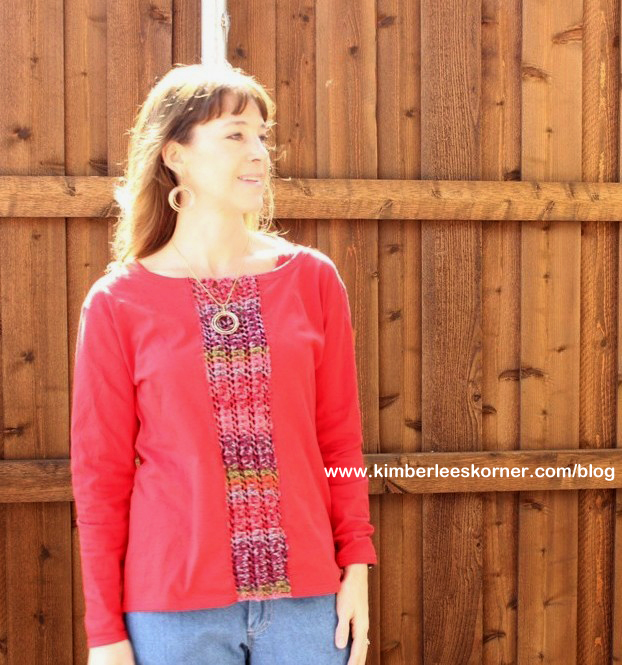
That’s it – all done. Super simple and fun to wear. The top can be worn as is or with a camisole or tank top underneath. I have a tank top under mine that I found at Old Navy and it was the perfect red to match the shirt.
I am currently working on a short sleeve version for spring using a different lace stitch and I will be sharing that on my blog in March – so be sure to follow me via bloglovin, email or RSS feed for future updates.
Leggings seem to be coming back around again. Maybe they have been around and I am just slow to noticing. I decided that I would make my own leggings because they seemed pretty simple to make – and they really are. The way I made mine there are only 3 seams then a waistband casing for your elastic and then the hem.
I chose to make mine with a little more ease in them than those you buy. I really don’t like super tight things on my legs. I like the way these fit me and they are comfortable to wear. That is one of the things I love about sewing my own clothes – I can make things the way I want.
I did not really use a pattern to make these. I consulted pinterest first on how to sew leggings and found a couple of good blogs with this info. You can look at my Sewing board on pinterest to see these pins-blogs. This helped me figure out how to use an existing pattern for just some basic pants and turn it into a leggings pattern. What I did was take my measurements and then using the My Label pattern I have for pants, I butted the front and back pieces together on the outer sides and then adjusted the size per my measurements, making sure I added in approx. 1/2 inch for a seam allowance. I then took some pattern drafting interfacing, I by this at Joann, and laid it over the two pieces and traced around to make a pattern for the leggings. This way there is no outer seam only an inner seam and the front and back crotch seam.
Sewing these is so fast and easy! You just sew with right sides together your inner leg seams and then sew the crotch seam. Then, turn over your casing for your elastic waistband – I use 1 1/4 or 1 1/2 inch elastic so the casing is fairly wide. You also turn up 1 inch for your hem on the legs. You are done! So simple. I have serger so sewing these is super fast but you could also use a regular sewing machine and a zigzag stitch. I sometimes use a twin needle for the hems but this time I chose to use a narrow zigzag to sew the hem and the casing. I think this gives it a little better stretch.
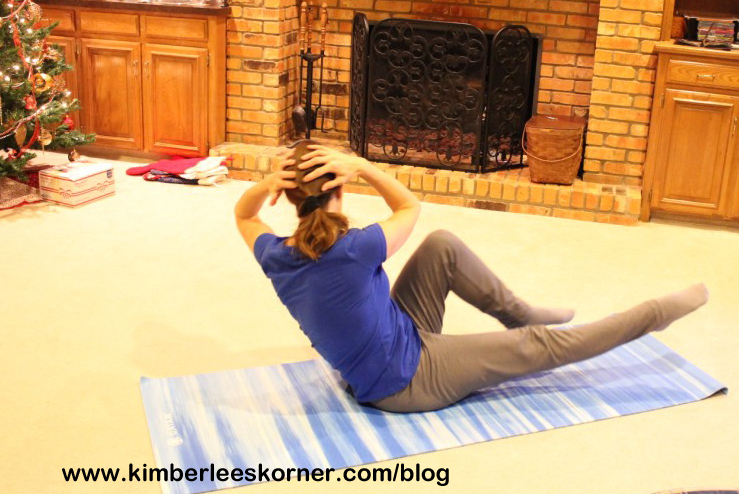
To make leggings you will need some fabric that is stretchy with a little bit of spandex or lycra in it. I think mine was from Joann and called Ponte Roma Sew Classic knits. The gray ones I made below that I use to workouts in are the Sweatshirt Performance fabric from Joann. Both fabrics have a little lycra or spandex and retain their stretch after hours of wear.
I have made four pair of leggings now and have some camel color fabric to make one more pair. Two of the pair I use as my workout pants in the morning.
I have lots of other sewing projects and ideas for 2014. Please follow my blog via bloglovin or RSS to receive future updates. I hope everyone has a Happy New Year!
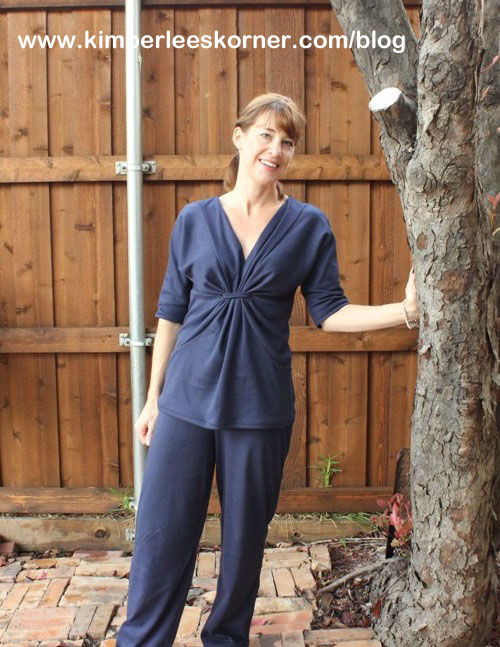
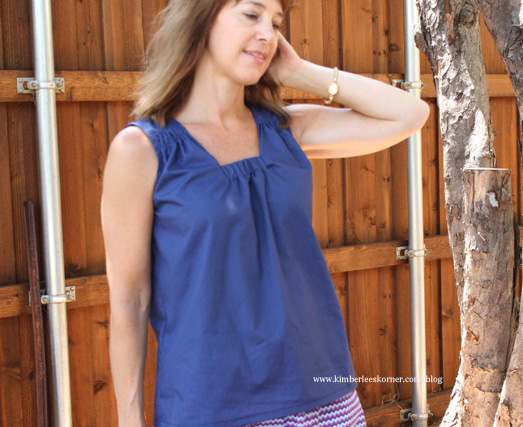
This navy knit top is made from a Butterick pattern that I bought at least a year or two ago. I am sure I got the pattern when they were on sale and had great intentions to sew it up asap but life got in the way – or other sewing projects!
I got really motivated to make this when I saw Deby from So Sew Easypost her finished versions of this top on her blog a couple of months ago. I made a comment to her on how I also had the same pattern and she responded that it was really easy to sew. I decided I needed to get it done!
One of the reasons I had put off making this top was while it said it was easy on the pattern it looked somewhat complicated after I had cut out the pieces. There really are not many pieces to it – like maybe 4 or 5 – but it still looked like a challenge. I have a lot of sewing experience and make a lot of my own clothes but I remember making this other twist front top a couple of years ago and it did not fit me correctly. It was too low in the front and I didn’t like wearing it.
This sewing project was much more successful than my previous one. I made the size 10 – the smallest size is an 8 and based on the measurements I went with the 10. I did decide to adjust the lower V point up a little and I am glad I did or I think it would have been too low cut for my taste. I think I brought that point up about an inch. The gathered front area is very attractive and the top is comfortable to wear, too.
I also made some pants from the same fabric using the Bernina My Label pattern that I have for just the basic pull on pant. They are really comfortable and the fabric has a poly blend with the cotton so they don’t get too baggy when you wear them. I am not sure where I bought the fabric – maybe Joann’s. I have had it in my stash for several months now. I tend to buy fabric when it is on sale and stick with colors I like.
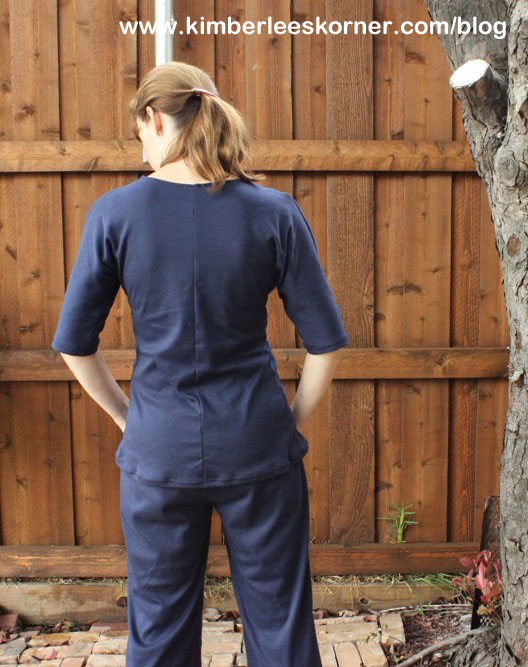
The above is the back view of the top. Sorry it is a little wrinkled – I took the photos later in the day after I had been to church and sitting for a while.
I will definitely make this top again. There are two other versions in the pattern. They have the same front but one is sleeveless and the other is longer, more like a tunic, with long sleeves. I think I will make the long sleeve tunic version next so I can wear it with some new leggings that I recently made.
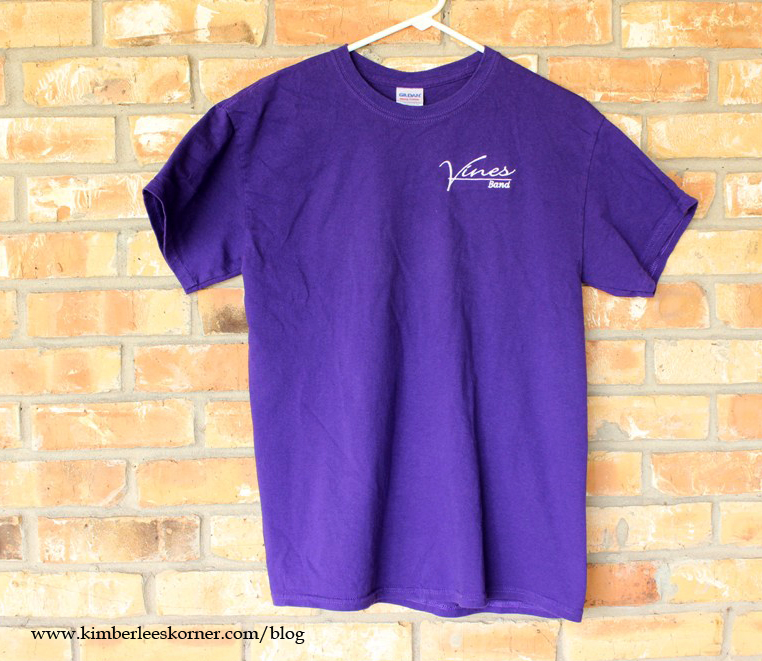
I recently did a makeover to this basic T-shirt. I tried to wear it the original way but the neck felt too constricting and I wanted this purple T-shirt (for my sons high school marching band) to have a more feminine touch. So, out come the scissors and sewing machine and some creativity!
BEFORE PHOTO:
purple t-shirt for my sons marching band Kimberlees Korner
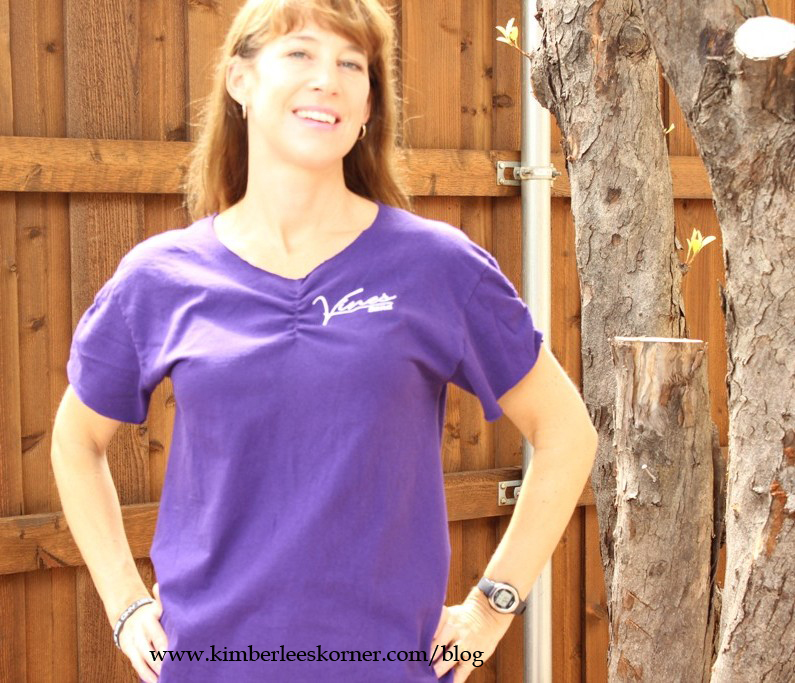
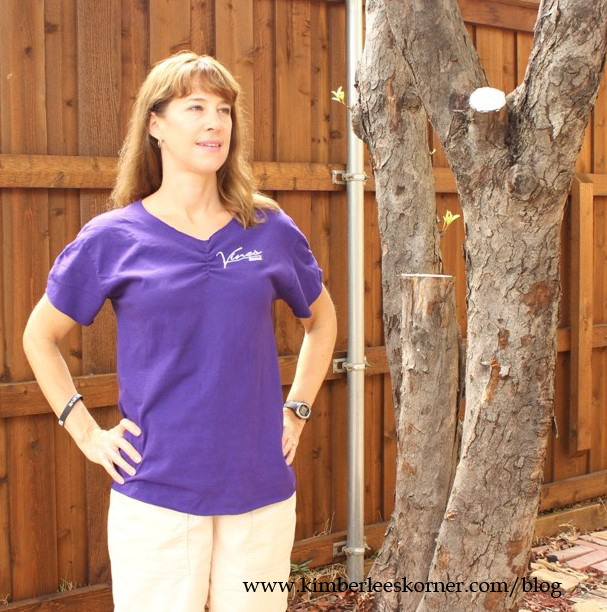
AFTER PHOTO:
T-shirt makeover by Kimberlee from Kimberlees Korner
This project is very easy and requires basic sewing skills, a sewing machine, 1/8 or 1/4 inch wide elastic and a T-shirt.
Here are the steps to makeover your basic T-shirt:
Cut off neckband (ribbing), sleeve hems, and lower hem
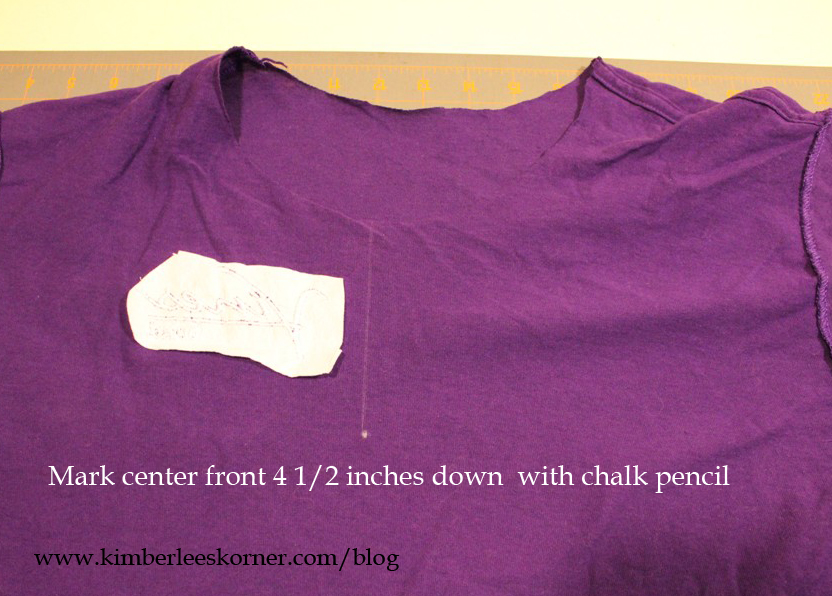
Use a chalk pencil and mark each center sleeve, lower side seams and front center down 4 1/2 inches on wrong side of shirt – draw a straight line with chalk from edge of shirt to this mark – this will be your sewing line for the elastic
mark t-shirt on wrong side with chalk pencil and draw a line for sewing guide
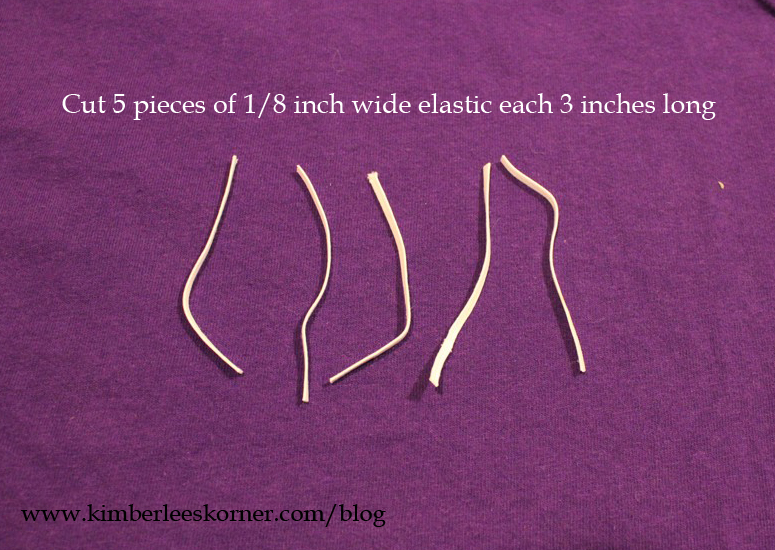
Cut 1/8 in. (or 1/4 in.) wide elastic into 3 in. long pieces – you will need to cut 5 of them
elastic cut into 3 in. long pieces
Use a sewing machine set on straight stitch – start at the marked point and stretch elastic and sew to the end
sewing elastic to t-shirt – stretch as you sew from marked point to end
Repeat step 4 for all marked areas: sleeves, lower hem and neckline
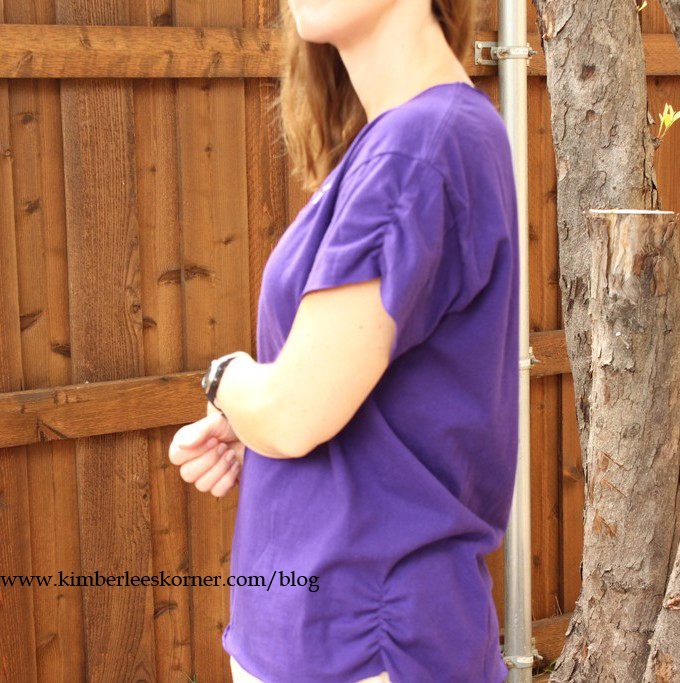
Your T-shirt is Done! Put it on and take a photo!
sleeve & hem view of t-shirt makeover by Kimberlees KornerFinished T-shirt makeover by Kimberlee from Kimberlees Korner
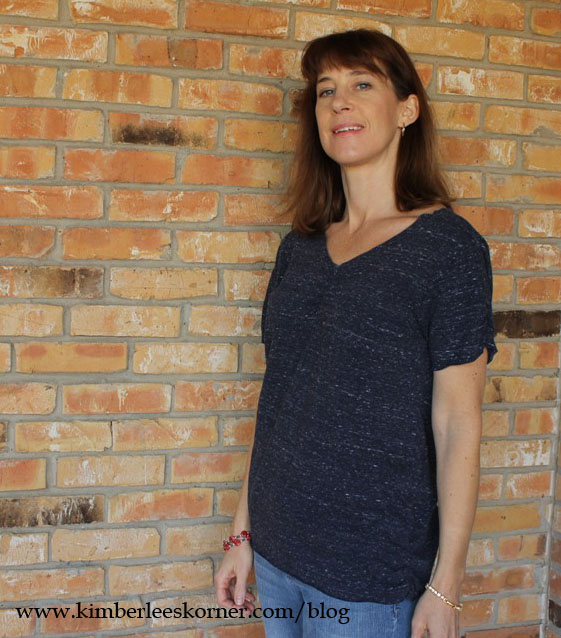
I also did this to another shirt a while back that is navy. It is harder to see the work in this photo but I love the look of the finished shirt and how it adds something to a plain T-shirt. This navy shirt is actually a mens shirt from Target.
navy t-shirt redo by Kimberlee from Kimberlees Korner
Send me an email at kkg@kimberleeskorner.com with your finished shirt – I would love to see them and feature them on my facebook page.
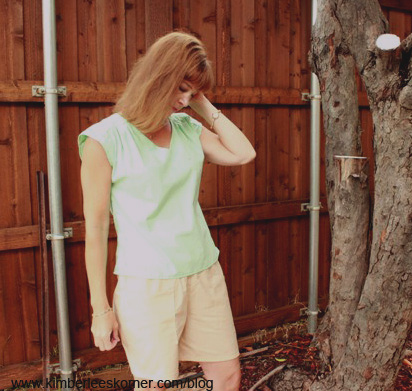
I made these two tops recently from the same pattern. The pattern I used was Simplicity 2594. There are 6 different views in this pattern.
The tops were pretty easy to sew. They have a lined yoke area that I thought would be difficult to sew but it turned out to be pretty simple. There is a little topstitching involved so it is helpful to have an edge stitch foot for that.
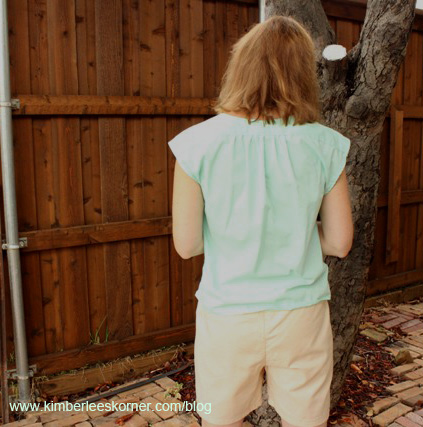
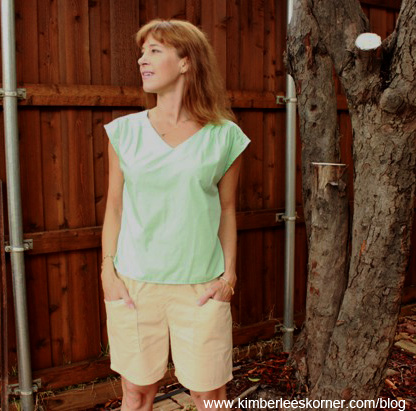
mint green v neck top sewn by Kimberlee from Kimberlees Kornerback view of mint green top sewn by Kimberlee from Kimberlees Korner
I made the mint green one above first and really like how it turned out. I used a basic broadcloth fabric and it was easy to sew on. I have already worn this top many times. This top has a v neck front and a gathered back. There are also a few pleats on the front on each shoulder area. This was view E in the pattern.
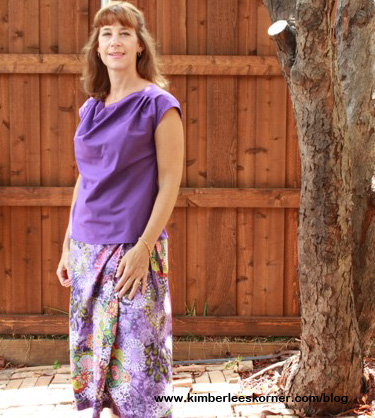
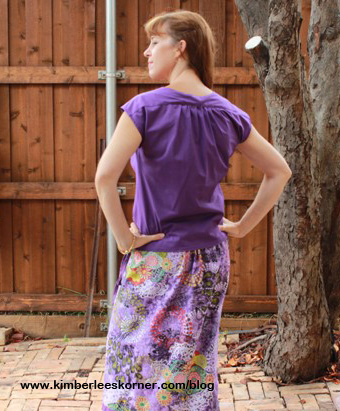
purple top sewn by kimberlee from kimberlees kornerback view of purple top sewn by kimberlee from kimberleeskorner
The second one I made was this purple one in the above photos. I used the same pattern but made a different view – view B – with the draped cowl neckline. This top is okay. I don’t like how it tuned out as well as the mint green one. I used broadcloth fabric again because it was something I had in my stash and I think a rayon or silky poly fabric would have been a better fabric choice. Even after sewing over 20 years I still make things that don’t always turn out as planned. I have wore this top a couple of times. I am also thinking that I do not care for how the drape of the cowl neck looks on me. I will be sticking with the v neck option or the scoop neckline in the future.
What sewing projects have you been working on lately? Leave me a Reply and let me know.
I made this bathing suit top a year ago using McCalls 3566 pattern. I have had the pattern several years so I am not sure if it is still current. It was simple to make but I never wore it due to the fact it needed more support. I had tried various bra inserts you buy at JoAnns or Hancock Fabrics but none of them seemed to work out well. So, the top got set aside in a sewing to-do pile meaning I intended to figure out a way to fix it one day.
Then, about a month or two ago I was on pinterest – doing some daily pinning – and found this pin on making a bathing suit top from a bra. It was intriguing to me and also something I had considered doing before and even had set aside a couple of older bras with the bathing suit top I had made. I had just not had the proper motivation to fix my top until I saw this on pinterest. Of course I pinned it to my sewing board and also immediately went to the site to see how to make this work.
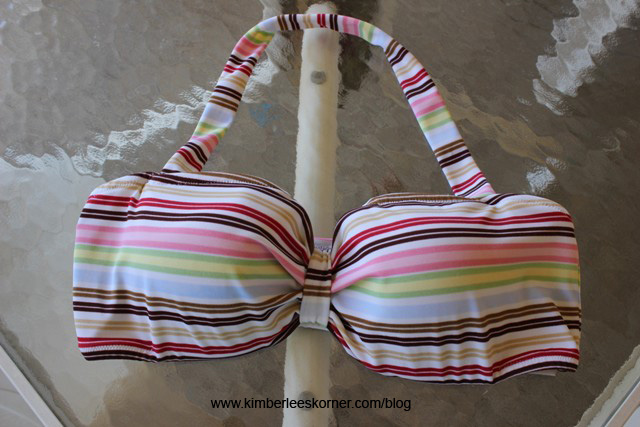
So finally, a few weeks ago, I got my project out and went to work with my sewing machine. This is what it looks like finished:
bathing suit top front view www.kimberleeskorner.com/blog
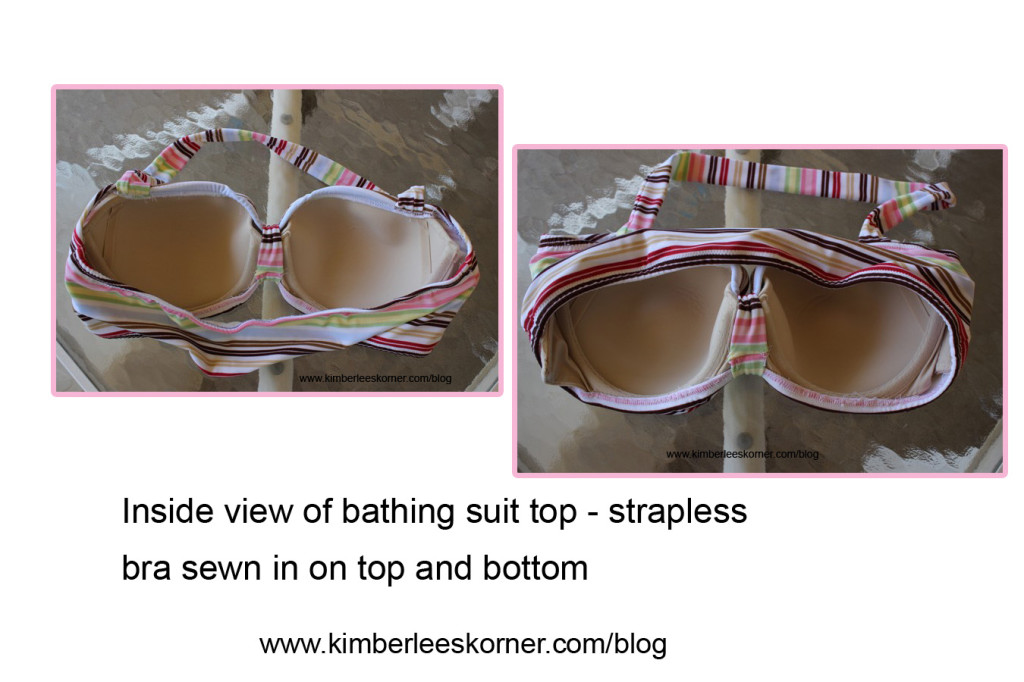
Since I was working with an already made bathing suit top I had to rip out some of the top stitching. I hate having to do that because it is a pain but it had to be done. I had an old strapless bra that I had kind of wore out in the back but it worked great for this project. I cut it off at the side seams – figured out where the center of the bathing suit top was and centered the bra in there. I had to do lots of pinning and stretch the top elastic area over when I sewed it in. I used a narrow zigzag stitch to sew the top elastic casing area to the top of the bra. The bottom area I stitched mainly by hand to the underwire area – wrapping the elastic area that I ripped out over the under wire bra.
inside view of how bra was sewn in to the top and bottom of the existing bathing suit top for support www.kimberleeskorner.com
I had a little of this fabric left so I made a 3 to 4 inch long tube about 2 inches wide and sewed it right sides together then turned it right side out. I wrapped this piece over the center of the bra-top to create the cute gathered front area. I stitched this down and tacked it to the bra by hand.
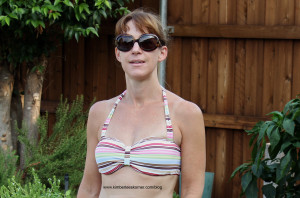
I am so pleased with how this turned out and glad I finally have a top to wear with the bottoms that fits well and has support. The first time I wore it my husband asked “Where did you get that bathing suit?” I told him I made it and he seemed impressed. The photo below is of me wearing it – this is after I have been swimming in it and done my water workout. It held up just fine in the water.
photo of me wearing my new bathing suit top
So, what sewing projects have you done lately? Let me know by leaving a reply.
Also, if you would like to receive future posts and updates please subscribe via bloglovin, email or RSS by clicking on one of the icons in the side bar. You can also find me on facebook – Kimberlees Korner Have a great day!
Recently I decided I needed to get rid of a few old pairs of shorts so that gave me a reason to sew up some new ones. I made these shorts using the Bernina My Label program. It is a pattern drafting program based on your measurements. The patterns fit pretty well for the most part but I have had to tweak some things on them. For example, on these shorts I had to add some to the crotch area – a crotch extension – on the back side or they tended to pull in the back and I hated that.
shorts made by Kimberlee from Kimberlees Korner with Bernina My Label program
The printed shorts above were the first ones I made to test out the pattern since I had only used it once before. At the time I didn’t have enough solid color fabric to make any shorts and decided this cotton print would be okay to just wear around the house or on the weekend. I also added one pocket on the side of these using a pocket pattern from another book I have on skirts called Sew Serendipity by Kay Whitt. I have not made anything from the book yet, just used this pocket pattern on my shorts since I liked the style. I only put one because I wanted to see how it looked and if I liked the style.
tan shorts with pockets made by Kimberlee from Kimberlees Kornertan shorts sewn by Kimberlee from Kimberlees Korner
The tan pair I made using a lightweight cotton fabric. I decided to sew the pockets on both sides of this pair. I have already gotten a lot of wear out of these in just the last couple of weeks since finishing them.
red shorts made by Kimberlee with Bernina My Label program
The red pair of shorts I made with stretch twill fabric I bought at Hobby Lobby. The fabric has a nice drape and is easy to wear. It is a bit stretchy and requires a little patience when working with it as it will stretch as you sew if you pull it – kind of like working with knits. I decided to not do any pockets on these as I figured with the stretch factor they might not look too good. I also just finished another pair in this same fabric yesterday in the sky blue color.
Overall these shorts turned out well and I like how they fit me. They sew up very quickly with an elastic waist band so they are a pull on type of short. For the types of fabrics I used I thought this style was the best choice and often an elastic waistband is much more comfortable than a traditional waistband with a zipper, in my opinion. Also, depending on the type of shirt or top you wear I think this style of short can be more slimming if you have a good fit.
I think I am all set with shorts now and ready to move on to some other projects. Thanks for visiting my blog. To receive regular updates please subscribe via bloglovin, email, or RSS feed in the sidebar. Have a great day!
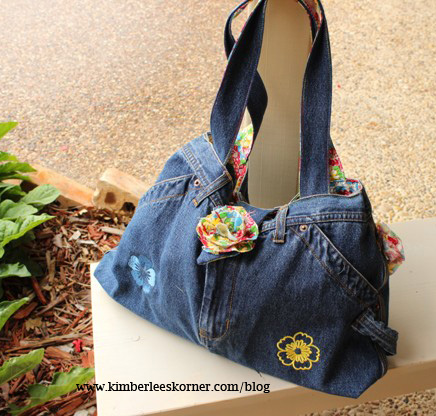
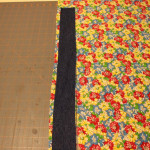
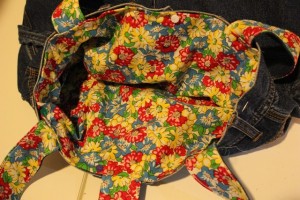
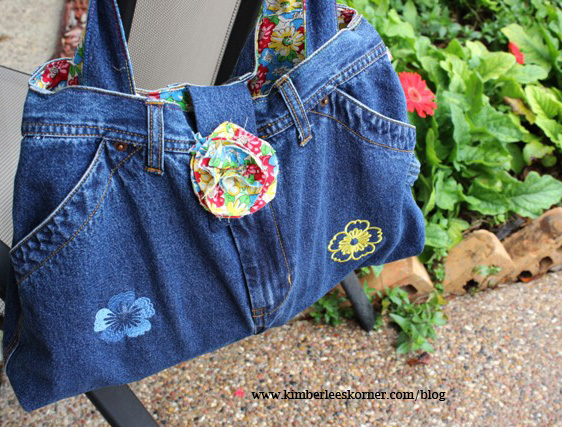
I finally finished the denim bag I started over 2 months ago. The project got put aside when I began working on some new skirts and shorts and my summer tunic. Too many ideas and projects and not enough time is forever a problem! Here is my finished bag:
Front side of bag by www.kimberleeskorner.com/blogBack of denim jeans bag by Kimberlees Korner
This bag was made using a very old pair of jeans that were mine – I had not worn them in many years. Below are the steps I used to make this bag. Really if you want to make an upcycled bag you can just kind of go with it and use your own ideas and sewing skills. That is more or less how I created mine.
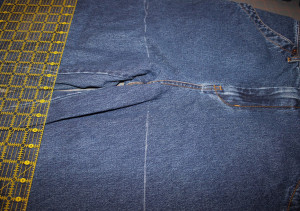
1. Cut off the jeans at the crotch area – draw a chalk line and cut
draw chalk line at crotch area of jeans and cut on line
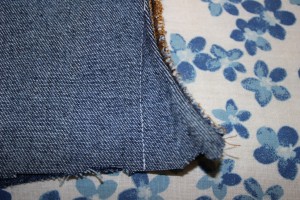
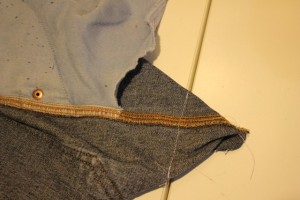
2. Even up the bottom and sew a little at the lower crotch area to straighten the seam on front and back side
sew lower crotch area to be a straight seam on front and back side
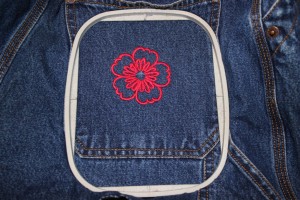
3. Do machine embroidery wherever you desire – I did mine on lower pocket areas and made it so I could use the pockets
machine embroidery on denim bag by www.kimberleeskorner.com/blog
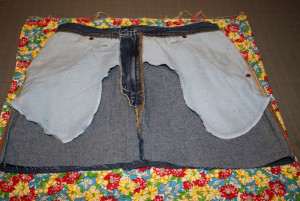
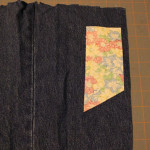
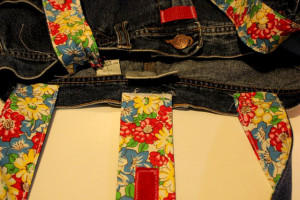
4. Lay the denim bag section over your lining fabric and cut out lining
cut out lining by laying denim section over lining fabric
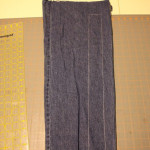
5. Cut straps from denim leg pieces and lining fabric – I did mine 23 in. long by 2 in. wide – cut 2 of each
cutting straps from jean leg section
cut straps from lining fabric using jean piece for guide
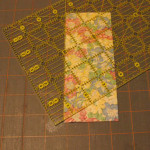
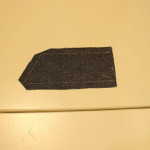
6. Cut tab closure piece – 6 in. long by 2 1/2 in. wide – 1 denim, 1 fabric and 1 interfacing Angle one end 60 degrees if you want it to be slanted not straight
cut tab closure at a 60 degree angle
cut tab closure of denim with RS of fabric facing down
7. Sew up bottom of bag with 1/2 in. seam allowance and square off ends of bag by sewing in 1 1/2 in. on each corner – I cut this off after sewing to remove bulk
sew a straight line 1 1/2 in. from corner to box bag bottom
8. Sew up lining on sides and bottom and square off ends as done in step 7
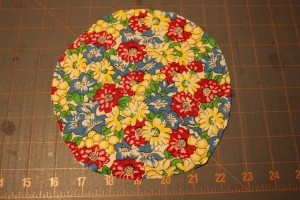
9. Cut 2 circles aprrox. 6 in. around and cut into a spiral for the scrappy flowers
6 inch circle for scrappy flower
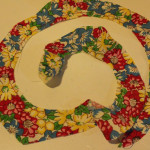
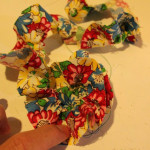
10. Sew scrappy flowers by using a stitch length of 5 and stitch 1/4 in. away from edge of inner side of cut spiral. Pull to thread to gather and coil fabric into a circular flower. Stitch with narrow zigzag in the middle to hold flower in place.
Cut circle into a spiral
sew along inner edge of spiral piece with long stitch length to gather for scrappy flower
coiling flower up after gathering to create flower
11. Sew scrappy flower to back pocket of bag on corner
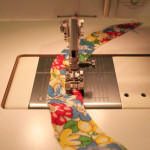
12. Straps – sew down each long side with RS together using edge of presser as a seam guide. Turn RS out using a dowel. Press and topstitch edge of each strap – baste straps in desired area on top edge of bag
use edgestitch foot to topstitch edge of straps
13. Sew tab closure – fuse interfacing to lining – sew tab with RS together around long edges and angled end – leave straight top side open – clip corners and turn RS out
sewing of tab closure
baste straps and closure tab to edges of bag
14. Use a 1 to 1 1/2 in. piece of velcro to sew onto tab on fabric side of tab and other side of velcro to denim bag – I place one verical and 1 horizontal for easy adjustable closure. After sewing velcro on sew tab with basting stitch onto middle of bag
15. Fold down approx. 1 in. on top of open lining part of bag with WS together
16. Place lining WS out down into denim bag. Using edge stitch foot sew around bag to close up lining and secure straps and tab in place – you can then remove basting stitches
place lining inside bag WS tog. and sew around top using an edgestitch foot
17. Make small pleat on either side edge of bag, if desired, to make opening at the top a little smaller
18. Sew other scrappy flower onto tab closure with narrow zigzag stitch to hide velcro stitching
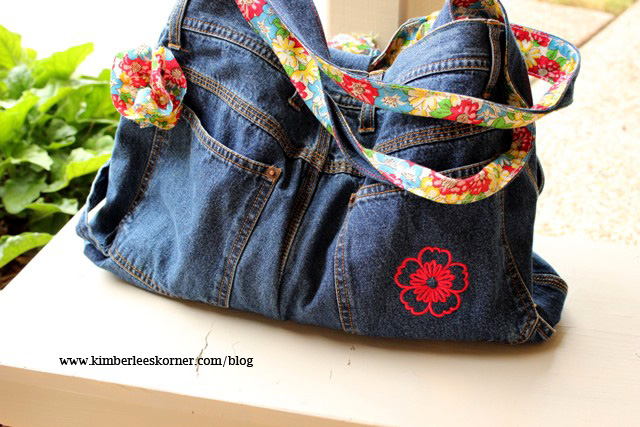
Bag is done! Fill it with stuff!
denim upcycled bag from Kimberlees Korner
Recommended items for easier sewing:
denim needles size 90 or 100
edgestitch foot for topstitching
quality sewing thread
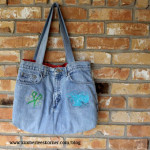
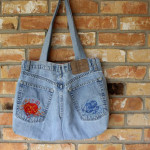
This is a fun and easy way to recycle jeans. I made another bag like this about a year ago using some sewing embroidery motifs and sewing fabric for the lining. I did not put the tab closure on that bag because I wanted to use it for a knitting tote not a purse. The flower one I am using as a purse.
recycled denim – jeans turned into knitting bag by Kimberlees Korner
recycled denim bag – jeans turned into a knitting bag by Kimberlees Korner
Currently I am working on some other ideas for using old jeans. To receive future updates on my other projects subscribe via RSS feed or through bloglovin by clicking on the icons in the sidebar. Have a great day!
This is one of my latest summer sewing projects that I finished recently – this navy tunic top. I made this top using Simplicity pattern 1668. Once again it was one of those bargain 99 cent patterns I got from Hobby Lobby a few weeks ago. The pattern can also be made into a dress with a waist tie. So far I have only made the tunic.
I love this top! It is lightweight and comfortable to wear. The size I made, according to my measurements, fits well. Although I think the next time I will scoop out a little more depth for the arm syce area. I prefer for my sleeveless tops to have a little more depth under the arm. I think it is because I have bigger shoulders so I usually need a little more room in this area. Another great thing about this top is it matched my chevron skirt that I also made recently.
The top has a gathered shoulder area and a gathered front that has elastic in the center. The back of the top has a large pleat. See photos below for front and back views:
navy summer tunic top – matches with my chevron skirt I made both items sewn by Kimberlees Kornerback view of navy summer tunic made by Kimberlees Korner
This pattern has quite a few pattern pieces but is fairly easy to sew. I would recommend it to anyone with intermediate sewing skills. Sewing the front elastic casing area was a little involved and requires some patience. Also, for the armhole facing I did not use the recommended bias tape – I just made my own from 1.5 inch bias strips.
I made this particular top out of a lightweight broadcloth. I am planning to make another one this summer. I have not decided what color yet – maybe white so it will go with everything.
Currently I am working on a denim upcycle bag made from old jeans. I am hoping to finish it soon so I can post it on my blog in the next week.
Thanks for stopping by my blog. To receive updates you can subscribe via RSS feed or through bloglovin by clicking on either icon in the sidebar. Have a great day!