Tag: sewing swimwear

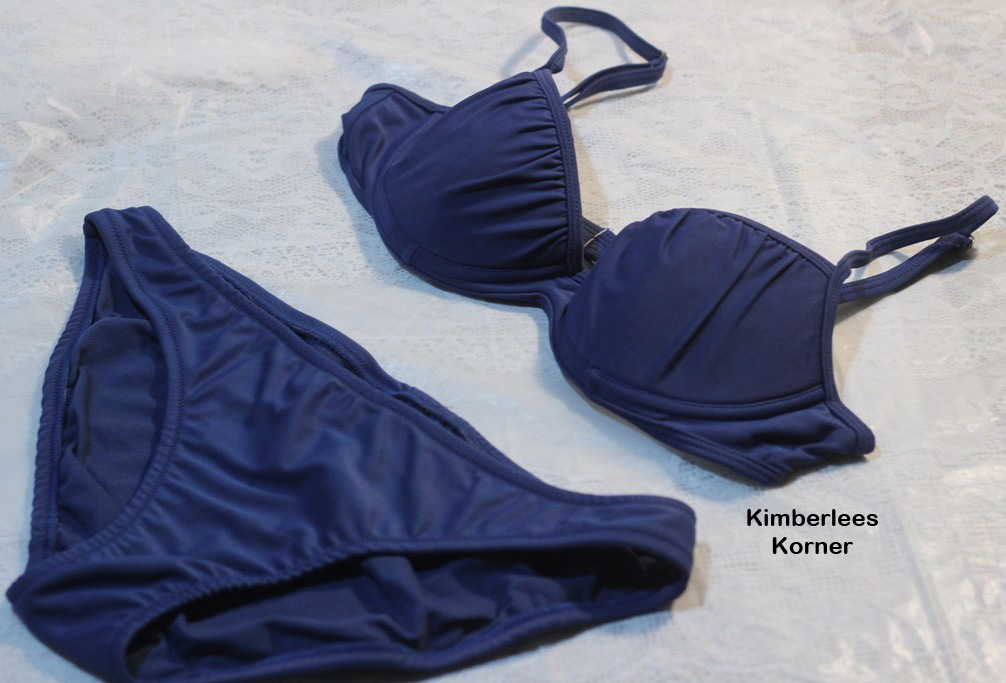
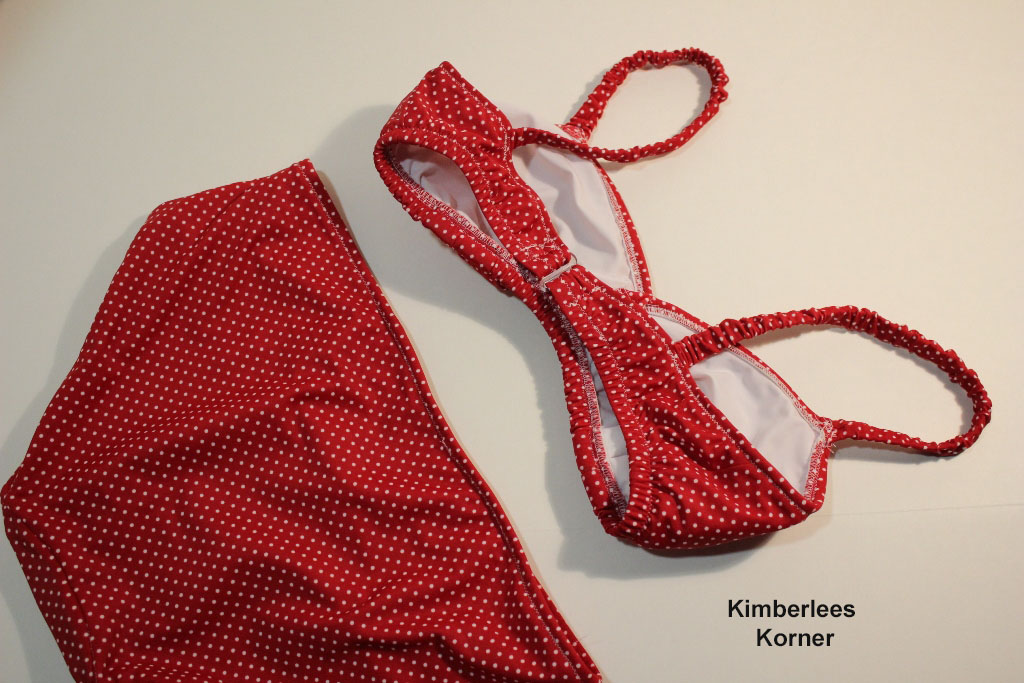
Red Polka Dot Bathing Suit

I recently finished sewing this red polka dot bathing suit.  This is one of the many sewing projects I wanted to complete this summer.   red polka dot bathing suit made by Kimberlee

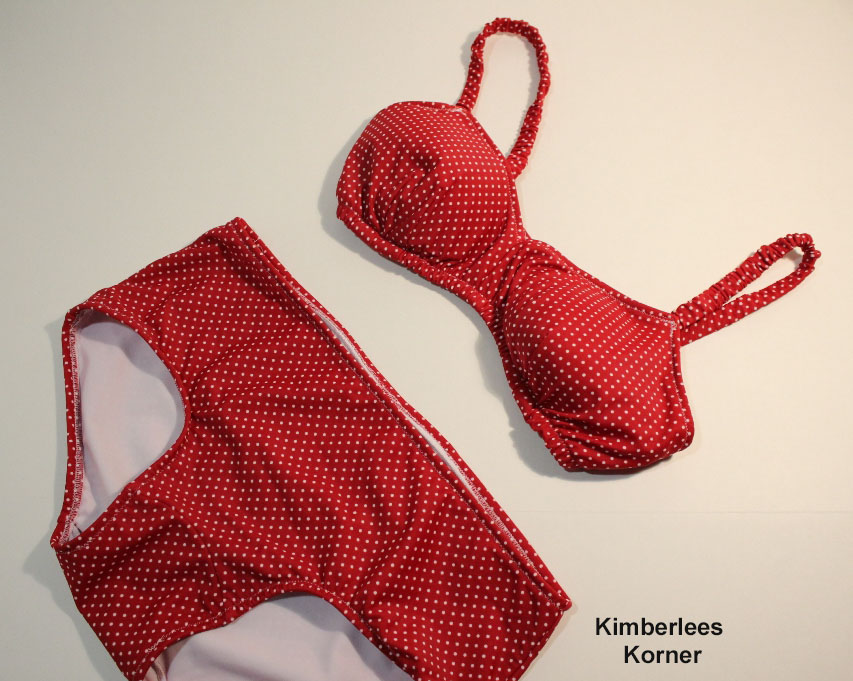
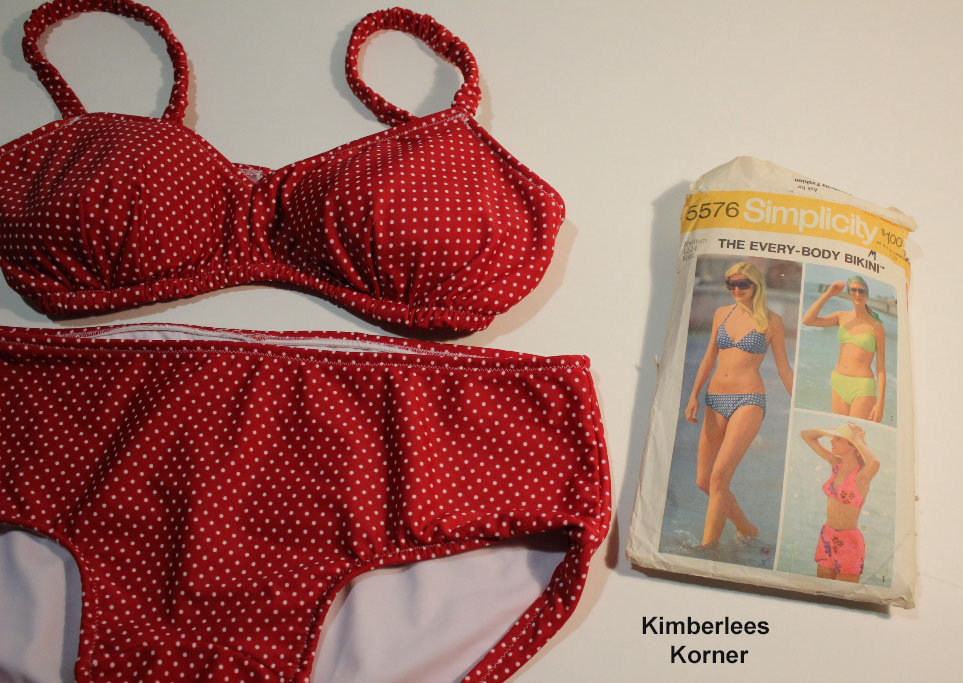
The pattern I used to make this bathing suit is a vintage pattern that I bought last summer from an Etsy seller.  If you go on Etsy and type in the search “bathing suit pattern” you can find lots of sellers that have patterns.  It seems like it is hard to find a pattern in the store these days – I guess it is not popular to sew your own bathing suit anymore.  I actually prefer to sew my own bathing suit as I can get the fit the way I want it.  I will admit sometimes you have to make the pattern a couple of times before it is exactly how you want it but the result is worth it – a good fit and a bathing suit that will last for several years, most likely.

vintage sewing pattern for bathing suit - Kimberlees Korner

The pattern was made back in 1973 according to the pattern information.  As you can see it was only a dollar back then.  I think I paid around $6 or $8 for it on Etsy.  I have made version 2, in the right hand corner, three times now.  I made one last summer and had to make a few adjustments to it and I made two this summer.  I recently finished a turquoise bathing suit in addition to the red polka dot bathing suit.

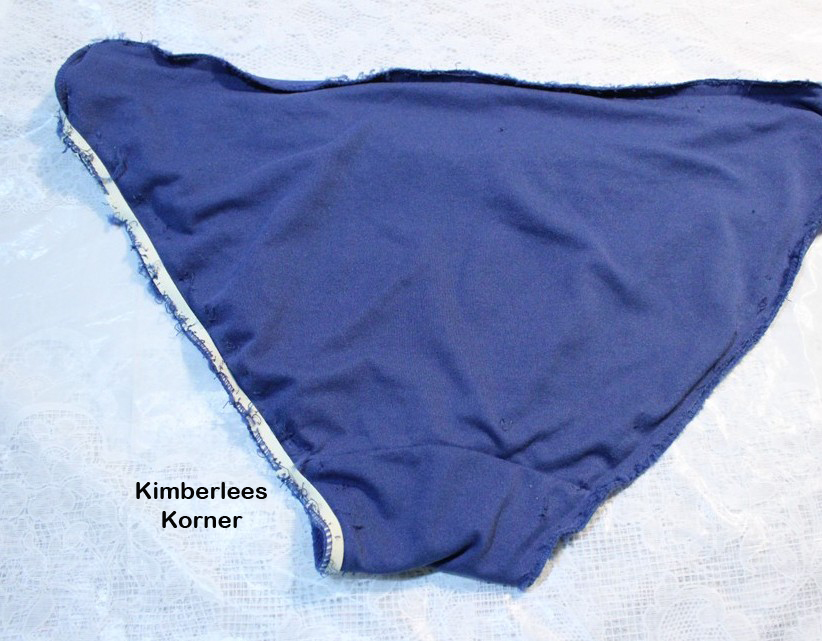
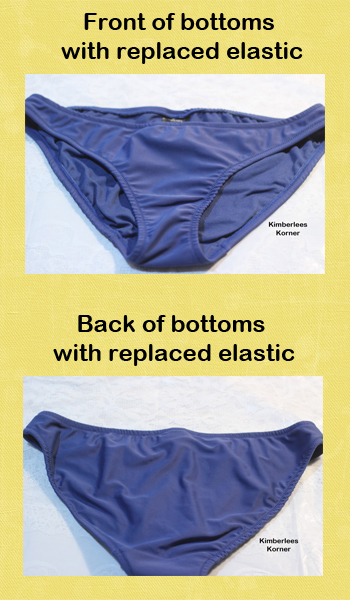
The fabric I bought for this bathing suit was from Spandex World.  I also bought it last year at the end of summer so it was on clearance.  The fabric I used for the lining was panty spandex from Sew Sassy.  I think it only cost me about $15 to $20 to make this red polka dot bathing suit and that includes the elastic and back closure.

red polka dot bathing suit back view - Kimberlees Korner

Some tips for sewing your own bathing suit:

  • Use decent quality swimwear fabric and purchase a little extra in case you need to make another top or bottom with adjustments to your pattern
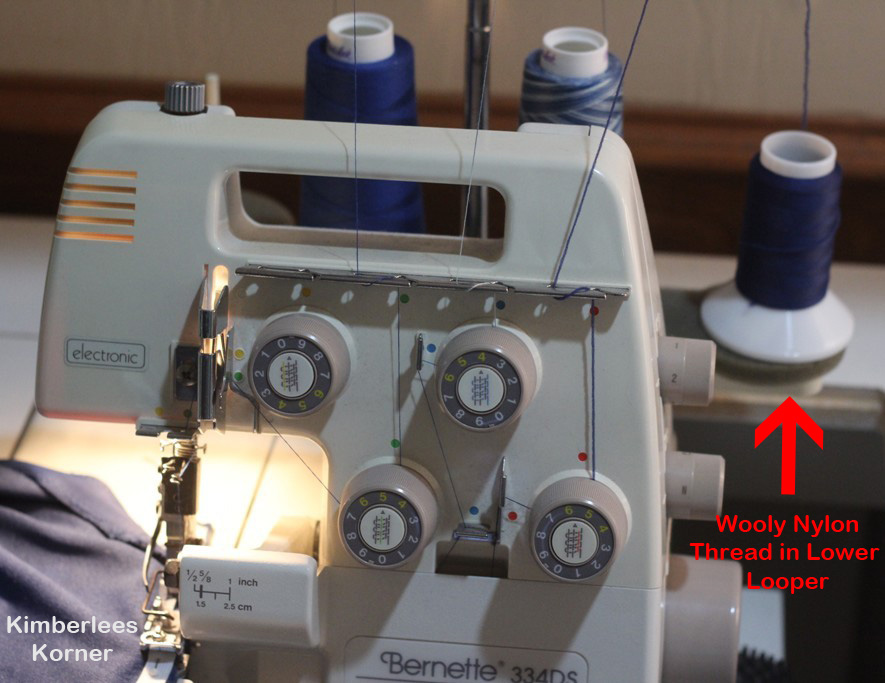
  • Be familiar with sewing on stretchy fabrics that have spandex or lycra in them
  • Line the top and the bottom for best results – you can use swimwear lining or panty spandex
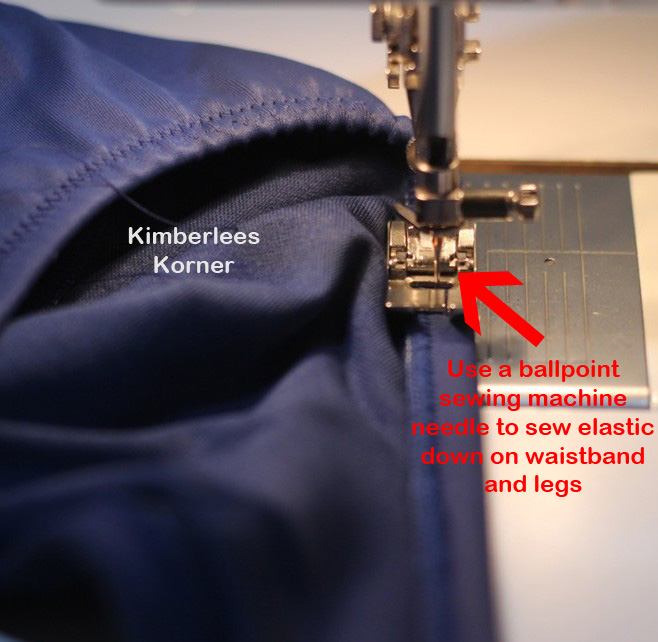
  • Use a stretch sewing machine needle size 75/11
  • Use a narrow zigzag stitch for topstitching the elastic as it will stretch more

Places to order supplies for making your own bathing suit:

  • Spandex World – lots of swimwear fabric at reasonable prices
  • Etsy – for swimwear fabric and bathing suit patterns, also the back closures
  • Sew Sassy – good quality elastic that is reasonably priced, plastic back closures, swimwear lining and thin foam cup inserts for the top

red polka dot bathing suit made by Kimberlee

What sewing projects have you been working on lately?  Let me know in the comments.

– Kimberlee

Bathing Suit Bottom Redo

6 Comments

One of my recent sewing projects has been to replace the worn out elastic in some bathing suit bottoms.  To be honest with you they were wore out last year but I neglected to fix them then.  I decided I needed to get them done this year as I really like the bathing suit and the top was still in good shape – so are the bottoms except for the elastic.

Ripping elastic from bathing suit bottoms

The above photo is of the bottoms with 2/3 of the elastic removed.  Let me tell you that removing the topstitching and then the serged edge that attaches the elastic is a lot of work!  I think it probably took me 3 or 4 hours total time (I didn’t do it all at once, it was too boring) to rip all of it out.

Once I had the elastic all removed the process was a lot faster and only took about 20 or 30 minutes to put in the new elastic.  I used a Kwik Sew pattern, pattern 3238 which is a bathing suit pattern I have made before, for the elastic length for the waistband and the legs.  I knew that those bottoms fit me well and the elastic measurements would be right.

Sewing elastic to bathing suit with serger

After cutting the elastic to the measurements I used my serger to attach it to the edges of the waistband and leg openings.  I first divided the elastic in half and then divided the bottoms fabric in half and marked it so I would know where and how much to stretch the elastic as I sewed.  I also used wooly nylon thread in the lower looper as that part will be next to my skin and the wooly nylon is a lot softer and provides a lot more coverage and stretch than a regular polyester or cotton thread.

Sewing elastic down with sewing machine and narrow zigzag stitch

After attaching the elastic with the serger I then took it to my regular sewing machine and turned the elastic over and stitched it down using a narrow zigzag stitch of a 2 width and a 2 length to topstitch the elastic in place.  I also used a ballpoint needle as it sews knits and over elastic better than a universal needle.

Elastic replace in bathing suit bottoms

The photo above is of the front and back of the bottoms after replacing the elastic.  I even remembered to sew the tag back in the back – not that I couldn’t figure out which was the back but I was glad I remembered.

Bathing Suit with elastic replaced in bottoms


Well, here is my new-old bathing suit.  I tried the bottoms on and they fit much better now and are not all loose.  It took a while (like a few weeks) for me to complete this project as it was a real pain to rip out that old disintegrating elastic.   It was so bad it would just crumble in some spots but I still had to rip out all of the old serging holding it in so I could replace it and not have all of the bulk.  The top for some reason does not, and I hope won’t any time soon, have this same problem and as you can see the bathing suit is still in pretty good shape for being several years old.  I am glad I was able to recycle it and not have to just get rid of it.

The weather here is still hot and will be for at least another month or more so I will be able to wear my “new” bathing suit when we swim in our pool.  My advice to anyone attempting to do an elastic replacement in a bathing suit is to be patient and just keep at the ripping of the stitches and eventually when you get to the sewing part it is super fast and easy.

Have a great day!

Kimberlee