Recently I have been introduced to kale and now I love this dark leafy green vegetable. It is full of lots of health benefits and high in anti aging antioxidants.
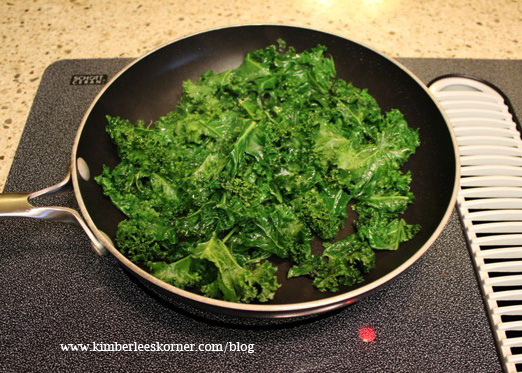
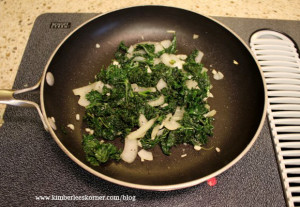
saute kale with olive oil
Here are some of the other health benefits:
B vitamins to boost brain power and help prevent memory loss
contains lutein which helps prevent eye disease
a good source of calcium for your bones
silica for the skin, hair, teeth and nails
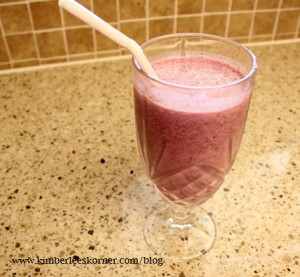
I have been adding fresh kale leaves to my cranberry fruit smoothies in place of spinach and love the refreshing taste it gives them. Here are 2 recipes I have been using for smoothies:
smoothie made with cranberry juice, frozen mixed berries, protein powder, yogurt, flaxseed meal and kale
Cranberry and Kale Smoothie
-3/4 cup cranberry juice -3/4 cup frozen mixed berries -1 Tbls flaxseed meal or Chia seeds -1/3 cup plain or vanilla yogurt -1 scoop vanilla protein powder – handful of torn kale leaves-no stems
Place all of the above ingredients in blender and blend for 1-2 minutes or until all berries are processed. Enjoy!
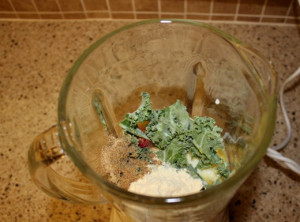
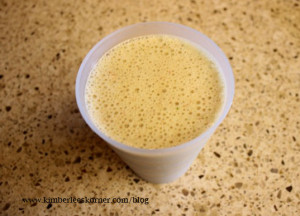
smoothie ingredients in blender before blendedOrange juice smoothie with frozen berries and fresh kale leaves
Orange Tropical Smoothie -3/4 cup orange juice -3/4 cup mixed frozen strawberries, pineapple, mango & peaches
-1/2 cup plain yogurt -1 Tbls flaxseed meal -1 scoop vanilla protein powder -handful kale leaves-no stems
Place all ingredients in blender and blend 1-2 minutes until smooth. Enjoy!
I first learned of putting kale in smoothies after I joined a green smoothie group on facebook. The group is called Green Cup of MOJO and has lots of interesting recipes posted regularly. You can click on the highlighted link to find it – I am not sure if you have to be invited to join.
I have also started cooking kale. It is similar to cooking with spinach or swiss chard. Here is a recipe I have tried and we enjoyed:
Kale saute with olive oil, onions and garlic
1 bunch of kale 1 to 2 Tbls olive oil 3 to 4 cloves of chopped garlic 1/2 onion chopped into large pieces
Directions: Saute kale in olive oil until it cooks down – stir frequently so it doesn’t burn. Add garlic and onions and saute 2 or 3 more minutes. Serve.
Thanks for visiting my blog. Please follow via RSS feed or with bloglovin to receive regular updates. Have a great day!
A little organization and pre-planning goes a long way when you’re managing a home, and this week’s bundle will help you get organized, tame the paper clutter and simplify your home. Plus, discover the secrets for throwing a party without the stress and get all of the printables you need to set up your home management notebook today!
This week only, get all 4 ebooks plus more than 300 printables for just $7.40, a savings of more than 75%!
Planner Perfect by Jenny Penton Planner Perfect: A Fresh Idea on Organizing Your Life is designed to help you become a master at managing your home. Intended for moms during every season of life, you’ll find tips for creating a space of your own, effectively using a calendar, organizing in a way that maximizes your strengths and talents, vacation planning, prioritizing your health, keeping your home clean, meal planning and more!
Plan a Fabulous Party {Without Losing Your Mind} by Mary Carver From baby showers to birthday parties, we all know that hosting a party usually ends up being more stressful than we hope it will! In Plan a Fabulous Party {Without Losing Your Mind}, Mary walks you through the steps involved in planning any type of party and leaves you prepared to handle unexpected complications or challenges. With questions and prompts, reminders about possible stumbling blocks, planning checklists, survival stories and last-minute cleaning tips, this guide is a must have before your next party, big or small.
10 Steps to Organized Paper by Lisa Woodruff Can you imagine being able to find any piece of paper in your house anytime you needed it? 10 Steps to Organized Paper will motivate, encourage and lead you step-by-step through turning your mountains of paper into organized systems. Not only will Lisa walk you through the paper purging process, but she’ll also help you create a system that’s easy to maintain so that you can find the papers you need when you need them!
Homestead Simplicity by Lisa Barthuly Sometimes it can be difficult to strike a balance between simple living and wanting the best for our family. In Homestead Simplicity: A Primer, Lisa shares her simple hints, tips and recipes to inspire and encourage you. Discover Lisa’s secrets to cooking from scratch (easily!), keeping your pantry stocked, making and using homemade cleaners and toiletries and more, including some of her favorite recipes.
The Life Your Way Printables Complete Download Pack from Mandi Ehman With more than 300 printable pages to help you get organized, The Life Your Way Printables Complete Download Pack includes both full-size and half-size home management printables, cheat sheats, holiday planners and more, plus free monthly updates with new printables!
The Homemaking bundle is only available through 8am EST on Monday, 7/29. Get yours today!
Have you taken an online Craftsy class yet? I first learned about Craftsy over a year ago and took the Jean-ius class, this is a class on how to sew your own jeans by using an existing pair of jeans you love to make a pattern. I have been sewing for over 25 years but learned lots of great techniques and tips on how to sew jeans to make them look professional. If you check out my pinterest board on my sewing projects you can see my jeans or through my craftsy projects.
I am writing this post to inform you that Craftsy is having a summer saleon some of their classes. This would be a great time to try out an online class for a very low price. Here are some of the advantages to taking a Craftsy class:
watch it when you want to – learn at your own pace
watch the class as many times as you want to – once you buy it you have it forever and can access it at any time
lots of great knowledgeable instructors
I have also taken the Just Shoot It class on photography and learned a great deal more about my camera and how to take better photos (still improving them all the time though). This class also inspired me to buy a better camera – a Canon DSLR. Having a nice DSLR has also made a great difference in my photos.
I am also signed up for a few other classes that I have not yet totally completed. I bought those classes on a previous craftsy sale knowing that I can take them whenever I want to on my own time.
You can click on the link above to view the online sale. They offer lots of different types of classes on a variety of crafts – click above to check them out. The sale ends this Sunday July 21, 2013 so don’t delay.
Thanks for visiting my blog. Please follow me via RSS feed or through bloglovin by clicking on either icon in the sidebar to receive future updates. Have a great weekend!
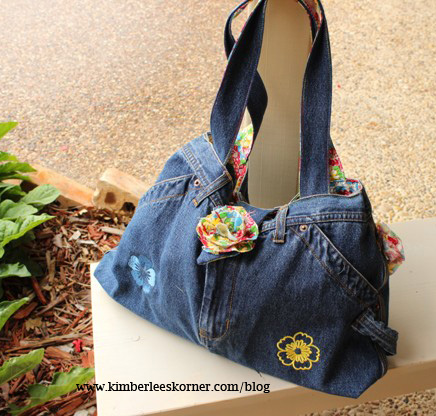
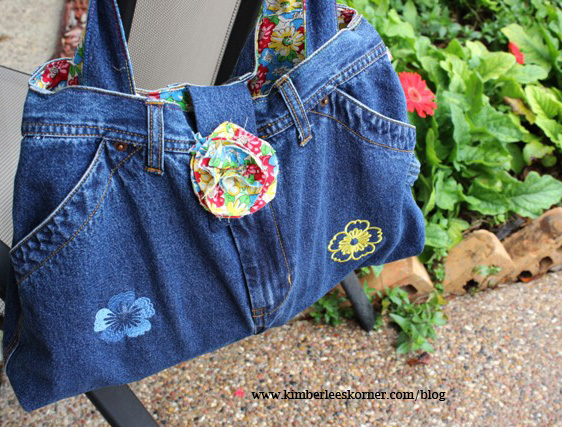
I finally finished the denim bag I started over 2 months ago. The project got put aside when I began working on some new skirts and shorts and my summer tunic. Too many ideas and projects and not enough time is forever a problem! Here is my finished bag:
Front side of bag by www.kimberleeskorner.com/blogBack of denim jeans bag by Kimberlees Korner
This bag was made using a very old pair of jeans that were mine – I had not worn them in many years. Below are the steps I used to make this bag. Really if you want to make an upcycled bag you can just kind of go with it and use your own ideas and sewing skills. That is more or less how I created mine.
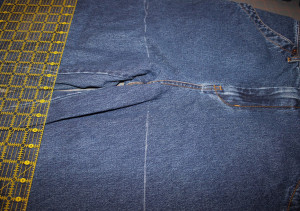
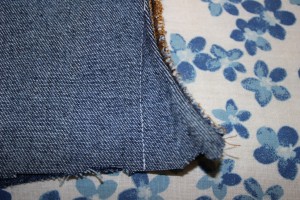
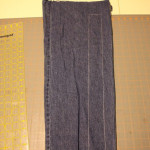
1. Cut off the jeans at the crotch area – draw a chalk line and cut
draw chalk line at crotch area of jeans and cut on line
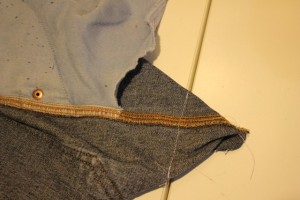
2. Even up the bottom and sew a little at the lower crotch area to straighten the seam on front and back side
sew lower crotch area to be a straight seam on front and back side
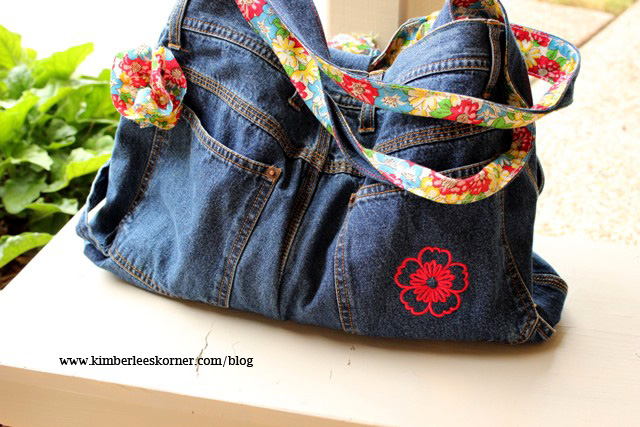
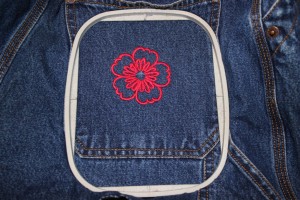
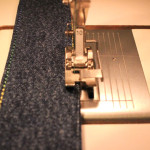
3. Do machine embroidery wherever you desire – I did mine on lower pocket areas and made it so I could use the pockets
machine embroidery on denim bag by www.kimberleeskorner.com/blog
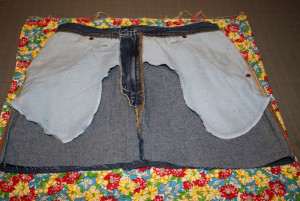
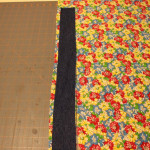
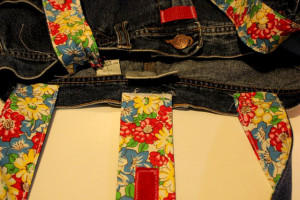
4. Lay the denim bag section over your lining fabric and cut out lining
cut out lining by laying denim section over lining fabric
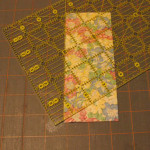
5. Cut straps from denim leg pieces and lining fabric – I did mine 23 in. long by 2 in. wide – cut 2 of each
cutting straps from jean leg section
cut straps from lining fabric using jean piece for guide
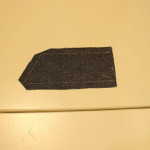
6. Cut tab closure piece – 6 in. long by 2 1/2 in. wide – 1 denim, 1 fabric and 1 interfacing Angle one end 60 degrees if you want it to be slanted not straight
cut tab closure at a 60 degree angle
cut tab closure of denim with RS of fabric facing down
7. Sew up bottom of bag with 1/2 in. seam allowance and square off ends of bag by sewing in 1 1/2 in. on each corner – I cut this off after sewing to remove bulk
sew a straight line 1 1/2 in. from corner to box bag bottom
8. Sew up lining on sides and bottom and square off ends as done in step 7
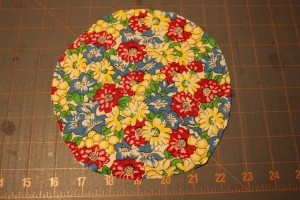
9. Cut 2 circles aprrox. 6 in. around and cut into a spiral for the scrappy flowers
6 inch circle for scrappy flower
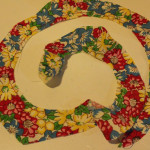
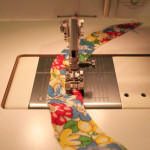
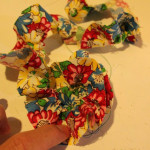
10. Sew scrappy flowers by using a stitch length of 5 and stitch 1/4 in. away from edge of inner side of cut spiral. Pull to thread to gather and coil fabric into a circular flower. Stitch with narrow zigzag in the middle to hold flower in place.
Cut circle into a spiral
sew along inner edge of spiral piece with long stitch length to gather for scrappy flower
coiling flower up after gathering to create flower
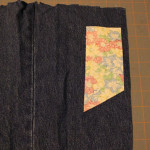
11. Sew scrappy flower to back pocket of bag on corner
12. Straps – sew down each long side with RS together using edge of presser as a seam guide. Turn RS out using a dowel. Press and topstitch edge of each strap – baste straps in desired area on top edge of bag
use edgestitch foot to topstitch edge of straps
13. Sew tab closure – fuse interfacing to lining – sew tab with RS together around long edges and angled end – leave straight top side open – clip corners and turn RS out
sewing of tab closure
baste straps and closure tab to edges of bag
14. Use a 1 to 1 1/2 in. piece of velcro to sew onto tab on fabric side of tab and other side of velcro to denim bag – I place one verical and 1 horizontal for easy adjustable closure. After sewing velcro on sew tab with basting stitch onto middle of bag
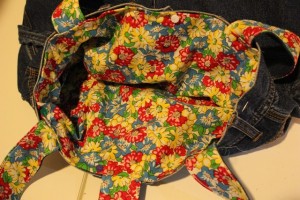
15. Fold down approx. 1 in. on top of open lining part of bag with WS together
16. Place lining WS out down into denim bag. Using edge stitch foot sew around bag to close up lining and secure straps and tab in place – you can then remove basting stitches
place lining inside bag WS tog. and sew around top using an edgestitch foot
17. Make small pleat on either side edge of bag, if desired, to make opening at the top a little smaller
18. Sew other scrappy flower onto tab closure with narrow zigzag stitch to hide velcro stitching
Bag is done! Fill it with stuff!
denim upcycled bag from Kimberlees Korner
Recommended items for easier sewing:
denim needles size 90 or 100
edgestitch foot for topstitching
quality sewing thread
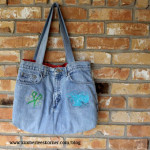
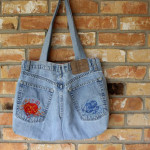
This is a fun and easy way to recycle jeans. I made another bag like this about a year ago using some sewing embroidery motifs and sewing fabric for the lining. I did not put the tab closure on that bag because I wanted to use it for a knitting tote not a purse. The flower one I am using as a purse.
recycled denim – jeans turned into knitting bag by Kimberlees Korner
recycled denim bag – jeans turned into a knitting bag by Kimberlees Korner
Currently I am working on some other ideas for using old jeans. To receive future updates on my other projects subscribe via RSS feed or through bloglovin by clicking on the icons in the sidebar. Have a great day!
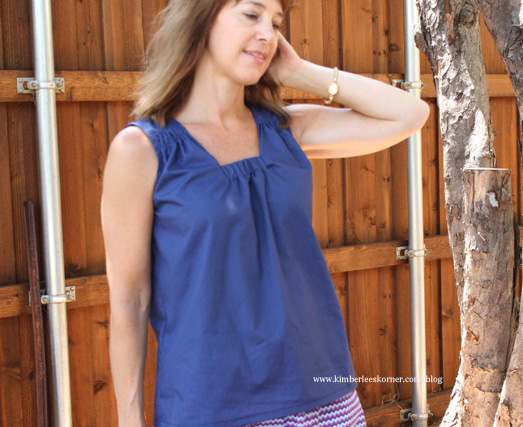
This is one of my latest summer sewing projects that I finished recently – this navy tunic top. I made this top using Simplicity pattern 1668. Once again it was one of those bargain 99 cent patterns I got from Hobby Lobby a few weeks ago. The pattern can also be made into a dress with a waist tie. So far I have only made the tunic.
I love this top! It is lightweight and comfortable to wear. The size I made, according to my measurements, fits well. Although I think the next time I will scoop out a little more depth for the arm syce area. I prefer for my sleeveless tops to have a little more depth under the arm. I think it is because I have bigger shoulders so I usually need a little more room in this area. Another great thing about this top is it matched my chevron skirt that I also made recently.
The top has a gathered shoulder area and a gathered front that has elastic in the center. The back of the top has a large pleat. See photos below for front and back views:
navy summer tunic top – matches with my chevron skirt I made both items sewn by Kimberlees Kornerback view of navy summer tunic made by Kimberlees Korner
This pattern has quite a few pattern pieces but is fairly easy to sew. I would recommend it to anyone with intermediate sewing skills. Sewing the front elastic casing area was a little involved and requires some patience. Also, for the armhole facing I did not use the recommended bias tape – I just made my own from 1.5 inch bias strips.
I made this particular top out of a lightweight broadcloth. I am planning to make another one this summer. I have not decided what color yet – maybe white so it will go with everything.
Currently I am working on a denim upcycle bag made from old jeans. I am hoping to finish it soon so I can post it on my blog in the next week.
Thanks for stopping by my blog. To receive updates you can subscribe via RSS feed or through bloglovin by clicking on either icon in the sidebar. Have a great day!
This week’s bundle takes you back to the basics with 5 cooking resources to help you meal plan, create your own recipes, make homemade condiments and reduce waste. With a little planning, you can save time and money in your kitchen, and this week only get all 5 ebooks for just $7.40, or 85% off their list price!
How To Cook For Yourself by Rachael Roehmholdt
How To Cook For Yourself: A Complete Beginner’s Guide is your guide to meal planning, grocery store strategizing, and learning the ins and outs of cooking basics and techniques. Rachel takes you through the entire process of selecting meals, grocery shopping, and getting a great meal on the table in no time. Learn how to cook for yourself in a way that is simple and can easily integrate with your life, right now!
Cooking Techniques with Olive Oil by Mary Platis and Laura Bashar Cooking Techniques with Olive Oil is a fabulous resource for cooks of all experience, from the novice to the professional. With detailed descriptions, a variety of recipes for vegetarians and meat eaters alike, and plenty of beautiful and vivid photographs, Mary and Laura show you how to poach, braise, marinate, infuse, and even bake with olive oil!
Restocking the Pantry by Kresha Faber
Making your own condiments isn’t difficult! Restocking the Pantry is packed with nearly 75 pages of recipes and tips, and Kresha shows you exactly how easy it is – not to mention frugal and healthy – to make your own favorites at home, including ketchup, mustard, mayonnaise, Worcestershire sauce, jellied cranberry sauce, hot sauce and more, for a total of 55 recipes!
Design a Dish by Millie Copper
In Design a Dish, Millie shows you how to use formulas rather than recipes to design dishes with the ingredients that are available so that you can reduce food waste and save money! Once you start using formulas for your meals you will discover just how easy it is to nourish your family for less!
From Garbage to Gourmet by Carrie Isaac
From Garbage to Gourmet features more than 80 recipes and creative ideas for using things like broccoli stalks, potato peels, carrot ends, herb stems, corn cobs, and more, plus hundreds of strategies to help you prevent food waste and create delicious food out of things you normally throw away. Carrie has taken the strategies she’s learned in her quest to reduce waste and stretch her budget and packaged them in a beautiful ebook that will make you forget you’re reading about food waste!
The Cooking Basics bundle is only available through 8am EST on Monday, 7/22. Get yours today!
Are you a writer? Do you want to be a writer? If so, this bundle is for you! With five incredible resources from well known and successful authors, this collection is packed full of inspiration, practical tips and strategies to help you take your writing to the next level and earn an income from your craft.
Get this bundle for 70% off this week only!
You Are a Writer by Jeff Goins
You Are a Writer {So Start Acting Like One} is an ebook about the process of becoming who you already are. It’s a guide for those called to a life of words, a book about passion and calling, striving and sacrifice. Mostly, it’s about writing: the glorious and grisly process of putting your butt in the chair and creating something worth remembering. This ebook will challenge you, call you out, and launch you into the life you should be living — a life of writing.
Self-Publish: Moving from Idea to Product by Erin Ulrich and Teri Lynne Underwood
Self-Publish is an ebook for writers intrigued and/or intimidated by the world of self-publishing, writers who value quality and are prepared to devote time to creating an excellent product. With detailed information about each component of a great self-published work, Erin and Teri Lynne guide you from idea to product to help you ask yourself the right questions about four key elements of a successful book — content, design, audience, and marketing — with 20 worksheets to help you plan and prepare to write and release your book.
31 Days to Become a Better Writer by Kristina J. Tanner
Written for every writer who longs to hone their craft but is pressed for time, 31 Days to Become a Better Writer covers 31 different aspects of your craft with a daily exercise to reinforce that day’s topic. This book is beneficial for individual writers by themselves, but can be used effectively in a group setting as well!
How to Market and Sell Your eBook by Sarah Mae
Why should print books have all the fun? You can earn a full-time income with e-publishing, and you don’t have to be a superstar to do it. Based on her own experience (she’s sold over 40,000 in eBooks) and by studying the experiences of other’s, Sarah Mae shares the lessons she’s learned about communicating your passion to others in a new way and then getting those ideas to the world, one practical and thrilling step at a time in How to Market and Sell Your eBook.
On Becoming a Writer by Denise J. Hughes
The world of blogging has revitalized people’s interest in the craft of writing. They want to improve their craft too. In On Becoming a Writer: What Every Blogger Needs to Know, Denise answers thirty-four of the most important questions about writing that bloggers need to ask. What’s the difference between writing advice and editing advice? What if I hated English class? How do I tell my story? With the answers to these questions and more, this e-book will help you become a writer who has something to say and says it.
Ebook Bundle #28 ends this Sunday July 14, 2013. Order yours today by clicking on the above buy now link – you pay through paypal – quick, easy and reliable check out.
First off, let me start this post by saying I am not a health or fitness expert. I am a mom of 3 boys, ages 15 and two 12 year olds, who has developed a plan for maintaining good health and working out regularly. I do this on my own, mostly, by reading books and magazines and using various fitness dvd’s to work out. I have never belonged to a gym or been on any type of diet plan.
The following is my guide to being proactive with health and fitness:
Exercise – 4 to 6 times per week for at least 20 to 45 minutes each workout.
plan your workouts in advance, for the week – see this workout schedule table by kimberlees korner – it is what I use – it is a blank table that you can fill in your schedule for the week
Do your workout at a convenient time – like before your kids get up – get up 30 to 45 minutes earlier each day. It will be hard at first but you get used to it and then your workout is done for the day.
Rotate your workouts for variety. I like to do a variety of different types of exercise. I do cardio one week then yoga the next week then maybe strength training alternating the strength workouts with biking outside or swimming laps. Variety keeps you from getting bored and it keeps the metabolism going strong. There are tons of different dvd’s available – check your local library. That is how I started with yoga and pilates 10 years ago by checking out books and dvd’s from my local library and then I started buying them.
Meal Planning – a must for anyone who has a busy family or a busy life
Plan meals at the beginning of each week so you will know what you need to buy to cook and you won’t have a last minute excuse of not having the right ingredients to cook a meal and have to go out to eat.
Find healthy recipes via books, blogs, pinterest or from friends. There are lots of blogs that feature easy to prepare meals that are healthy.
Try to eat only fresh food and not pre-packaged food that is filled with things that you don’t want to be eating – I know sometimes this is hard to do with a family and a busy schedule.
Keep a Food Journal
Keep track of what you eat throughout the day to see how many calories you consume – see what you need to adjust. Personally I don’t keep a journal but I think it is helpful if you are just starting a fitness and health plan to do this for a while.
Keep Healthy Snacks on Hand
Get rid of all junk foods items and pre-packaged snacks that may tempt you
Keep lots of fresh fruits and vegetable around for snacks
Look on pinterest or the internet for tips and ideas of healthy snack items
Do not drink any soda
Don’t Deprive Yourself of Things You Like
Have dessert 2 or 3 times a week – a reasonable portion! Personally I eat ice cream with my kids at least 2 or 3 nights per week for dessert after dinner – but only 1 or 1 1/2 scoops, not 3 or 4.
Don’t Eat Late at Night – I try to never eat anything past 7:30 pm at night.
Don’t Skip Breakfast or Any Other Meals
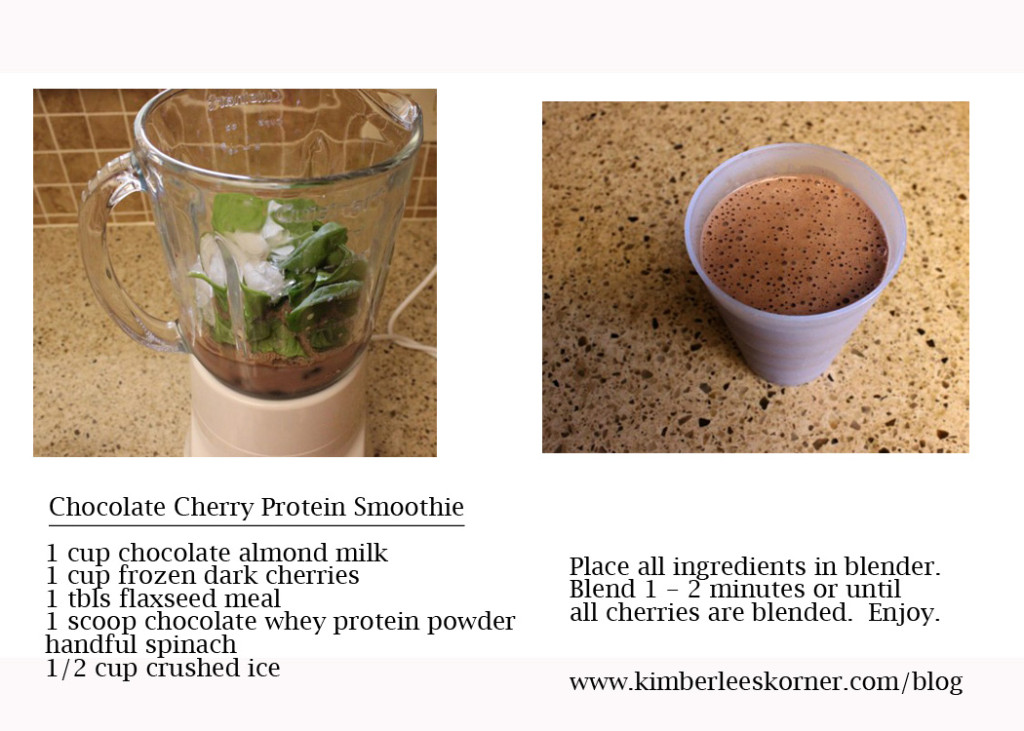
Drink a Protein Shake Every Morning for Breakfast
This is a great way to start your day right with some fruit and protein and some added fiber to keep you full. Personally I think this gives me a lot more energy each morning than eating a big breakfast.
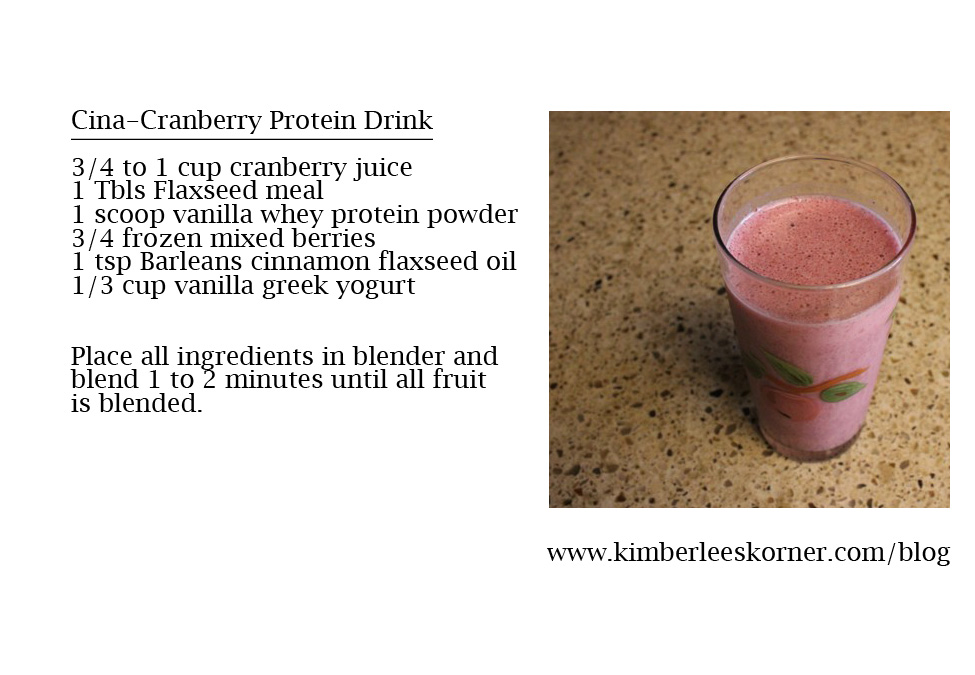
Here are 2 of the shakes-drinks I have been making lately and really enjoy. Both recipes make a pretty large shake so I often save some to drink a couple hours later for a mid morning snack.
Chocolate Cherry Protein Smoothie from Kimberlees Korner blogcina-cranberry protein drink from kimberlees korner blog
Drink Plenty of Water Throughout the Day
Add lemon slices to water for a little flavor and cleansing of your insides
Add a splash of cranberry juice or make cranberry ice cubes from the juice to detoxify the liver
Take a Quality Multi Vitamin Every Day
The above information are the things I do daily to take care of myself and be fit and healthy. I began my fitness and health journey over 10 years ago when my twin boys were about 2 years old. It really helped me with my energy and keeping up with 3 children when I started incorporating healthy habits with regular workouts.
Discipline is the key in making a fitness plan work. I discipline myself each week to write down my workout schedule and hold myself accountable to it each week. Most research and experts agree it takes 21 days to form a new habit but you have to get started and stick with it. Eventually it will just be part of who you are and part of your daily routine. My daily workout is one of the best parts of my day.
Thanks for visiting my blog. To receive future updates you can subscribe via RSS feed or through bloglovin by clicking on either icon in the sidebar. Have a great day!
Here are the rules for this party:
1. Please follow your hosts @ number 1 & 2. Please also follow your co-hosts at number 3 – 7 {and any others that you like!}
2. Please leave a comment on their blog letting them know that you are a new follower and found them on the Share the Love Blog Hop.
3. Link up your blog’s home page {not an individual post}.
4. Copy and paste the code at the bottom into a new post on your blog {optional}.
5. Have fun!!