Tag: craft project

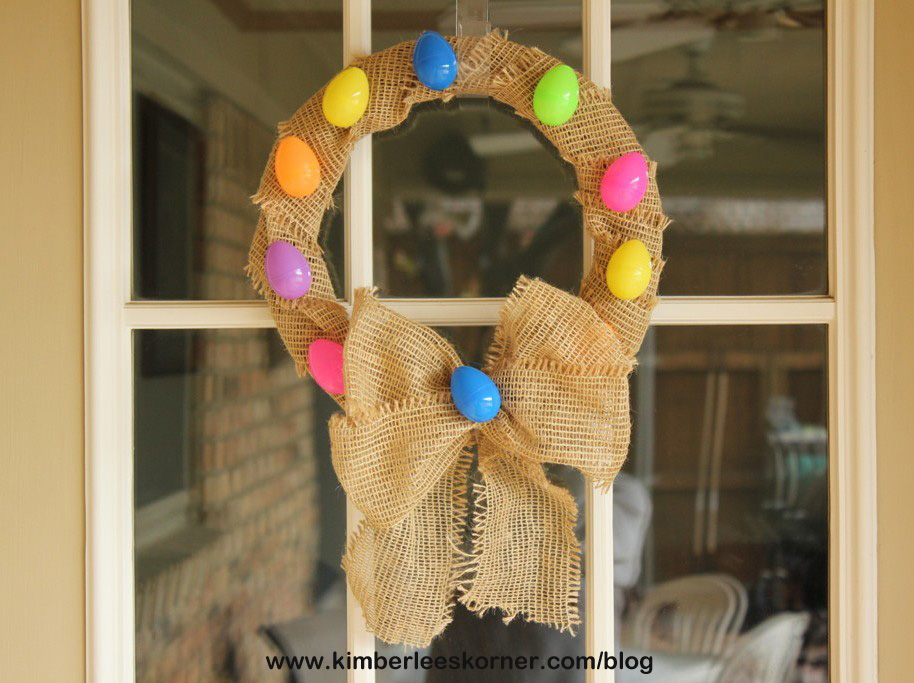
Simple Burlap Easter Wreath

6 Comments

This wreath idea was something I came up with after seeing all the fun and pretty spring and Easter wreaths on pinterest.  I have actually had this 4 inch roll of burlap ribbon that I got at Hobby Lobby a couple of months ago and it was time to use it for something.

Burlap Easter Wreath  Kimberlees Korner

This wreath is super simple and easy to make.  I think you can easily make one in 45 minutes or less.  Here is what you need to make one:
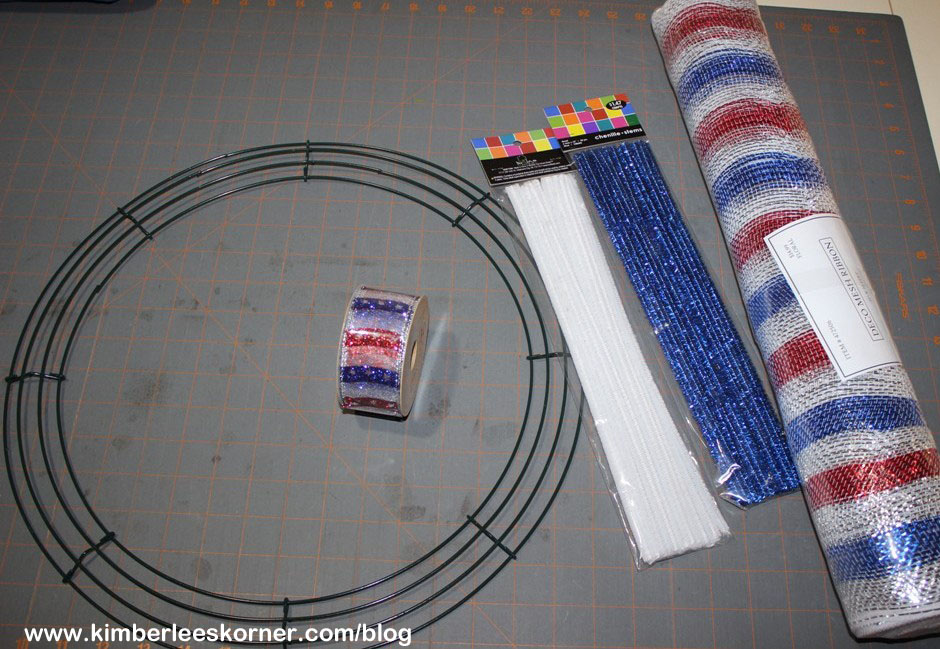
Supplies:

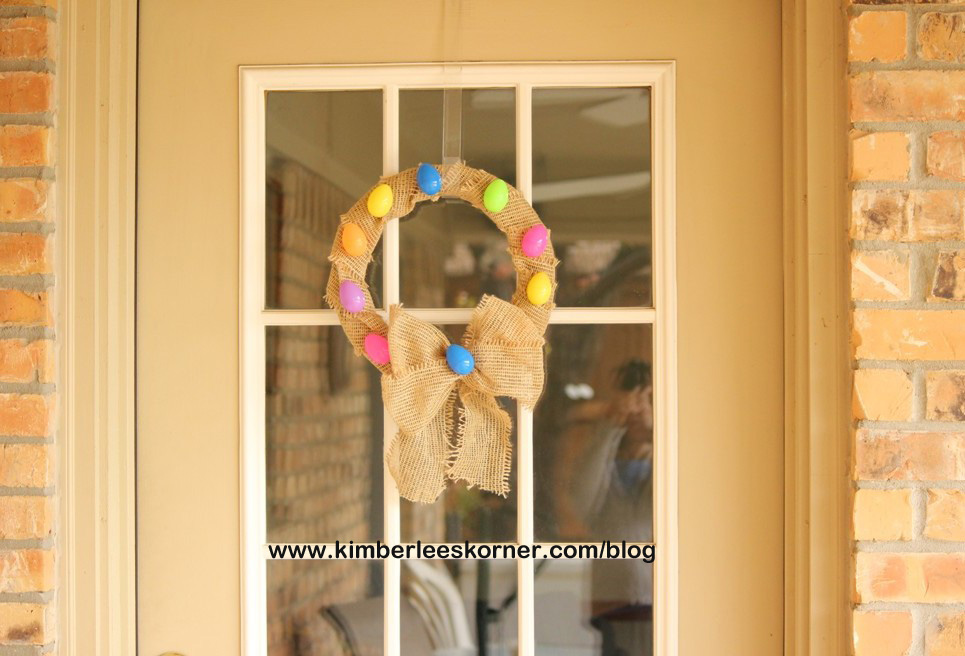
  • 1 wired frame wreath whatever size you choose – mine was smaller as I wanted it for the back door that we go in and out of a lot
  • 1 roll 4 inch wide burlap ribbon
  • 1 package small plastic easter eggs
  • 1 chenille stem to fasten bow
  • glue gun

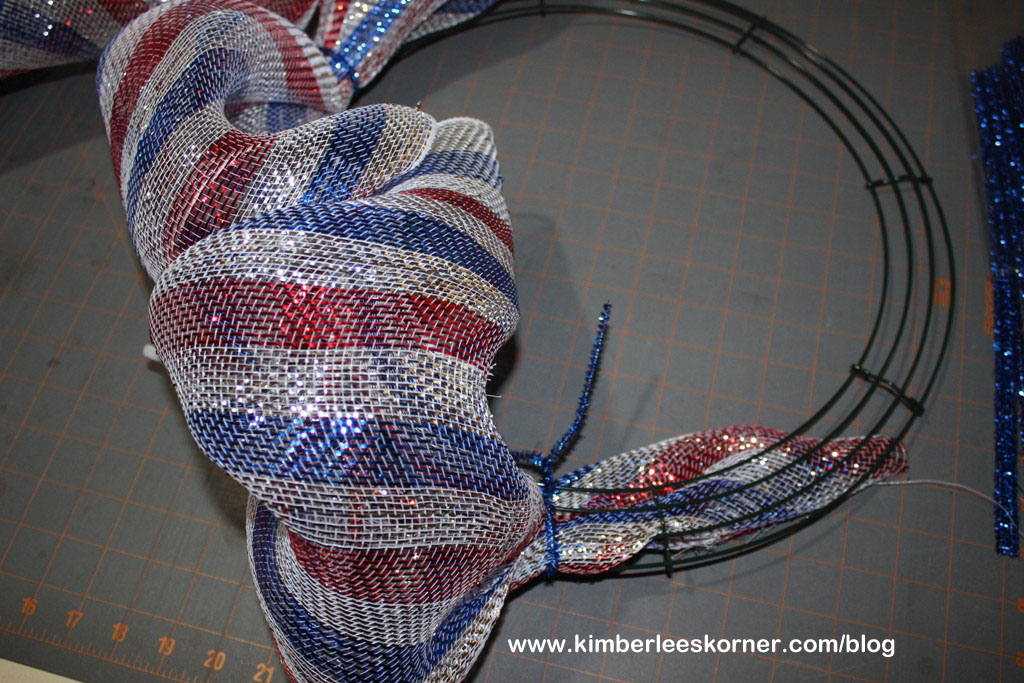
Step 1:  Wrap burlap around wire wreath, overlapping edges as you go – glue at back when get to where you began to secure

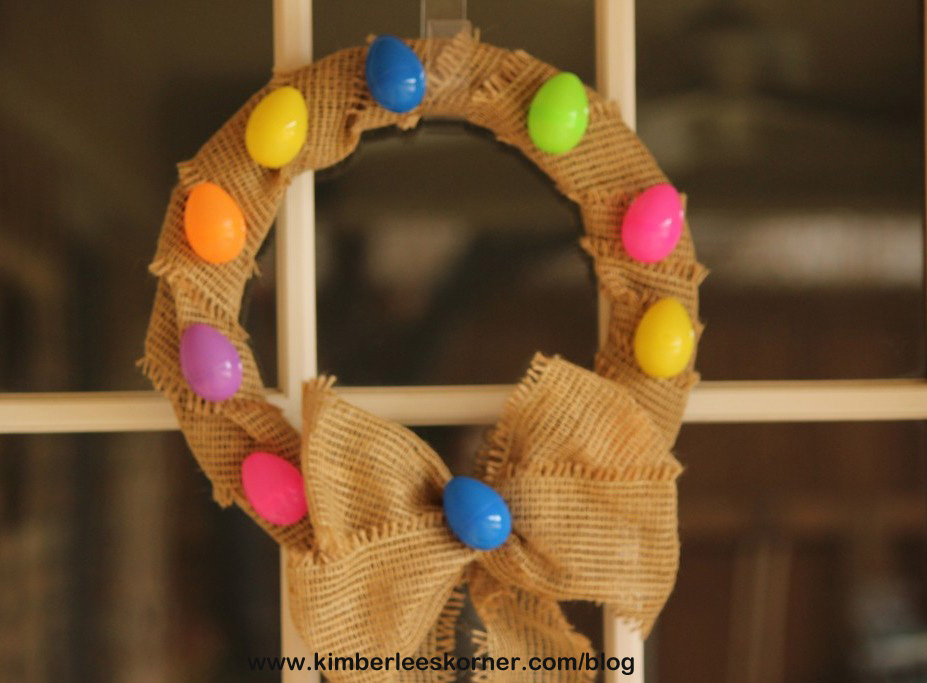
Step 2:  Glue plastic eggs onto burlap in desired areas – leaving an open area where the burlap overlaps for your bow

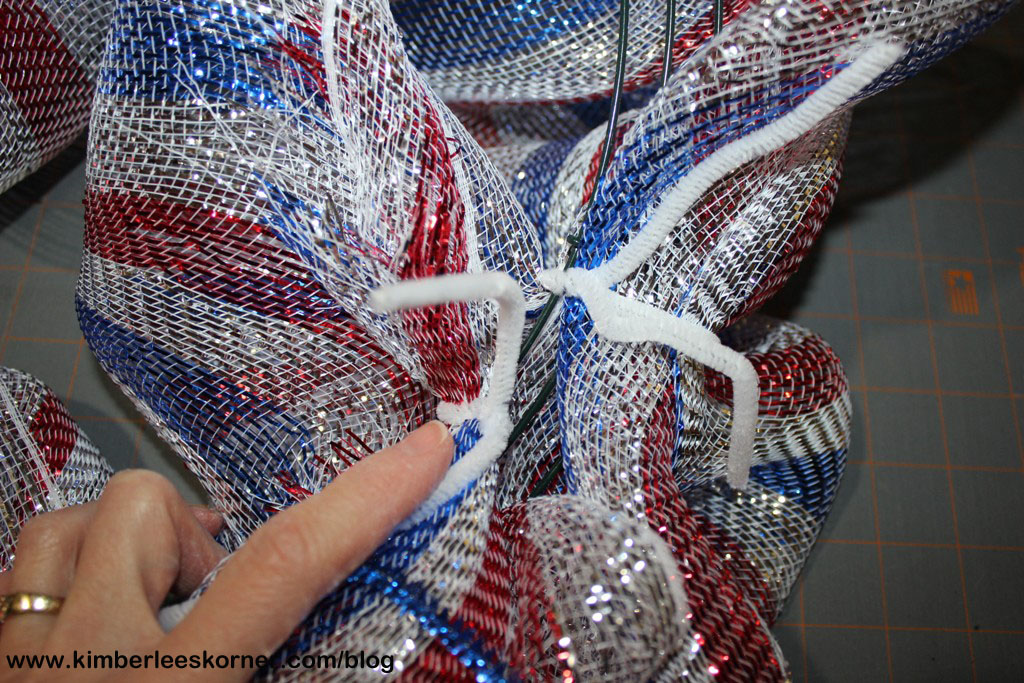
Step 3:  Make a bow with the burlap ribbon and secure to wreath with chenille stem – do this where burlap is glued to cover

Step 4:  Glue a plastic egg in middle of bow to hide chenille stem- you could glue more than one if you wanted to

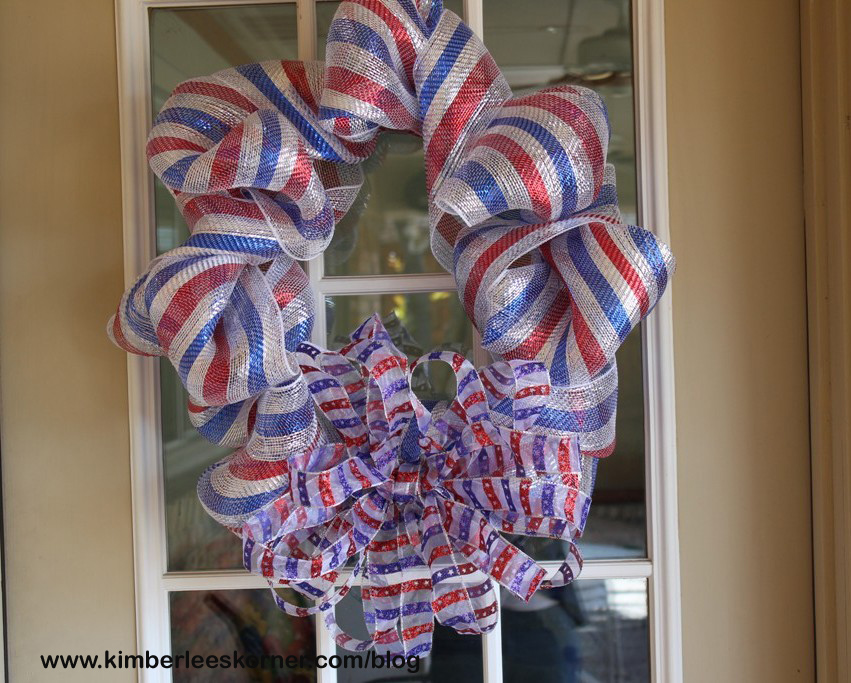
That’s it – you are done – find a place to hang your new wreath and admire it!

Note:  For hanging purposes you may not want an egg in the top center – mine is hanging a little off center because I glued one there – but it doesn’t bother me.

Burlap Easter Wreath  Kimberlees Korner

Below you can see a better view on the door of the size and how small it is.  I didn’t want a really big wreath because we go in and out this door to our patio a lot.  Also, for the purpose of storing the wreath I think this will fit in my Easter storage box that goes in the attic.

back door Easter egg wreath made with burlap  Kimberlees Korner

I hope everyone is having a great start to the second week in April.

Kimberlee

Deco Mesh Olympic Wreath

4 Comments

As I mentioned the other day in my post, Crochet and Knitting Olympic Style, I have been on an Olympic craft spree lately.  This past weekend I created this really fun wreath from a wire wreath frame and deco mesh that I bought at Hobby Lobby.  This is the easiest project and can be made in less than an hour.

To make a wreath like this you will need:

  • 16 inch wire wreath frame
  • 1 roll 21 inch wide deco mesh
  • 1roll 5 1/2 inch wide deco mesh
  • 1 roll wire edge ribbon
  • pipe cleaners to match your deco mesh
  • scissorsSupplies needed to make deco mesh wreath  Kimberlees Korner
  1. Wrap 21 inch deco mesh around frame using pipe cleaners to secure every 5 or 6 inches leaving the mesh kind of full to hide the pipe cleaners.  When you make it all the way around to the place where you started overlap the beginning a little and secure to the back the end – you will have to cut the deco meshMaking Deco Mesh Wreath  Kimberlees KornerPipe Cleaners to secure Deco Mesh to wreath frame   Kimberlees Korner
  2. Use the 5 1/2 inch wide deco mesh in between the previous wider layers – this layer I just secured at the beginning and end with pipe cleanrersWrap another layer around with 5 1/2 inch deco mesh
  3. Make a bow with your wire edge ribbon – (I am not the greatest bow maker so I am not going to tell you how to make your bow).  Secure bow to wreath using a pipe cleaner or some type of floral wireDeco Mesh Olympic Wreath  Kimberlees Korner

That’s it – All Done!  Super EASY!  I really like how it turned out and I have had it up all week to show my Olympic spirit.  I will also be able to use it for other holidays like Memorial Day and 4th of July.    I have quite a bit of the deco mesh left so I figure I can use it to make another wreath or decorate my patio out back for the holidays I just mentioned.

I am thinking this deco mesh would also make a fun St. Patricks Day wreath.

I hope you enjoyed this short tutorial on how to make this fun wreath.  Please follow me via bloglovin, email or RSS to receive future updates on other craft and sewing projects.  The icons are in the sidebar.

Have a great day!Deco Mesh Olympic Wreath  Kimberlees Korner

Kimberlee

Linking to:
The Olympics, Oh Link Picks Linky Party and Medal Ceremony with Learn Like A Mom, P is for Preschooler, This Ole Mom, and Mice in the Kitchen

Cork Tile and Denim Project

3 Comments

I got the idea for making this project from pinterest.  Here is my pin for the project.  The project is just an image and does not link to any site or instructions.  I thought this was a really cute idea and a great way to organize some things so I made two of them.  I am using one on a wall behind my desk and the other on the wall behind my sewing machine.

denim pocket and clothespin wall organizer project by kimberlee from kimberleeskorner.com/blog

The photo above was the first one I made.  That is the one I am using on the wall behind my desk to hold notes and the pocket holds important info like bills to pay, etc.  I was able to clear a basket off my small desk that was holding some of these things and now I have a lot more usable desk space.

This project is so quick and easy to make.  You will need:

  • cork tiles – 12 x 12 (I got mine at Hobby Lobby)
  • old jeans – cut out the pocket
  • clothes pins
  • glue gun
  • washi tape (optional – for clothes pins)

Basically you just figure out where you want your pocket and clothes pins to go and glue them down with a glue gun.  You can put the washi tape on the clothes pins after you are done if you want to add some color to them.  I guess you could also write on them with permanent marker if you wanted to label them.  I chose to hang the first one I made so I cut a strip of denim and glued it to the back of the cork board.  I used a small cup hook on the wall to hang it with.

cork tile and denim pocket project 2 by kimberlee from www.kimberleeskorner.com/blog

The one above here is the second one that I made and I am using that on the wall behind my sewing machine.  This one is very basic.  I think the clothes pin clips will be nice for holding pattern instructions or photos of ideas I have to inspire me.  The pocket can hold smaller items like a seam ripper, seam gauge or pencils and pens.  This one I chose to use the sticky back squares the cork tiles came with and put it on the wall.

Below are the photos of my projects hanging on the wall in my sewing – office room.  The photos are not great due to the fact that this room needs better lighting – something I am going to be working on changing soon – and also both areas where the cork tiles hang I have a shelf above that area so it gives a shadow.  It gives you the basic idea of how I am using them though.

corkboard denim pocket project hanging on the wall  www.kimberleeskorner.com/blog
corkboard denim pocket project hanging on the wall
www.kimberleeskorner.com/blog
corkboard denim project - second one made for sewing area  www.kimberleeskorner.com/blog
corkboard denim project – second one made for sewing area www.kimberleeskorner.com/blog


If you would like to receive future updates please subscribe via RSS feed, with bloglovin or through email by clicking any of those icons in the sidebar.  I hope everyone is having a great day!