Patriotic Projects
In this previous month I worked on a few patriotic projects and wanted to share them on my blog. I love the colors red, white and blue and usually have them decorating my home for the months of May through August. The colors just seem to fit my summer mood and go with the holidays of Memorial Day, 4th of July and Labor Day.
The first project was a star garland that I made. It was super quick and easy. I was at Pier 1 back before Memorial Day and found these cool grapevine looking colored stars. I used some of my red, white and blue yarn and strung them to make a mantel garland.

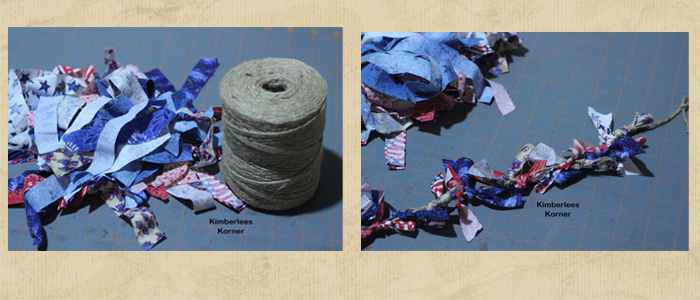
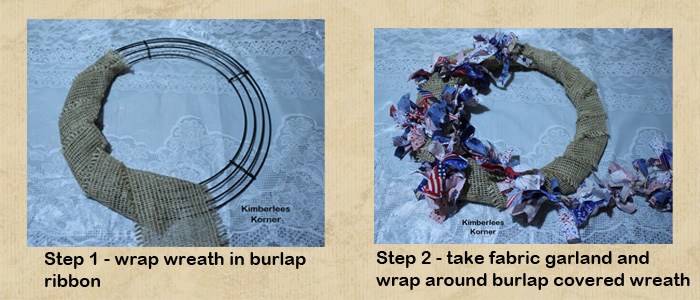
The next project I made was a wreath for my front door. I was at Michaels back in May and saw this tied fabric garland and decided I could make my own and use up some of my fabric scraps. I then used the fabric garland on a wire wreath that I first covered in burlap ribbon. I had a few of those stars leftover from my garland project and took some jute twine and tied them to the wreath.
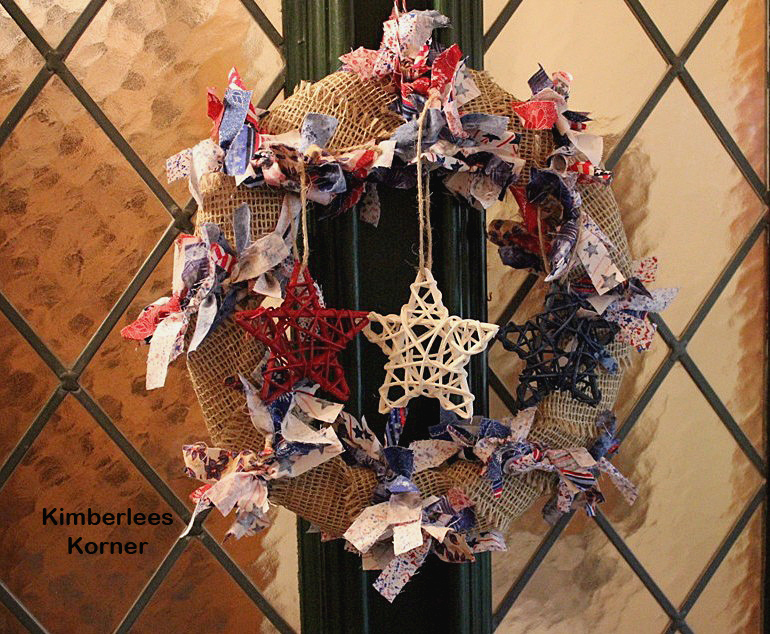
Below are the photos of the steps to make the wreath. I used a glue gun to secure the burlap after wrapping it onto the wire wreath and I also put a little glue on the fabric garland after wrapping it around. To make the fabric garland I used jute twine and just cut 4 to 5 inch pieces of fabric about a half inch wide and tied it to the jute. It was a great way to use up some leftover fabric in my stash.
The last project I made were fabric coasters made from 1 1/2 inch wide strips of fabric. This is another great way to use up some of your stash. To make these coasters you will need:
- a sewing machine
- 1/4 inch presser foot
- thread to match project
- 1 1/2 inch strips of fabric
- 2 1/2 inch strips of fabric for binding edges
- 6 inch squares of fabric for backing
- 6 inch squares of warm and natural cotton batting
- rotary cutter
- quilters ruler
The first step is to lay your 6 inch square batting on top of the wrong side of the 6 inch square of fabric. 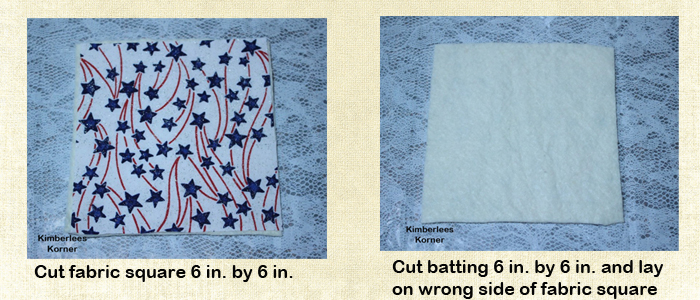
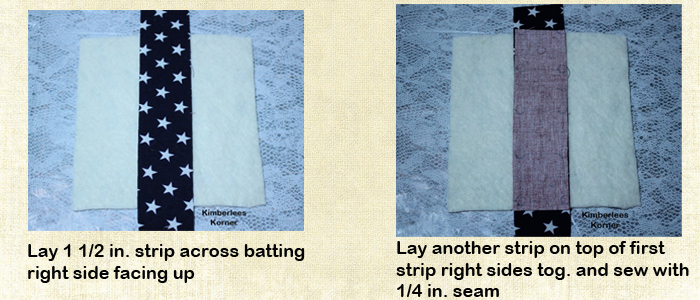
Then you will lay your first strip of fabric wrong side on batting and right side up – then place your 2nd strip on top of that strip right sides together and sew using a 1/4 inch seam – it is helpful to have a 1/4 inch foot for this step.
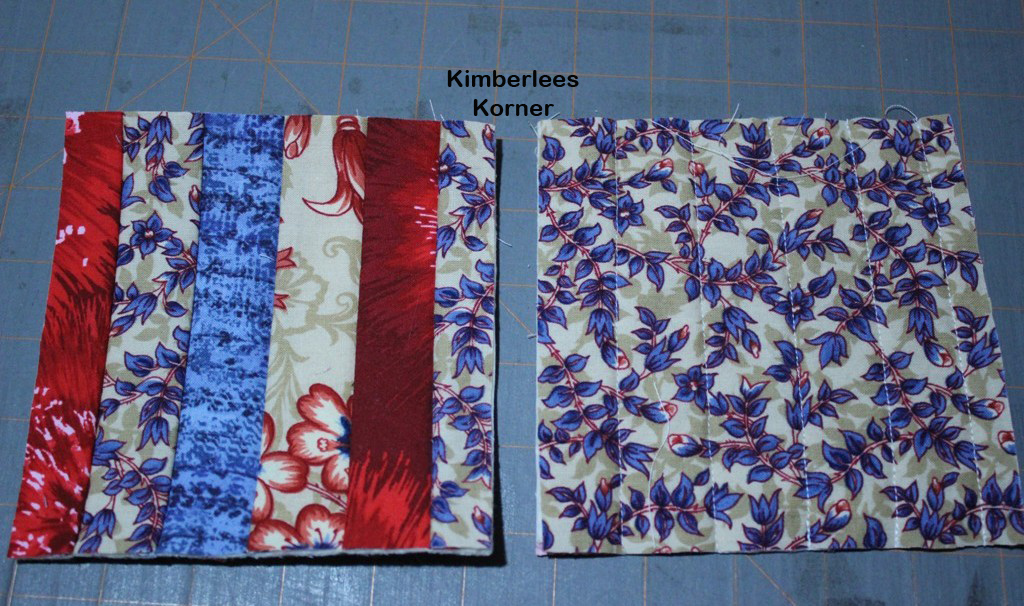
After sewing the strips together onto the batting and fabric backing you will press them and continue to sew strips in this manner covering both sides of batting. After a final pressing use a ruler and rotary cutter to square off all your edges. You will have a piece that looks like the photo below – front and back views. This called quilt as you go strip piecing.
The final step is to attach the binding. For this I used a 2 1/2 inch wide strip pressed in half and sewed it to the wrong side of the coaster with the raw edges even. Since there were no curves in this coaster I did not use a bias edge binding, just a straight strip. You can probably google how to make and attach quilt binding for a better explanation of how to do this.
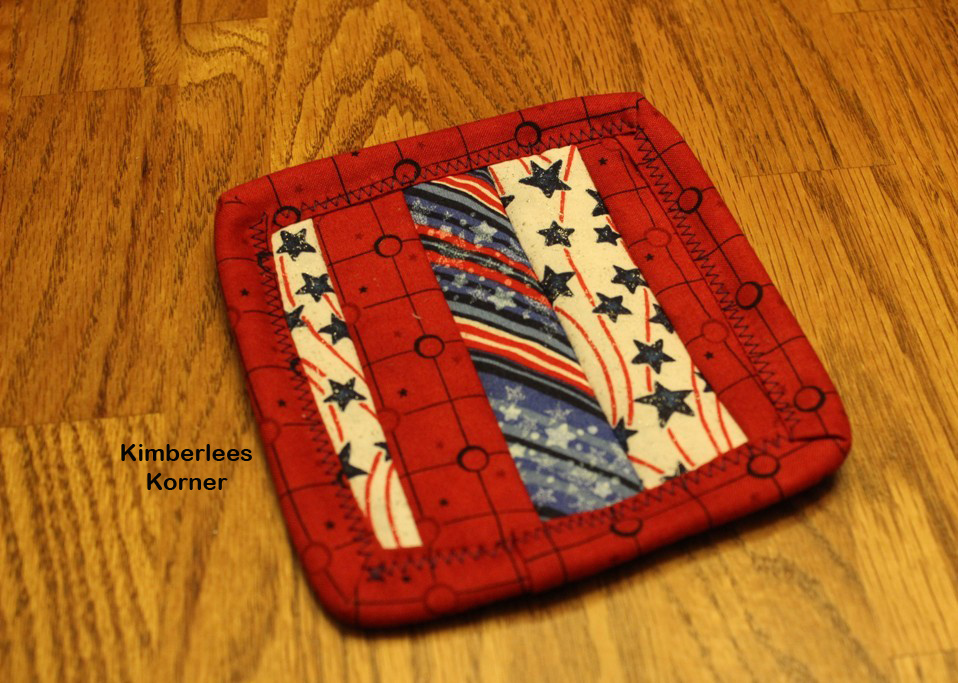
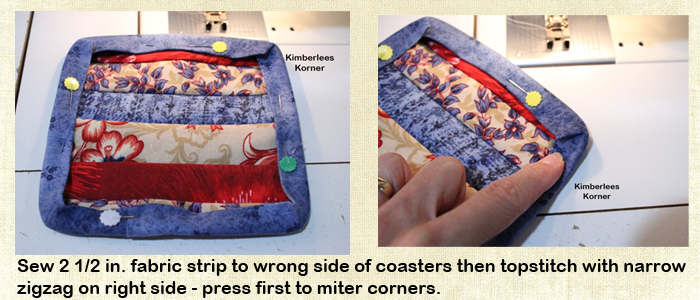 After sewing the binding to the wrong side you press it over the raw edge to the right side of your coaster. You may want to clip the corners a little. I like to pin it in place before sewing. Also, you will need to miter the corners by folding them in and pressing them in place. I then sewed around the folded edge of the binding using a narrow zigzag stitch. Photos below are of the finished coaster.
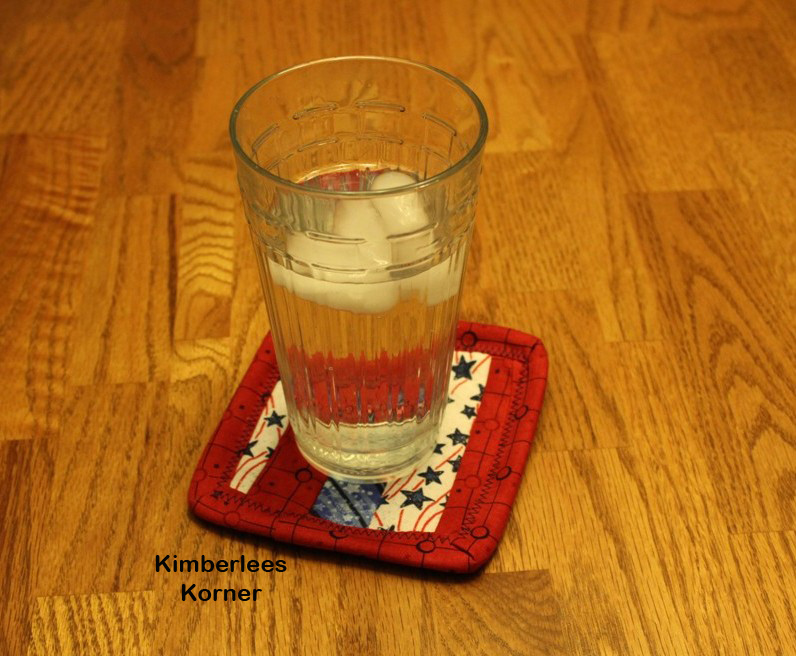
I like to use these coasters outside on my patio and in my kitchen and living room. They are super simple and quick to make if you have all of the supplies on hand – they make a good housewarming gift, too. You can also use this same process to make a matching potholder by using a larger square of batting and backing fabric – like 8 or 9 inches. For potholders you may want to use the thermal fleece type of batting so they are more heat resistant and even use 2 layers. I have also used 2 layers in the coasters if you want them to be thicker. If you decide to use 2 layers you may want to use a walking foot to sew the strips down so they don’t shift.
I hope you enjoyed reading about my projects and get inspired to make something patriotic for the summer season. If you have any projects you have currently made I would love to hear about them – click on Leave A Reply and tell me about them.
Have a great day!
Kimberlee