Category: Holiday Projects

Sewing A Quilt As You Go Table Runner

4 Comments

Sewing a quilt as you go table runner is a very easy project that can be made in just a few hours.  I recently made this little table runner to go on our new-used dining room table that we bought a couple of weeks ago at B & B Consignment Store in Plano, TX.   quilt as you go Valentines Day table runner
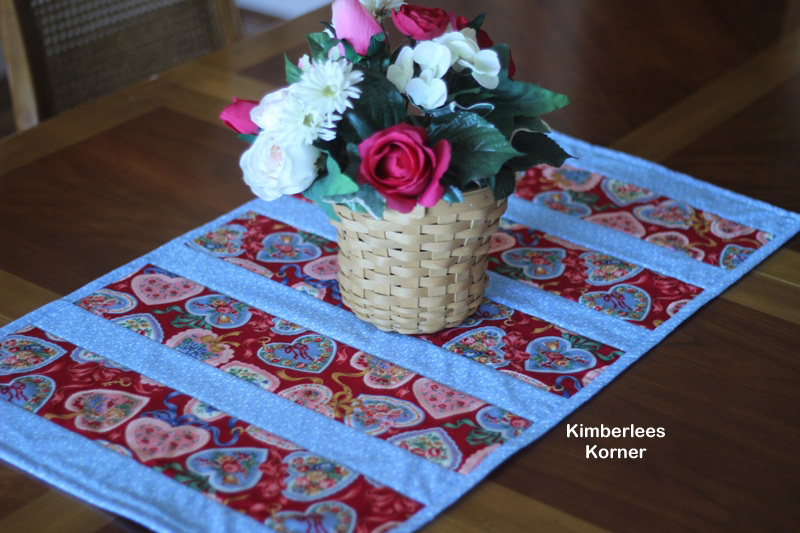
This project was made using fabrics from my stash that I have probably had for at least five years (or more).  At least I was able to use up some fabric, create something I like and I didn’t have to buy anything to make it since I had everything.  The piece of batting I used for the quilt was actually a scrap piece I had laying around.

My runner measures 32 inches long by 18 inches wide but you can really customize a project like this to be whatever size you want.  Basically you cut your base-backing fabric and your batting a little larger than your actual finished size and then you cut it once you are through sewing on the strips and before doing your binding.

To make this particular size you need about a yard of one cotton fabric and half a yard of a coordinating print for the contrasting strips and the binding.  Basically what I did was cut the heart fabric I had 4 1/2 inches wide because I wanted the print, which was kind of large, to show up and then I cut the contrasting fabric 2 1/2 inches wide for the strips as well as the binding.

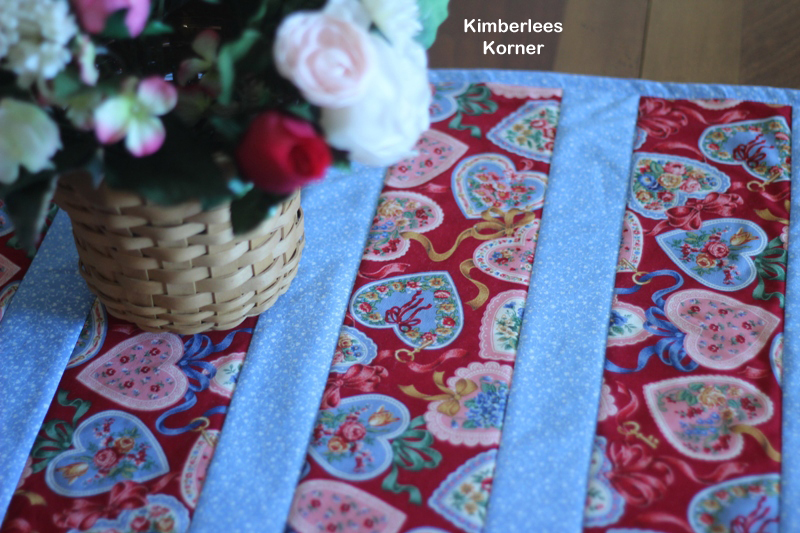
close up of fabric strips on quilt as you go table runner

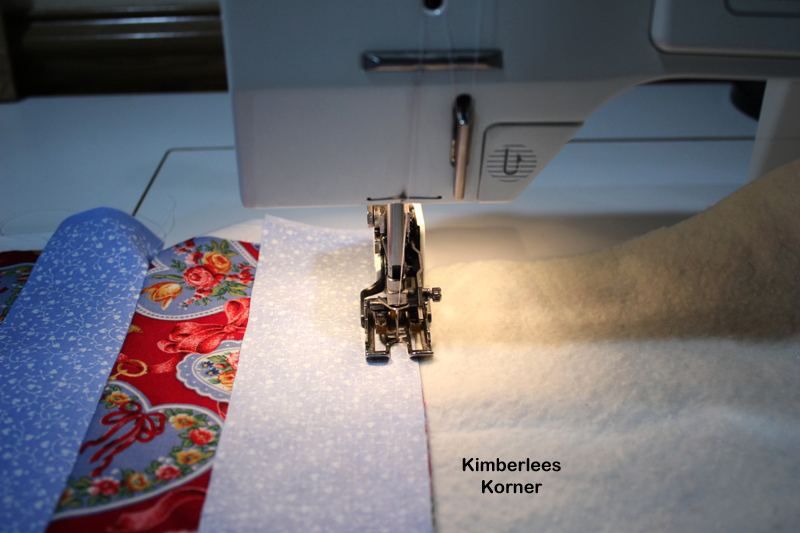
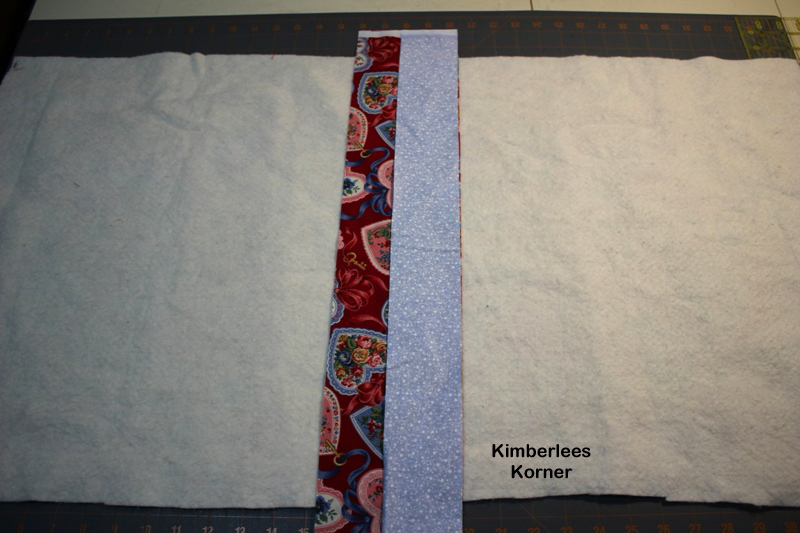
You then begin by laying your fabric backing piece down with the wrong side facing up then lay the batting on top of that.  Then find your center point and center one of the 4 1/2 inch strips there and lay a 2 1/2 inch strip on top of that and sew it with a 1/4 inch seam – I use a walking foot which I recommend so the pieces do not shift.

laying strips on batting for quilt as you go method


sewing strips with a walking foot to batting and backing of quilt

I just continued to alternate my 4 1/2 inch and 2 1/2 inch strips until I got to the one end then I did the same to the other end – ending with a 2 1/2 inch strip on each end.   NOTE:  After you sew each strip you will need to press them open so the right sides are facing up before sewing the next strip.

Then when both ends are done you will trim the excess batting and backing.  It is best to do this with a rotary cutter and a quilt ruler.trimming the excess batting and backing from the quilt
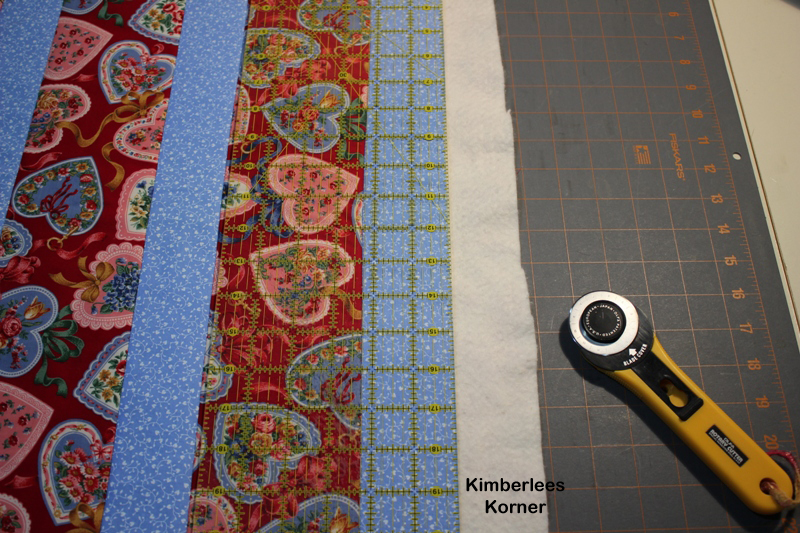
After this step you are ready to bind the quilt.  I used three 2 1/2 inch strips sewn together to make a very long strip – I then pressed it in half to be 1 1/4 inch with the wrong sides together.  I like to sew my binding on to the wrong side and then wrap it around, press it and sew it to the right side but everyone has a different method for this it seems.

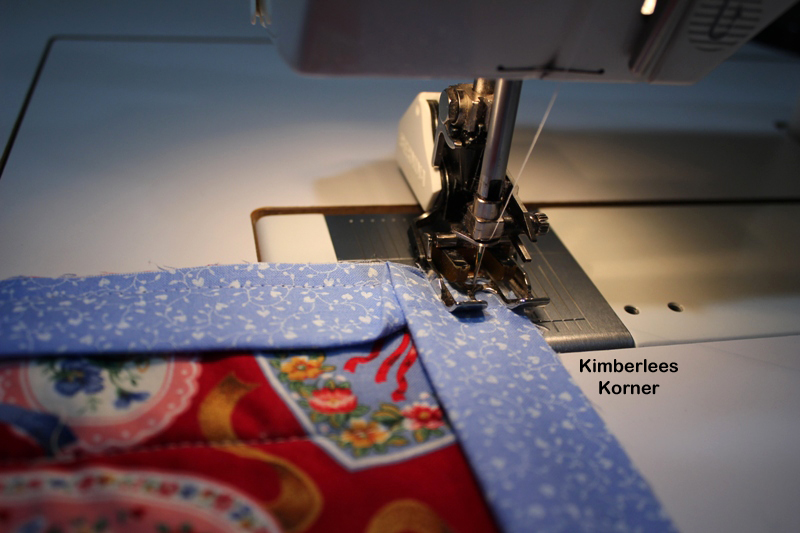
sewing binding onto quilt

Mitering the corners when sewing on the binding is always a challenge for me.  I have studied books on it and just try and do the best I can.  I figure this is for me so I don’t have to have it totally perfect.  Once the binding is sewn all the way around I then press it to the front side of the quilt, pin the corners and topstitch it down using my number 10 edge stitch foot and the needle in the far right position. You could also use a regular presser foot with possibly the inner toe of the foot as a guide.
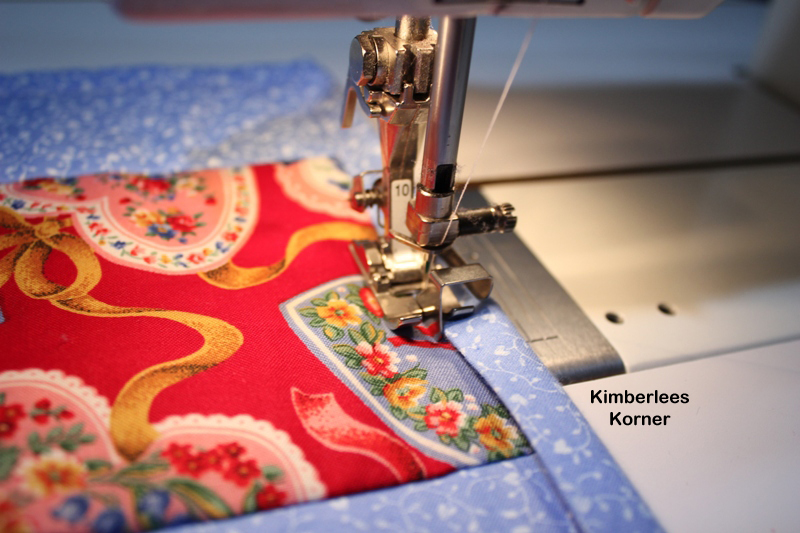
topstitching binding to quilted table runnerI then press the quilt one more time and it is done.
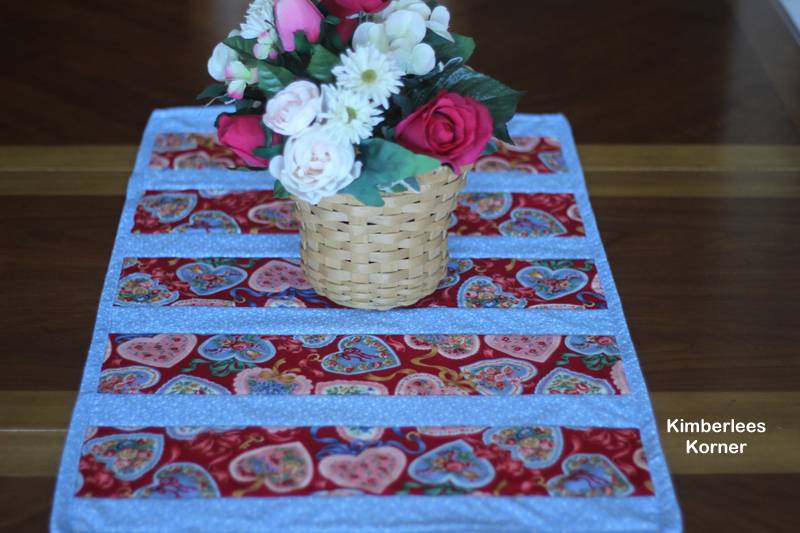
quilt as you go table runner from Kimberlees Korner This table runner is super easy to make and can be made with any type of fabric combination – not just Valentine’s Day like mine.  It is also a great stash buster project if you have some fabrics laying around, like I did, that you want to use up.  table runner and roses
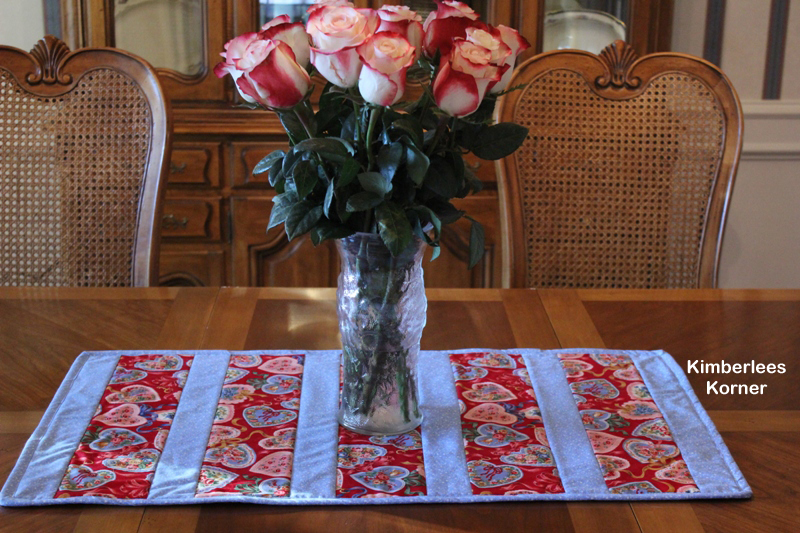
I will be offering the pdf pattern with step by step instructions and photos on how to sew this in my etsy shop and on craftsy in the near future.  I wanted to share it here first on my blog since I got it done a few days ago and today is Valentine’s Day.

Happy Valentines Day!

-Kimberlee

P.S.  I will also be doing a post in the next month on the new table we bought at the consignment store and how I recovered the chair seats so follow my blog to receive updates.
Patriotic Projects

In this previous month I worked on a few patriotic projects and wanted to share them on my blog.  I love the colors red, white and blue and usually have them decorating my home for the months of May through August.  The colors just seem to fit my summer mood and go with the holidays of Memorial Day, 4th of July and Labor Day.

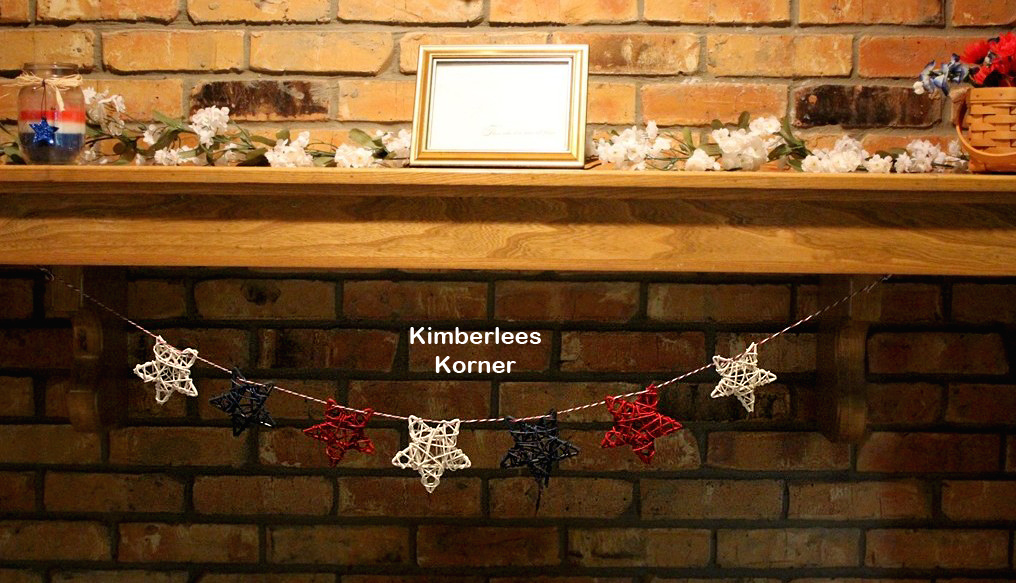
The first project was a star garland that I made.  It was super quick and easy.  I was at Pier 1 back before Memorial Day and found these cool grapevine looking colored stars.  I used some of my red, white and blue yarn and strung them to make a mantel garland.

Stars Garland

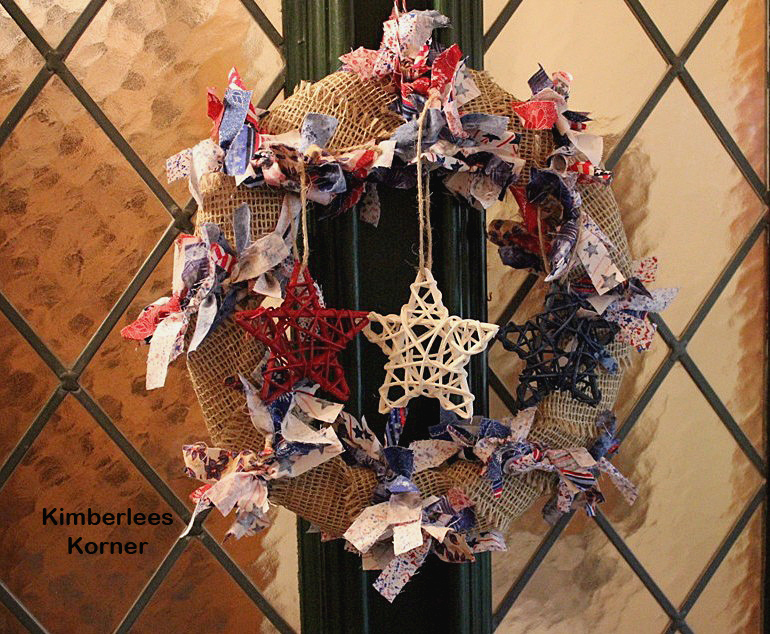
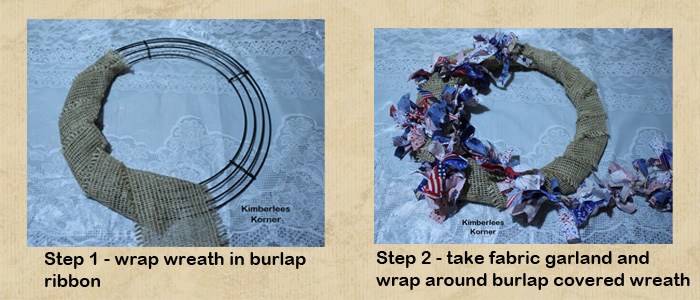
The next project I made was a wreath for my front door.  I was at Michaels back in May and saw this tied fabric garland and decided I could make my own and use up some of my fabric scraps.  I then used the fabric garland on a wire wreath that I first covered in burlap ribbon.  I had a few of those stars leftover from my garland project and took some jute twine and tied them to the wreath.

Patriotic Wreath

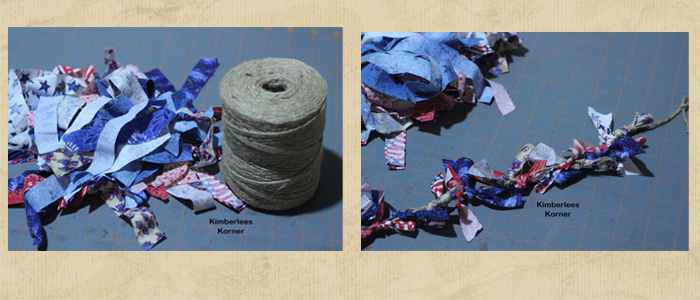
Below are the photos of the steps to make the wreath.  I used a glue gun to secure the burlap after wrapping it onto the wire wreath and I also put a little glue on the fabric garland after wrapping it around.  To make the fabric garland I used jute twine and just cut 4 to 5 inch pieces of fabric about a half inch wide and tied it to the jute.  It was a great way to use up some leftover fabric in my stash.

Twine Fabric Scrap Garland

Step to make RWB wreath

The last project I made were fabric coasters made from 1 1/2 inch wide strips of fabric.  This is another great way to use up some of your stash.  To make these coasters you will need:

  • a sewing machine
  • 1/4 inch presser foot
  • thread to match project
  • 1 1/2 inch strips of fabric
  • 2 1/2 inch strips of fabric for binding edges
  • 6 inch squares of fabric for backing
  • 6 inch squares of warm and natural cotton batting
  • rotary cutter
  • quilters ruler

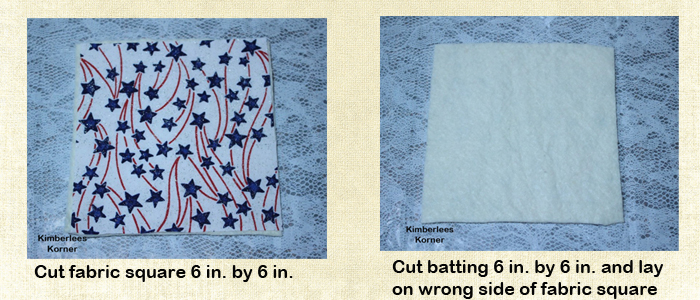
The first step is to lay your  6 inch square batting on top of the wrong side of the 6 inch square of fabric. coasters step 1

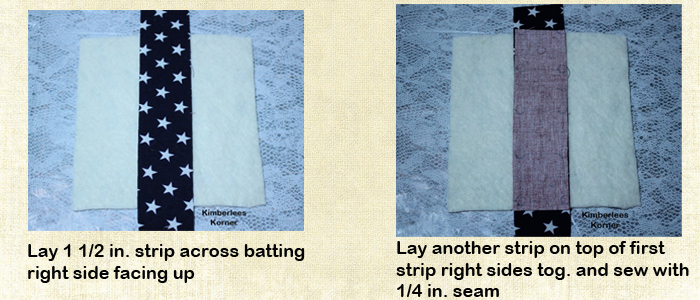
Then you will lay your first strip of fabric wrong side on batting and right side up – then place your 2nd strip on top of that strip right sides together and sew using a 1/4 inch seam – it is helpful to have a 1/4 inch foot for this step.

coasters step 2

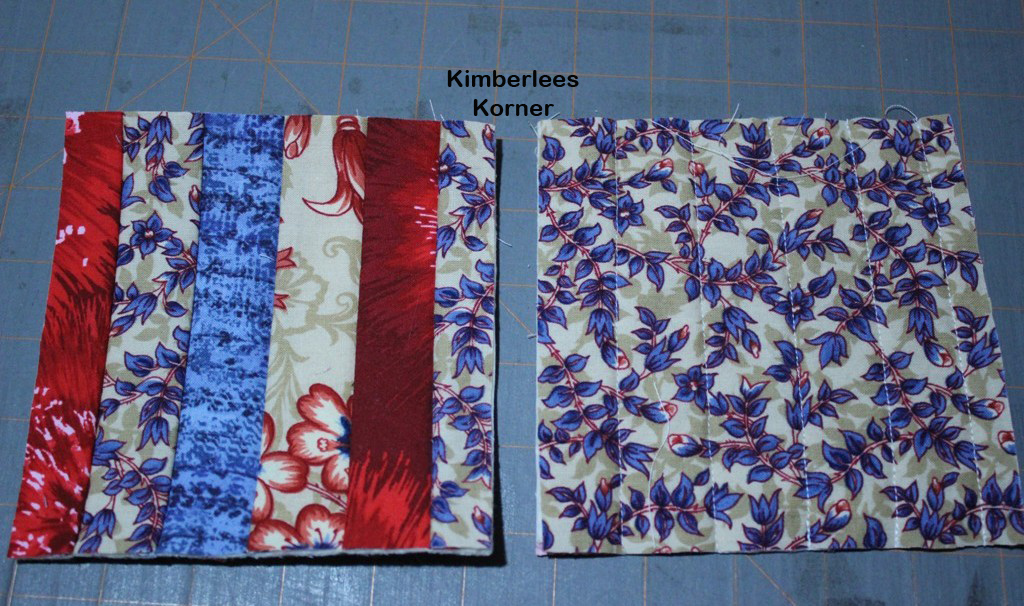
After sewing the strips together onto the batting and fabric backing you will press them and continue to sew strips in this manner covering both sides of batting.  After a final pressing use a ruler and rotary cutter to square off all your edges.  You will have a piece that looks like the photo below – front and back views.  This called quilt as you go strip piecing.

front and back view of strip coasters

The final step is to attach the binding.  For this I used a 2 1/2 inch wide strip pressed in half and sewed it to the wrong side of the coaster with the raw edges even.  Since there were no curves in this coaster I did not use a bias edge binding, just a straight strip.  You can probably google how to make and attach quilt binding for a better explanation of how to do this.

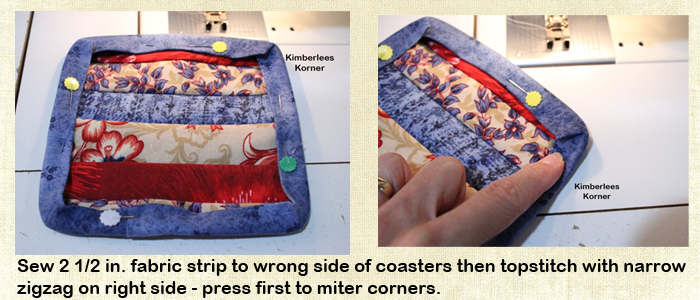
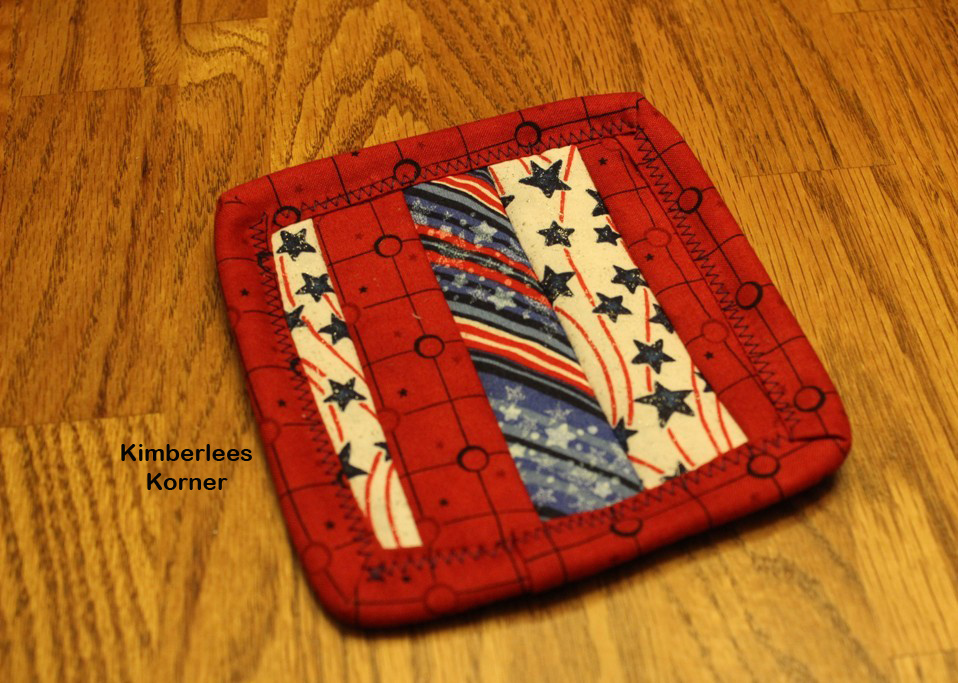
coaster sewing bindingAfter sewing the binding to the wrong side you press it over the raw edge to the right side of your coaster.  You may want to clip the corners a little.  I like to pin it in place before sewing.  Also, you will need to miter the corners by folding them in and pressing them in place.  I then sewed around the folded edge of the binding using a narrow zigzag stitch.  Photos below are of the finished coaster.

Patriotic Coasters

Patriotic Strip Coasters

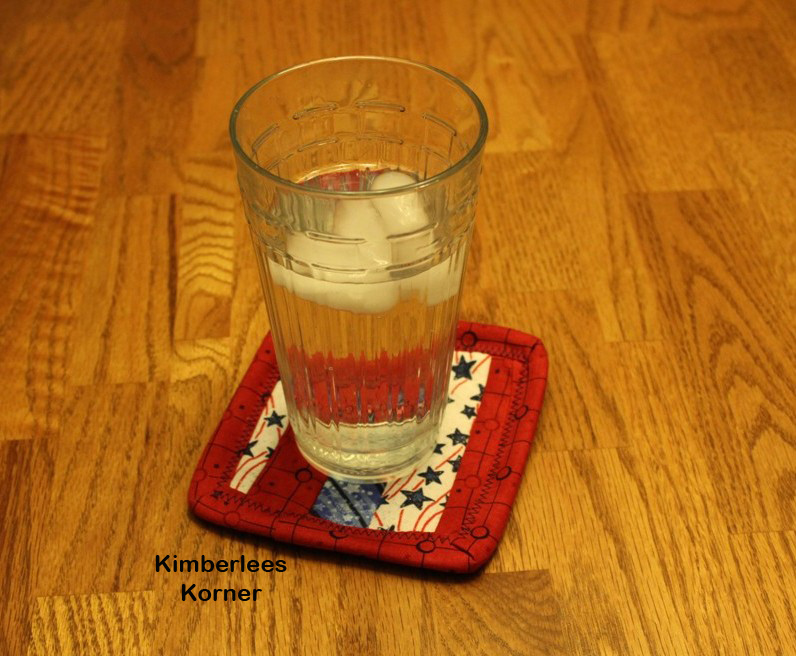
I like to use these coasters outside on my patio and in my kitchen and living room.   They are super simple and quick to make if you have all of the supplies on hand – they make a good housewarming gift, too.   You can also use this same process to make a matching potholder by using a larger square of batting and backing fabric – like 8 or 9 inches.  For potholders you may want to use the thermal fleece type of batting so they are more heat resistant and even use 2 layers.  I have also used 2 layers in the coasters if you want them to be thicker.  If you decide to use 2 layers you may want to use a walking foot to sew the strips down so they don’t shift.

I hope you enjoyed reading about my projects and get inspired to make something patriotic for the summer season.  If you have any projects you have currently made I would love to hear about them – click on Leave A Reply and tell me about them.

Have a great day!

Kimberlee

Shawl For My Mom

2 Comments

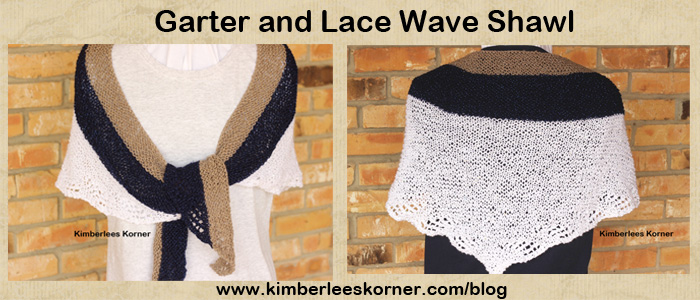
This shawl is a project I recently designed and made for my mom for Mother’s Day.  I began working on this shawl the end of April after finishing my shawl from the KAL I did with my facebook knitting group.  I had to knit fast as my mom does not live near me and the gift needed to be mailed.  garter and lace wave shawl from Kimberlees Korner

I knitted this shawl on size US 6 knitting needles.  Now anyone who is a knitter knows that projects on size 6 needles do not knit up as quickly as say something on a size 10 needle – so the weekend before Mother’s Day if I was sitting I was knitting, as the saying goes.  Luckily the weather was nice that weekend and I could sit outdoors on our patio to knit.

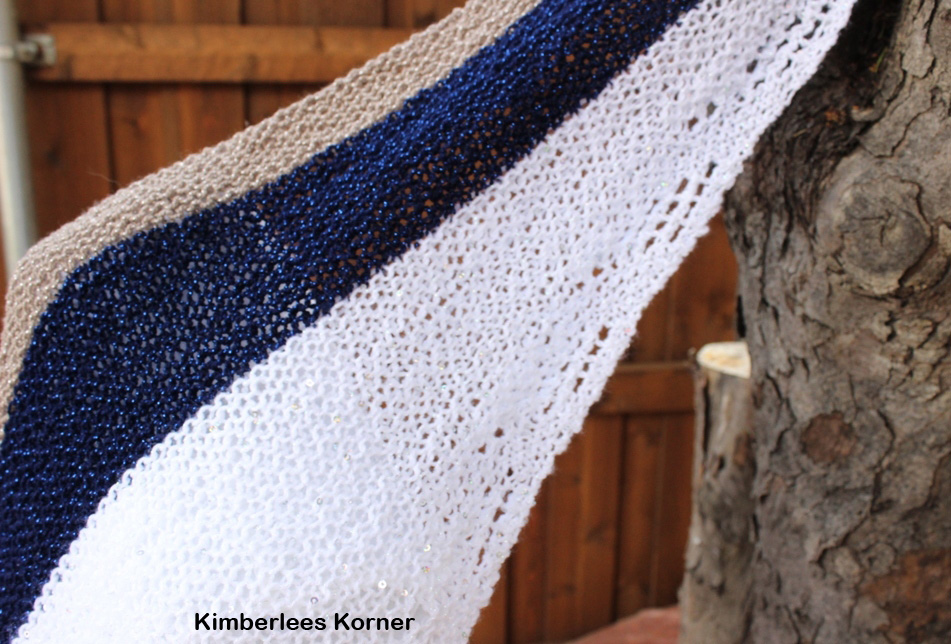
The yarn I used was a combination of glittery and sequin yarns that I had in my stash.  I didn’t have enough of one skein to do the whole thing the same color so that is where the idea came in to do a color block type of shawl.  The yarns I used were Vanna Glamour in the navy and beige and the white was Payette from Loops and Threads, which I believe is the Michaels label of yarn.  One skein of each color yarn was used.

Garter and Lace Wave shawl from Kimberlees Korner


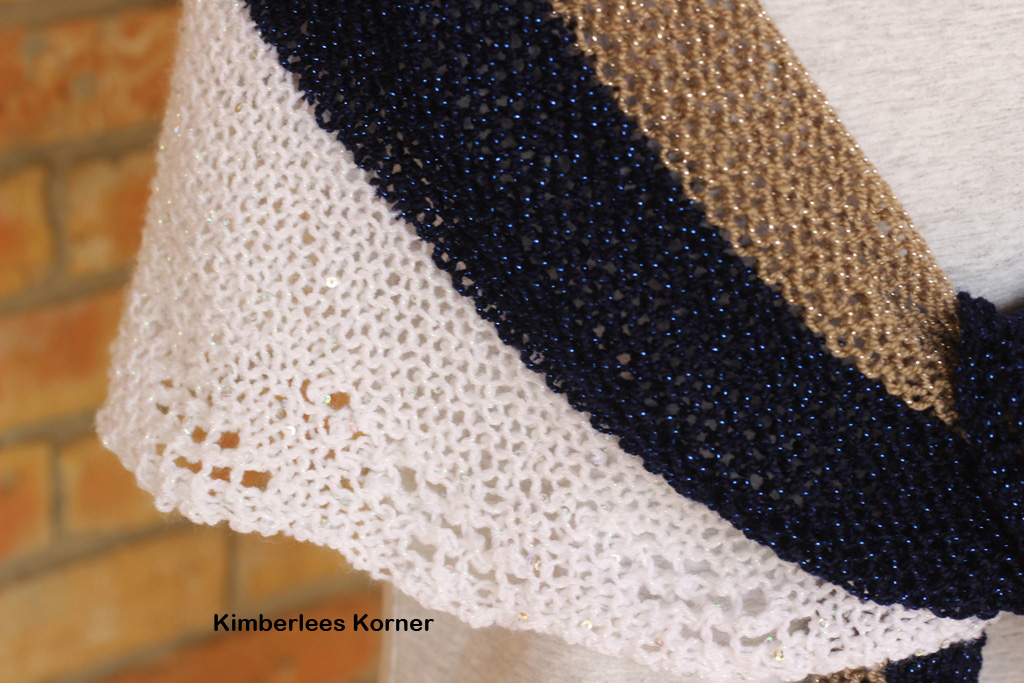
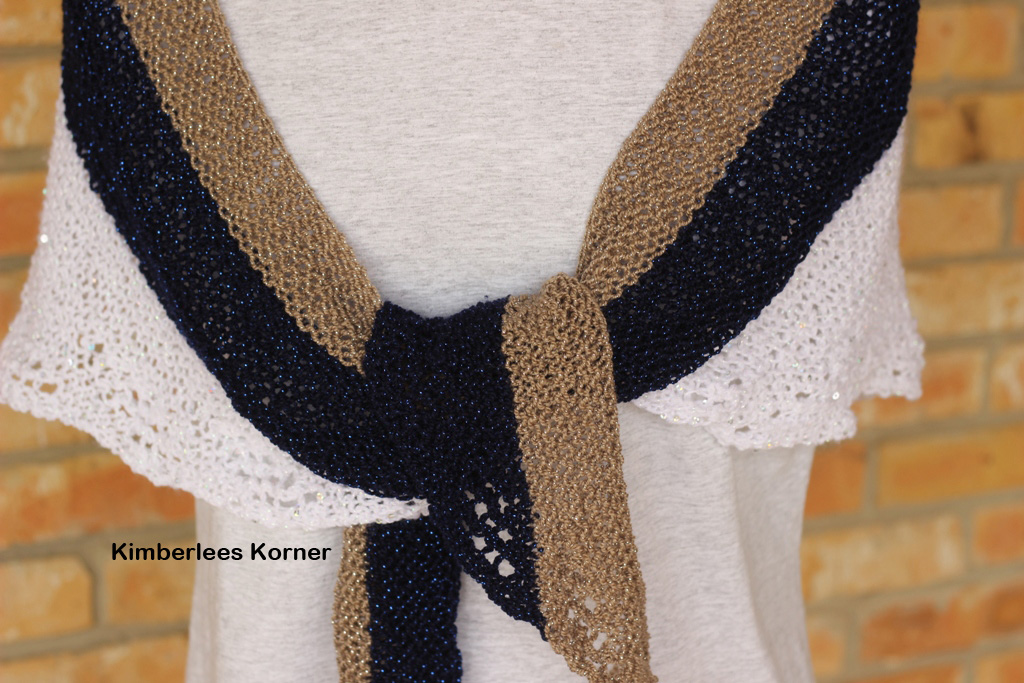
The edge of the shawl features a short row shaping and a lacy stitch which produces a gentle scallop or wave.  I really like how that turned out and looks in the front when it is tied.

Lacy Wave Edge of Shawl   Kimberlees Korner


Front of Garter and Lace Wave Shawl from Kimberlees Korner


My mom called me on Monday to tell me she got the shawl.  There is a funny story about me finishing  it frantically and mailing it Priority last Wednesday so it would get there by Saturday.  I get a phone call from her last Friday, the one before Mother’s Day, and they are on their way to go visit my grandmother, who is 91 years old, for the weekend.  I knew they would be going to see her for Mother’s Day but thought they would not leave until Saturday and she would have gotten the package by then.  I told her that I made an exerted effort to get it to her and we just laughed about it.  I had already kind of warned her the week before that her gift might be a couple of days late.  Well, anyhow – she received it by Monday when they got back home and she loves it.   I am so glad – I knew she would like the colors and would have lots of things to wear it with.

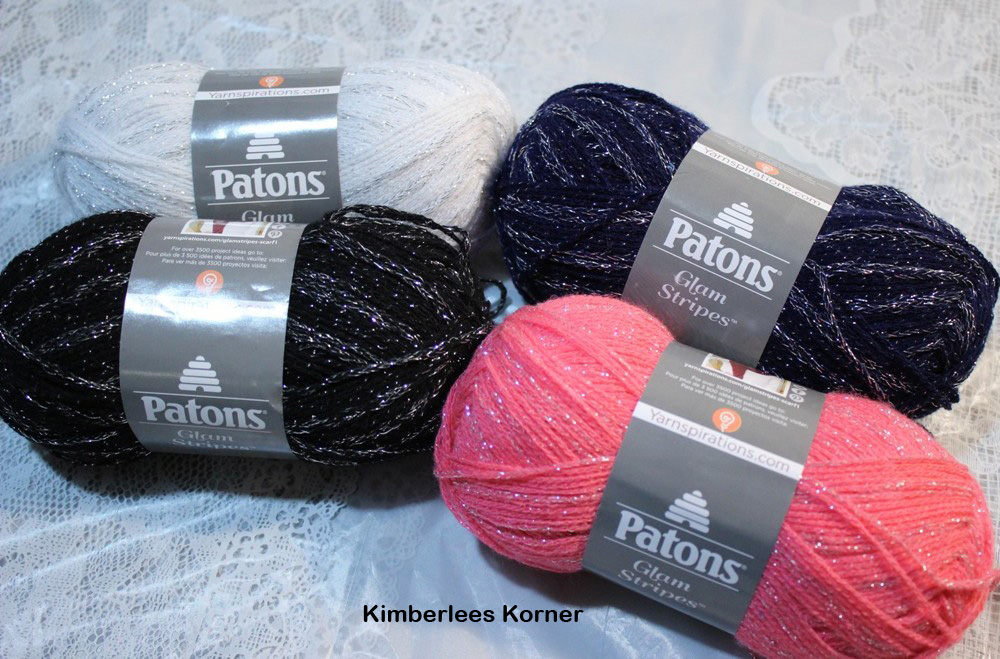
I went to Michaels yesterday to get some cotton yarn for the new KAL I am currently doing with my facebook knitting group that is knitting various dishcloths – the goal is two per week.  Well, while I was there I found this pretty yarn on clearance for only $1.79.  It is from Patons and called Glam stripe.  Glam Stripe yarn  Kimberlees Korner


There were a couple of other colors but I just got these 4.  I am going to be making another shawl using my Garter and Lace Wave pattern and combining it with some of this yarn and other sequin and glitter yarns in my stash.  The pattern for this shawl will be available in late May or early June in my etsy shop.

What types of projects are you currently working on?  Click on Leave a Reply and tell me about them.

Have a great day!

Kimberlee

St Patrick’s Day Lace Infinity Scarf

3 Comments

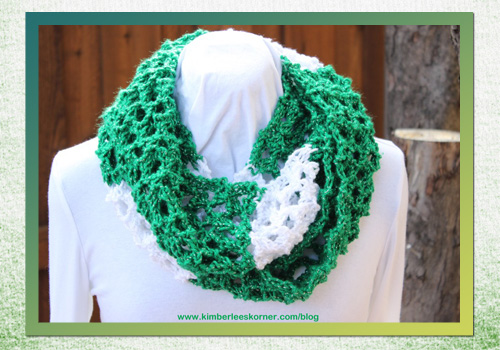
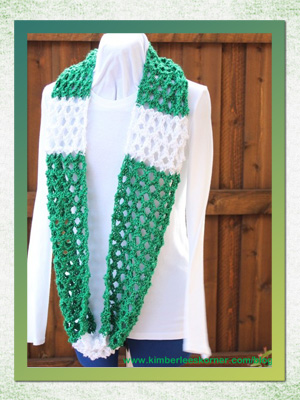
Now that the Olympics are over it was time to move on to some other crochet and knitting projects.  St. Patricks Day is coming soon so I started this lace knit infinity scarf the last couple of days of watching the Olympics.  I finished it a few days ago and wanted to share it on my blog. St Pats Day Lace Knit Cowl from Kimberlees Korner

St Pats Lace Knit Infinity Scarf from Kimberlees Korner

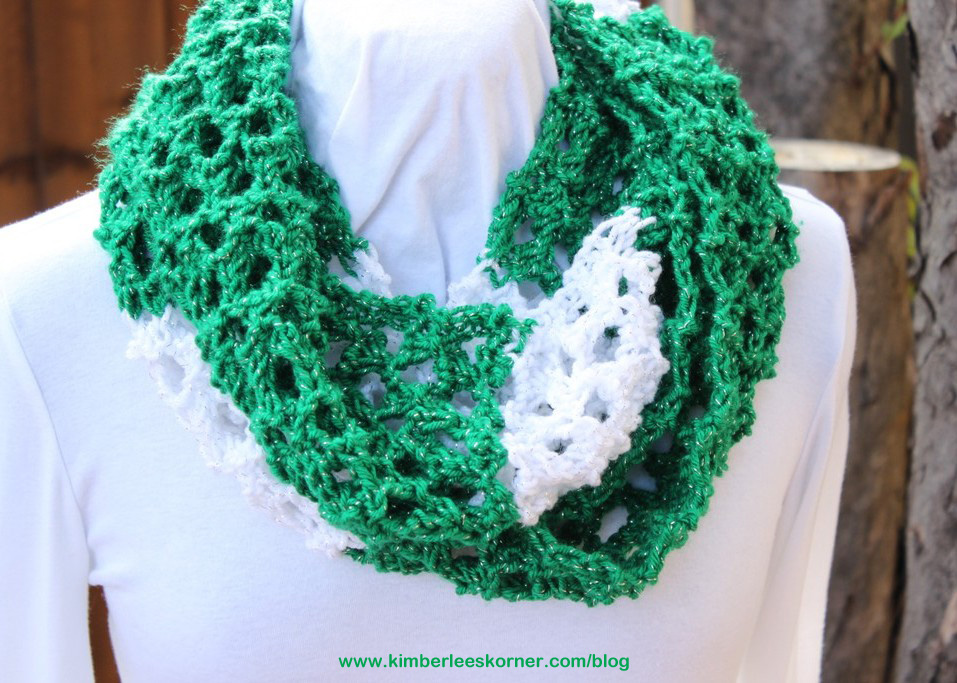
I really like how my new design turned out.  The yarn I use is the Hobby Lobby I Love This Yarn – a soft worsted weight yarn.  Both yarns are in the sparkle version so the green and the white both have metallic silver thread in the yarn – you can kind of see it in the close up photo below.   I only did a small amount of white since that is what I had leftover from making my Olympic projects.  I also like the length – it can be worn long as a stylish accessory or doubled for warmth.  Lace Knit Infinity Scarf in St Patricks Day colors  Kimberlees Korner

The knitting stitch I used for this pattern reminds me of crochet.  I really like the openwork of the pattern.  I am currently designing another infinity scarf – cowl using the same pattern mixed with another stitch and I really like how it is turning out.  I will be sharing that on my blog soon so check back often to see what is new.

Have a great day!

Kimberlee